|
I hope you all had a relaxing and fun Thanksgiving. We enjoyed spending time with family and being thankful for our blessings. Here are some great ideas for using up that leftover turkey. 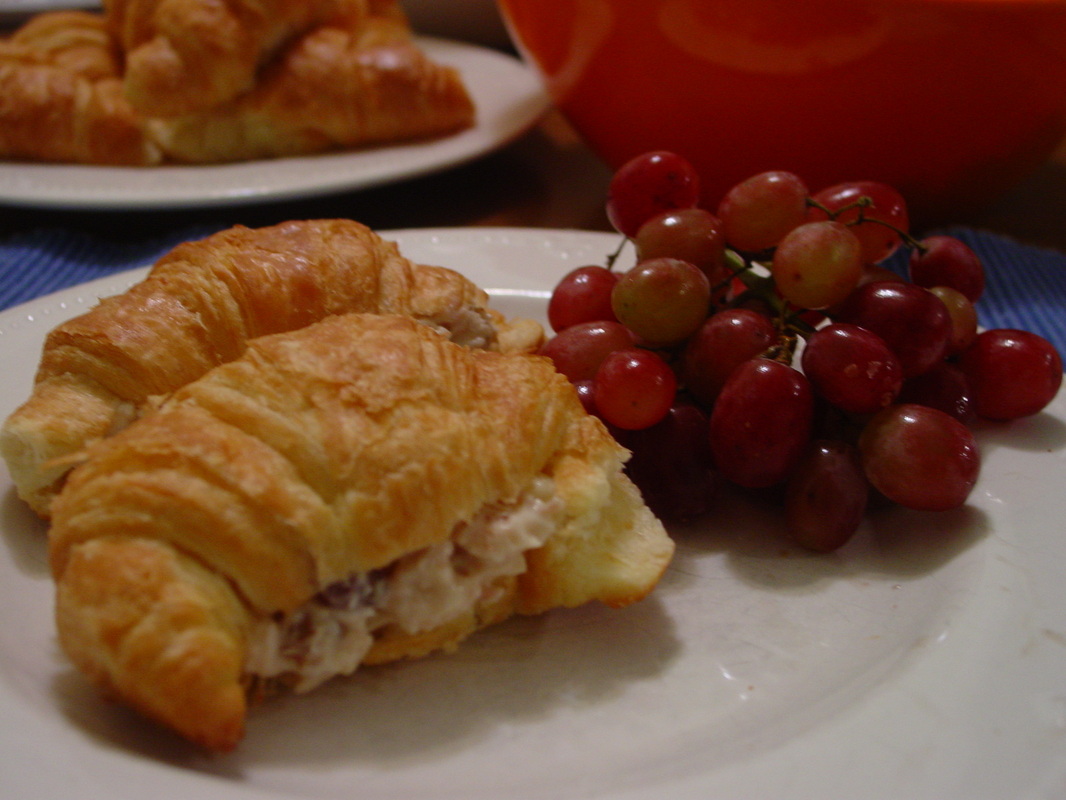 You can make turkey salad. Make just like chicken salad, but use leftover turkey in place of the chicken. 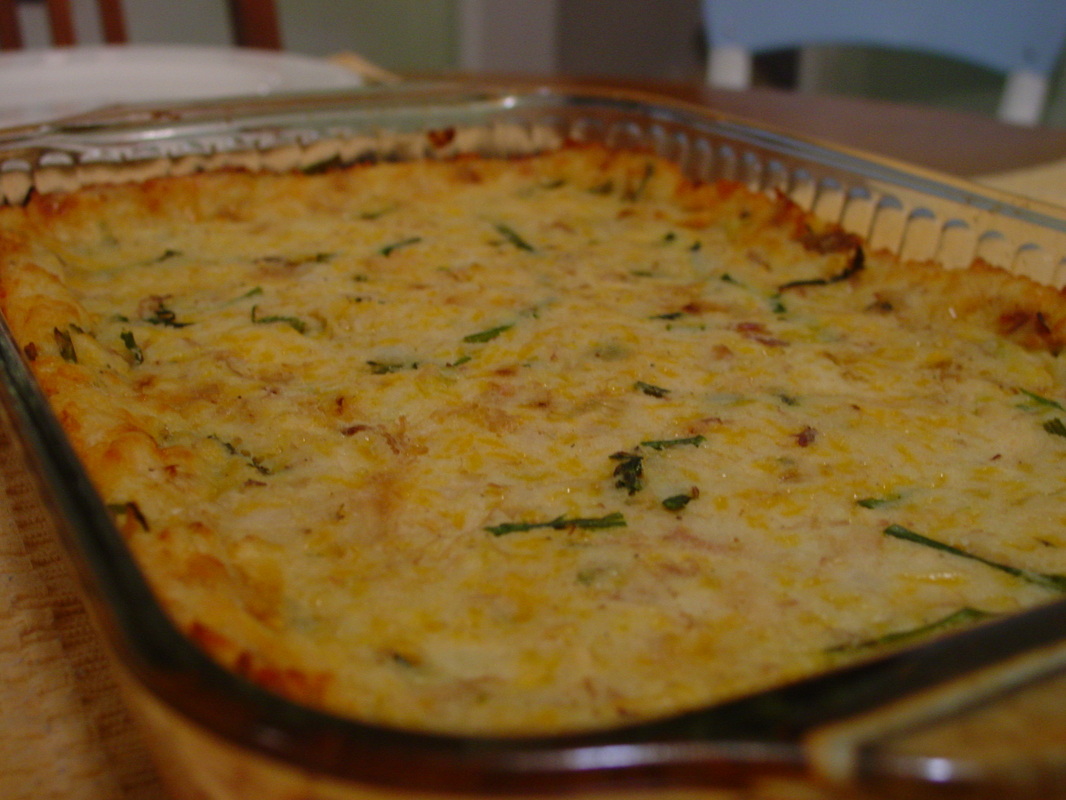 Another easy idea is leftover turkey mashed potato casserole. 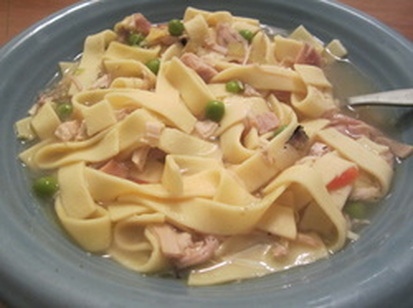 And my favorite thing to make is Turkey noodle soup. This soup is fantastic. Delicious and comforting on cold winter nights.
0 Comments
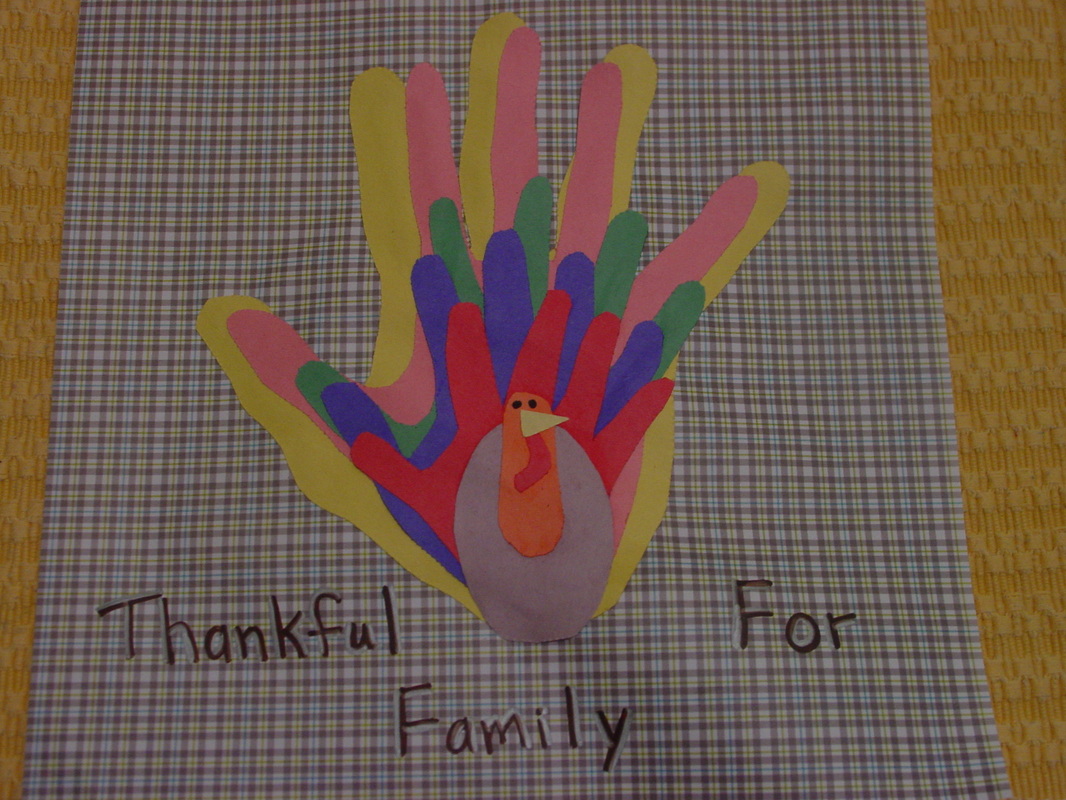
We made these family hand turkey crafts at my Catholic Moms group last week and I thought they were so cute I had to share. This is a really easy craft that you can make as a family. Just cut out everyone's handprints on different colored construction paper and layer the handprints to look like the turkey's feathers. Cut out the turkey's body, head, beak, waddle, and draw on the eyes. We mounted them on 12 X 12 scrapbook paper with Elmer's glue, but you could use whatever you have on hand. Thanks for sharing this fun and festive craft Joslyn.


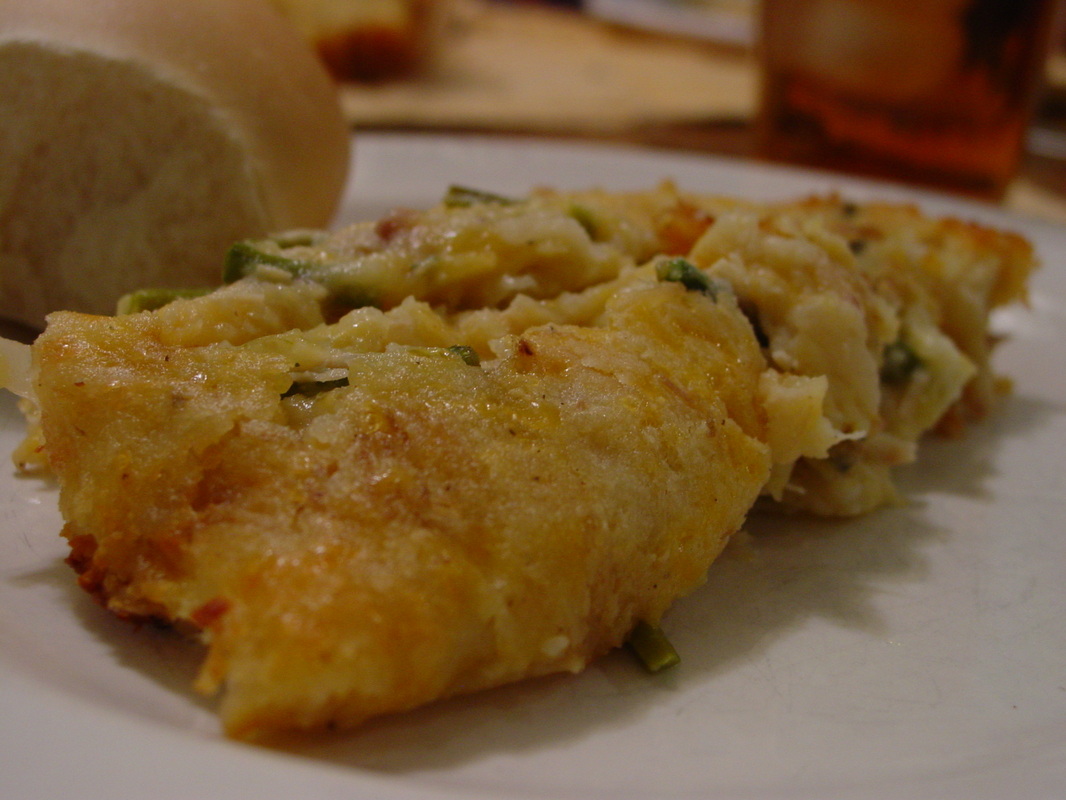
If you just dined on a delicious roast chicken or turkey and want to make sure you utilize the leftover meat, this is an easy way to do just that and have an all new meal. Plus, you can make this ahead and refrigerate it to bake the next day. This is one of those anything goes recipes, so feel free to be creative and use up those leftovers.
Ingredients:

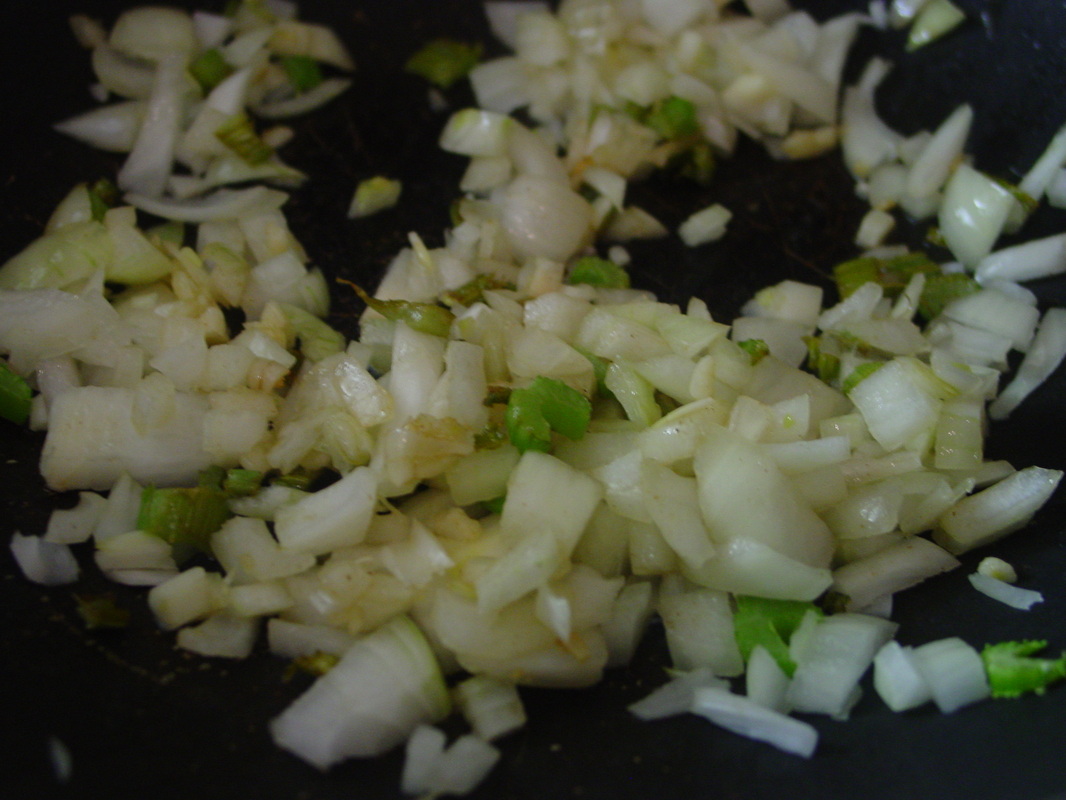
1. Saute onion, celery, and garlic in butter until tender, about 5 minutes.
2. Combine all ingredients in a large bowl. If you need to, add a little milk or 1/2 & 1/2 to help it mix.
3. Scoop into a greased 9 X 13 baking pan. 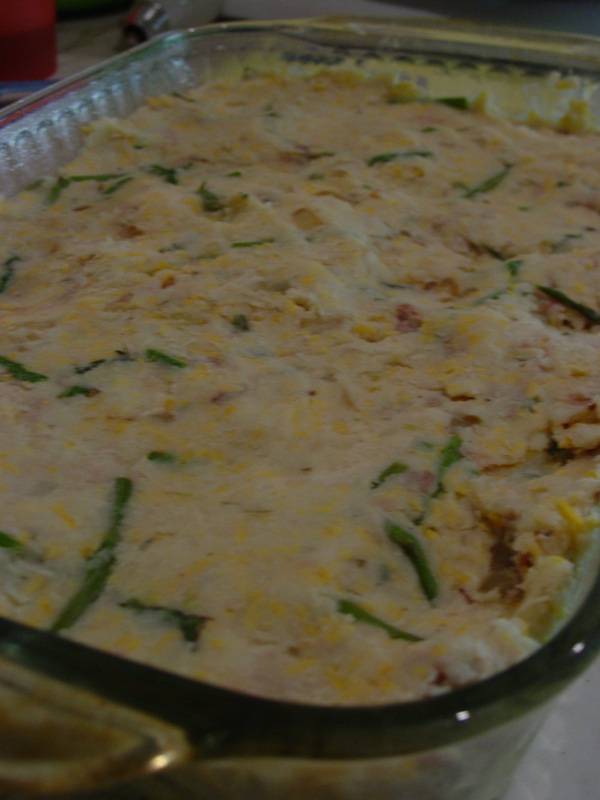
4. Cover and refrigerate to bake later or bake uncovered at 375 degrees for 45 minutes or until heated through.

Delish!
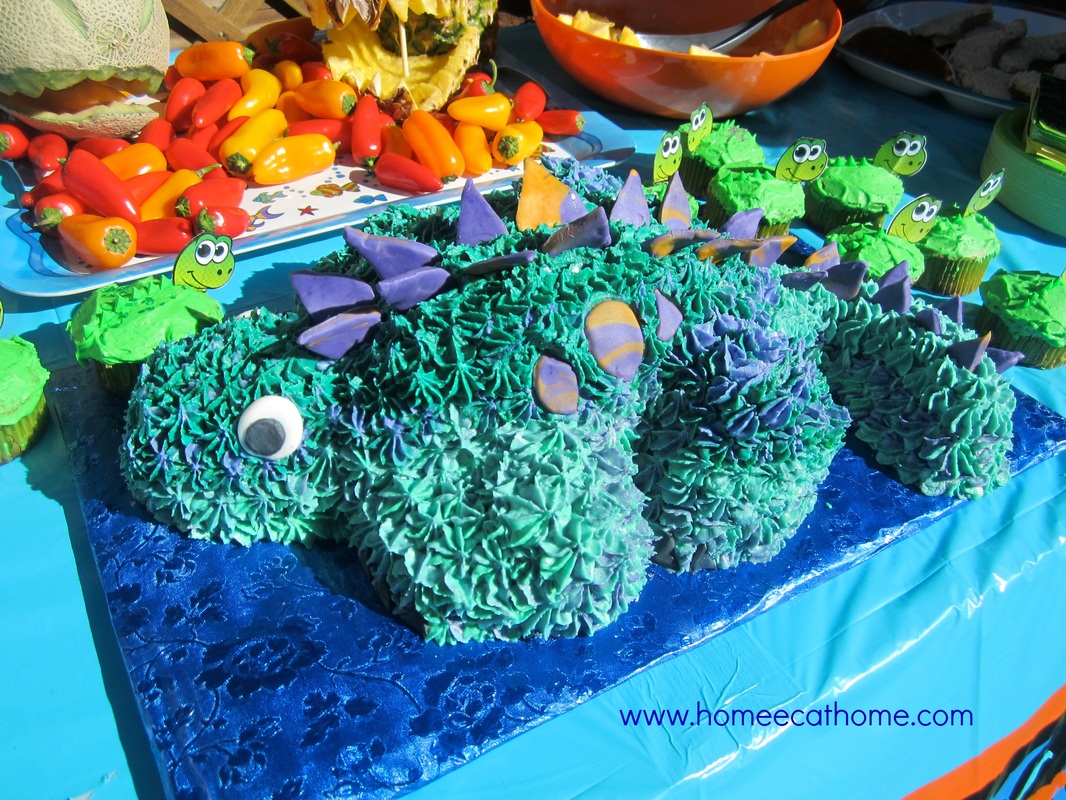
We gave our four year old a dinosaur birthday party this year. To make it extra special, I made a 3-D dinosaur birthday cake. To make sure I had enough cake (we invited my son's entire preschool class), I also made the green dinosaur cupcakes. They were super easy because I found a dinosaur cupcake kit at Meijer. (Thank you Mom for staying up late with me and putting dinosaur heads and spikes on the cupcakes.)
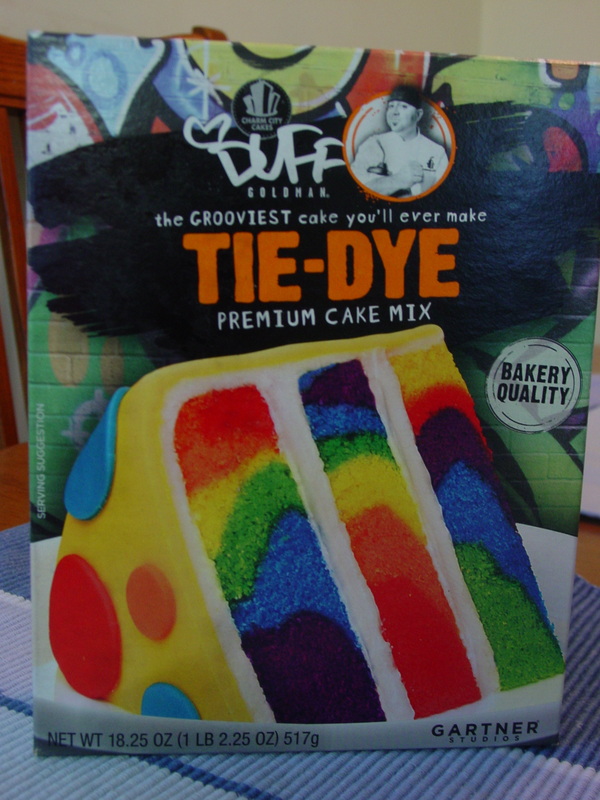
We were in Target a couple of days before the party and I had not decided on a cake recipe yet, when I saw these fantastic cake mixes from Duff Goldman of Charm City Cakes. I decided a cake mix sounded great at this point and let my son pick out his favorite. He chose this really cool tie-dye cake. I didn't realize at the time that I needed two boxes of this cake mix to make two 9 inch cakes that would be thick enough to create a 3-D dinosaur. I baked two very skinny cakes and went back to the store and bought 2 cake mixes. I then used one cake mix for each 9 inch cake pan. This cake mix worked well for the cake, just make sure and use 2 boxes.
My husband found the instructions for making a 3-D dinosaur cake years ago and printed them out and we still had them 5 years later. 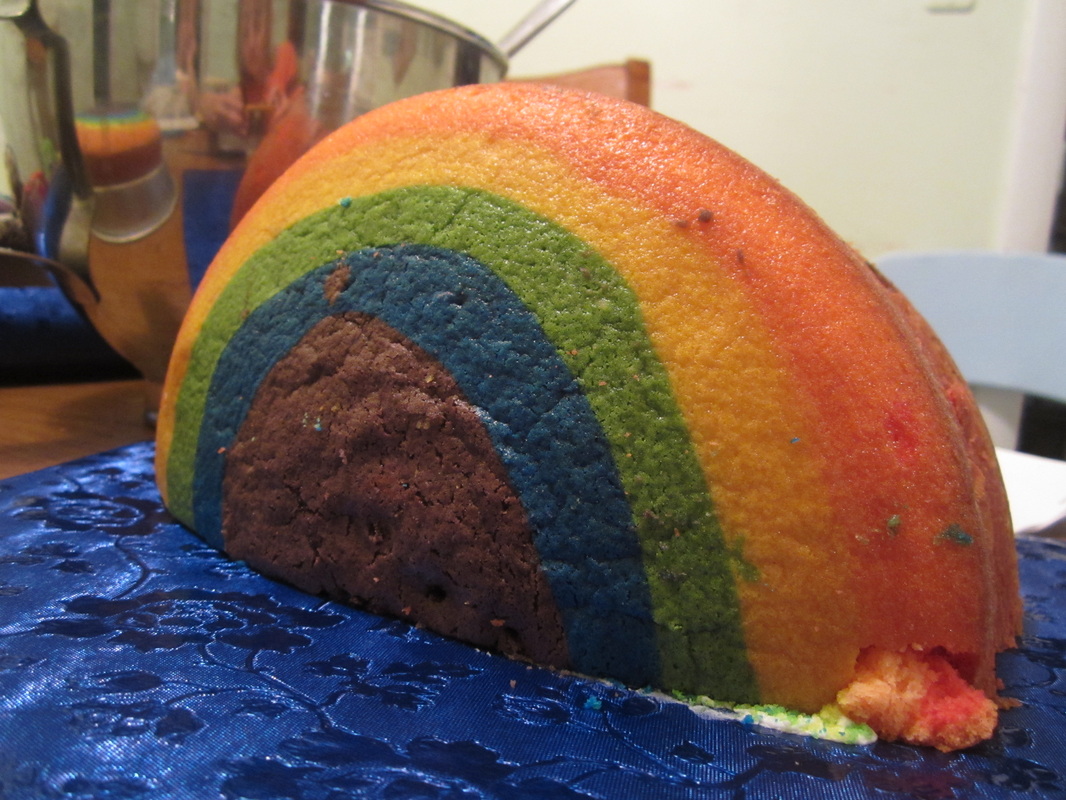
I love the way the tie-dye looks. You start with a body, by cutting one 9 inch cake in half and putting the flat sides together. Spread a little icing in between to help hold it together and put some icing on your cake board to help it stay in place.

Make a template following the instructions for making a 3-D dinosaur cake. I used the bottom of my cake pan as a stencil and cut out a 9-inch circle of wax paper, then penciled in the cutting lines from the guide online. I then cut out the wax paper pieces and placed them on the cake. I very carefully cut the pieces and assembled them into a dinosaur shaped cake.
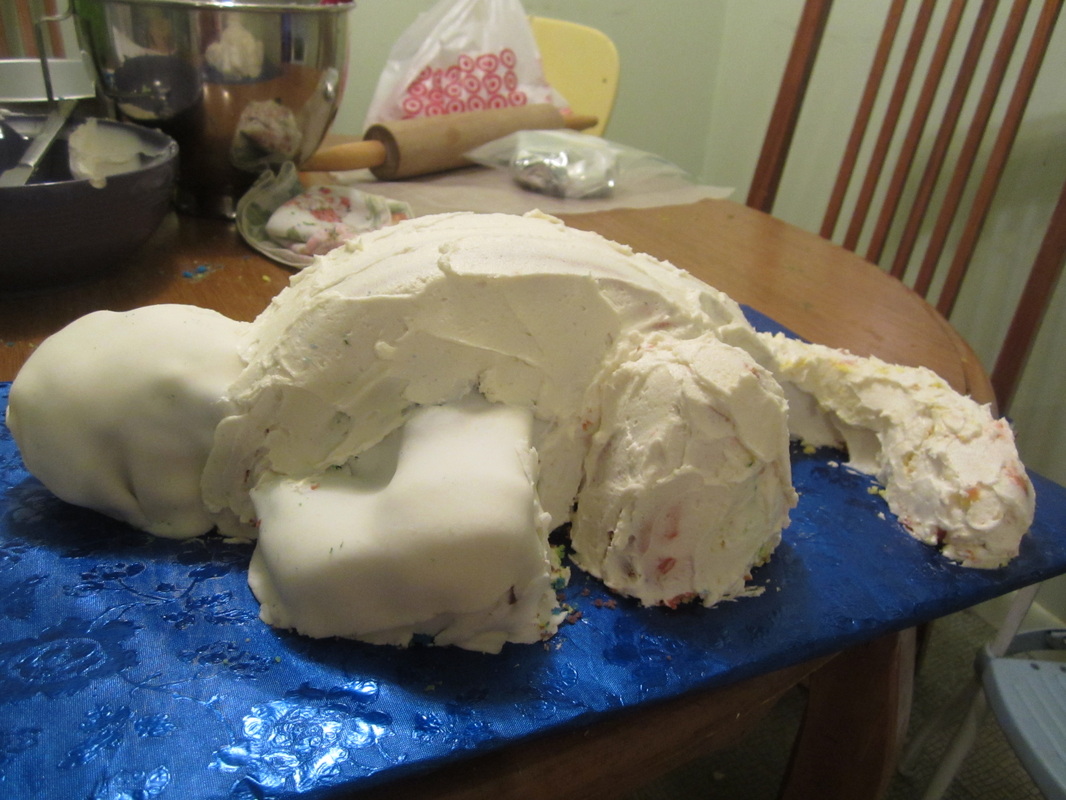
The head/neck and front legs were the hardest parts to assemble. I found them difficult to hold in place even with toothpicks so I covered the whole cake in a crumb coat of buttercream frosting and covered the difficult areas with a layer of fondant to help keep them in place.
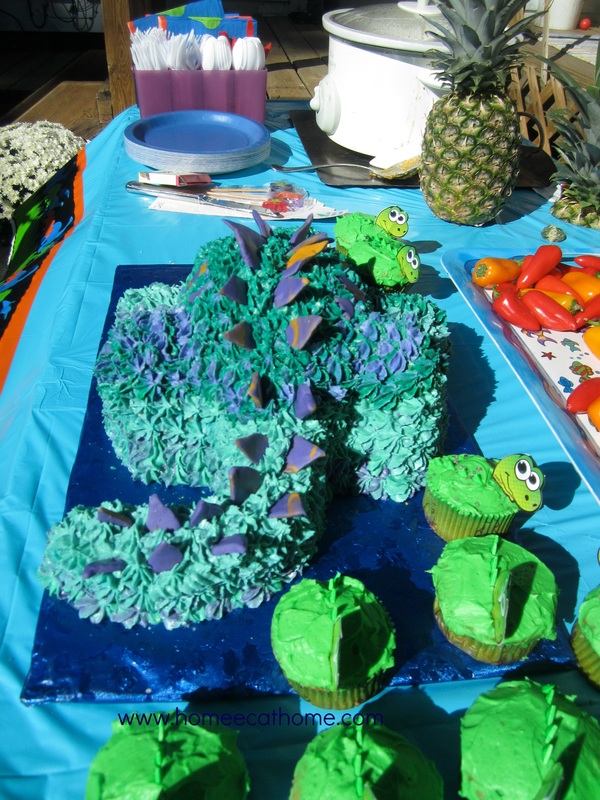
I used a large star tip to cover the cake with green and purple icing. I mixed purple and green icing in my icing decorator to get a nice mottled look. My favorite decorating tool is a pampered chef icing decorator that I have used for years. It has large tips and is great for cupcakes and less detailed work like this. I ran out of green before finishing the cake and when I made a second batch my green came out much darker, but I decided that was ok because it gave some variation in the color.
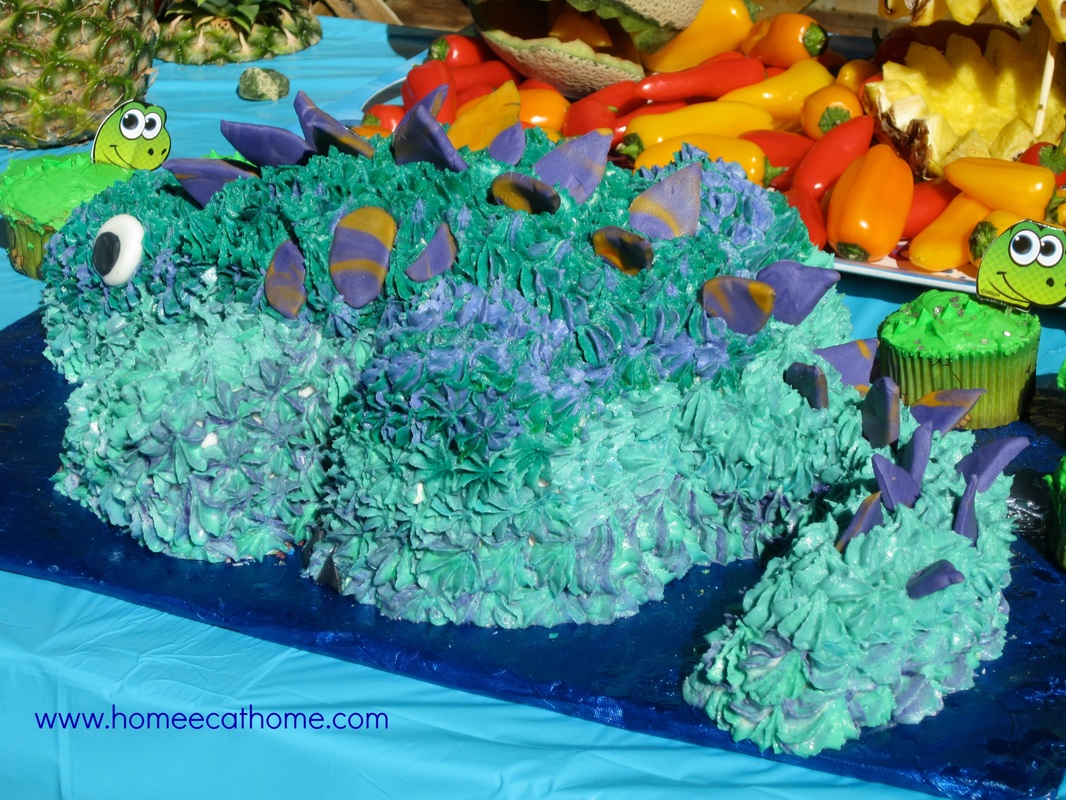
I colored some fondant gold and purple and cut out simple triangles for the spikes and random shapes for spots. The eyes are also cut from fondant. I did not leave my fondant pieces out to dry, I just put them directly on the icing while it was still moist and they held in place nicely.
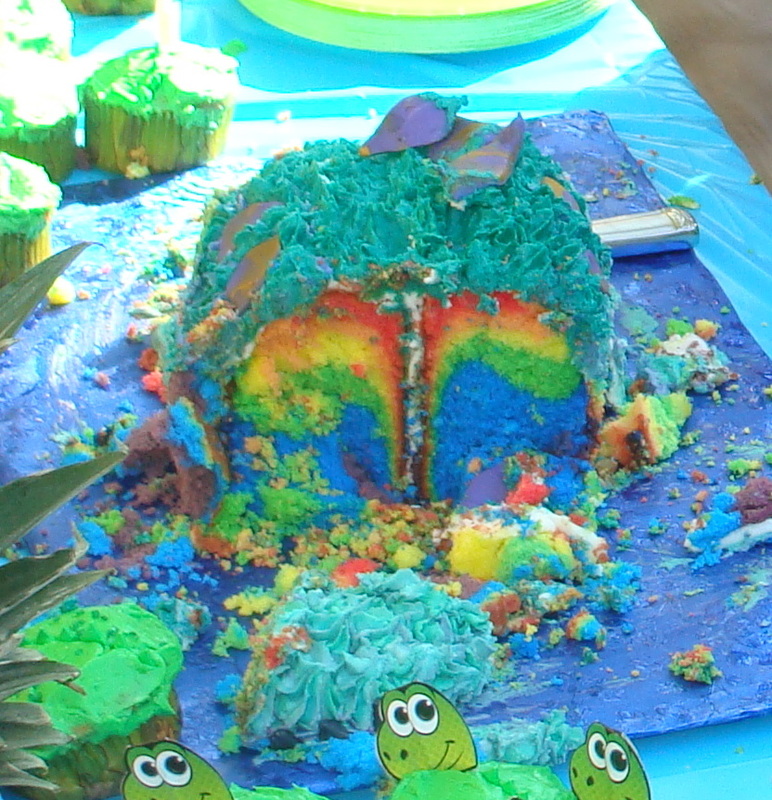
How cool is this? The tie-dye cake was most impressive. So fun for a kids party.
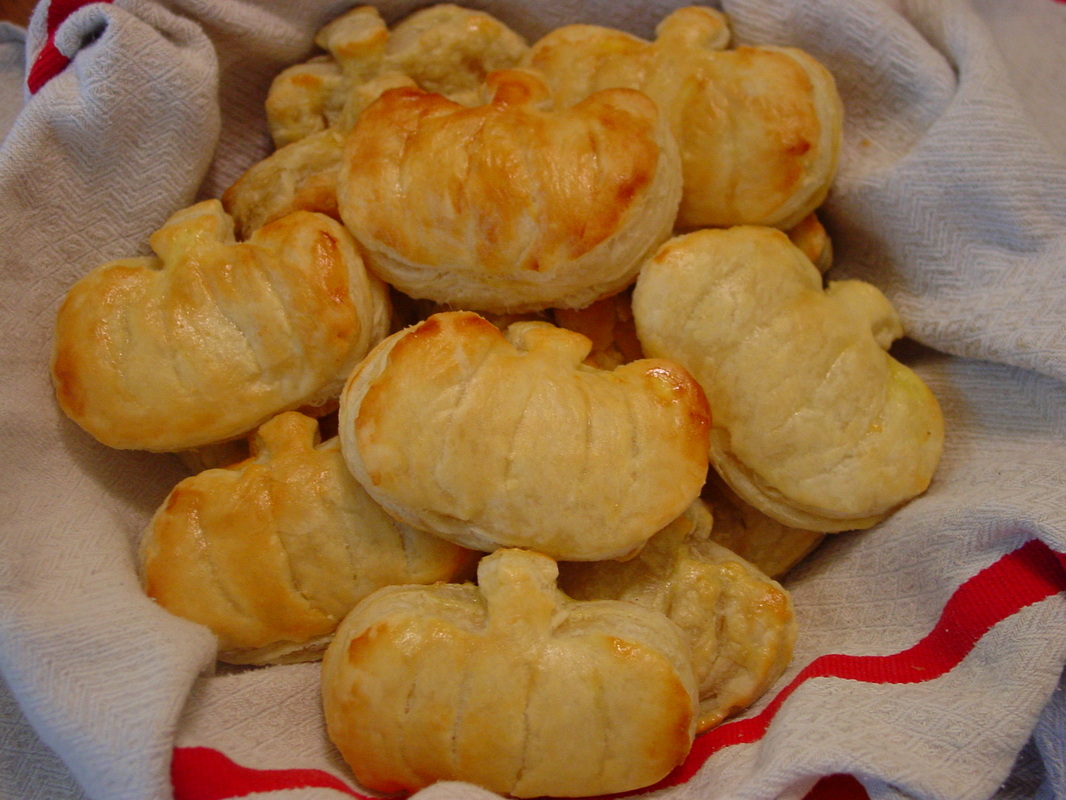
I made these for my son's kindergarten class snack last week. I had snack on Halloween and thought it would be fun to bring a pumpkin shaped snack. I needed to make 24 pumpkins and was able to do this with 3 boxes of puff pastry. I actually made 25. You could probably save a lot of money by making your own puff pastry, but I was going for the easiest route. It is expensive, usually $4.50 to $5 a box, but it is fun to use every now and then.
My younger sons and I took snack in and they got to have one with the class too. The children were very appreciative and said lots of thank you's while they enjoyed a warm snack. I took them over right after they came out of the oven so that they could be eaten warm. I think they are best served warm. You can make these into whatever shape you want by cutting the dough into your desired shape. The pumpkin cookie cutter shape is a good size. 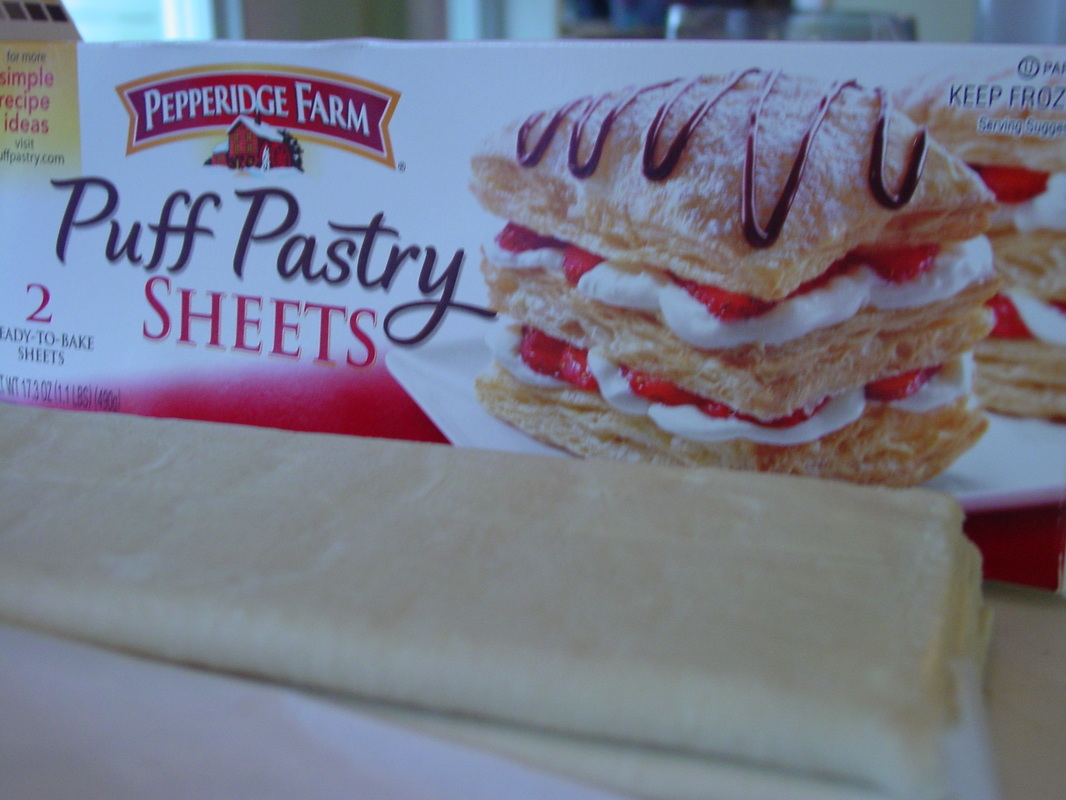
Store bought puff pastry usually comes 2 sheets to a box.
Ingredients: Puff Pastry Deli sliced ham Sliced cheese 1 egg for egg wash Parchment paper To make the egg wash beat an egg with 2 Tablespoons water. 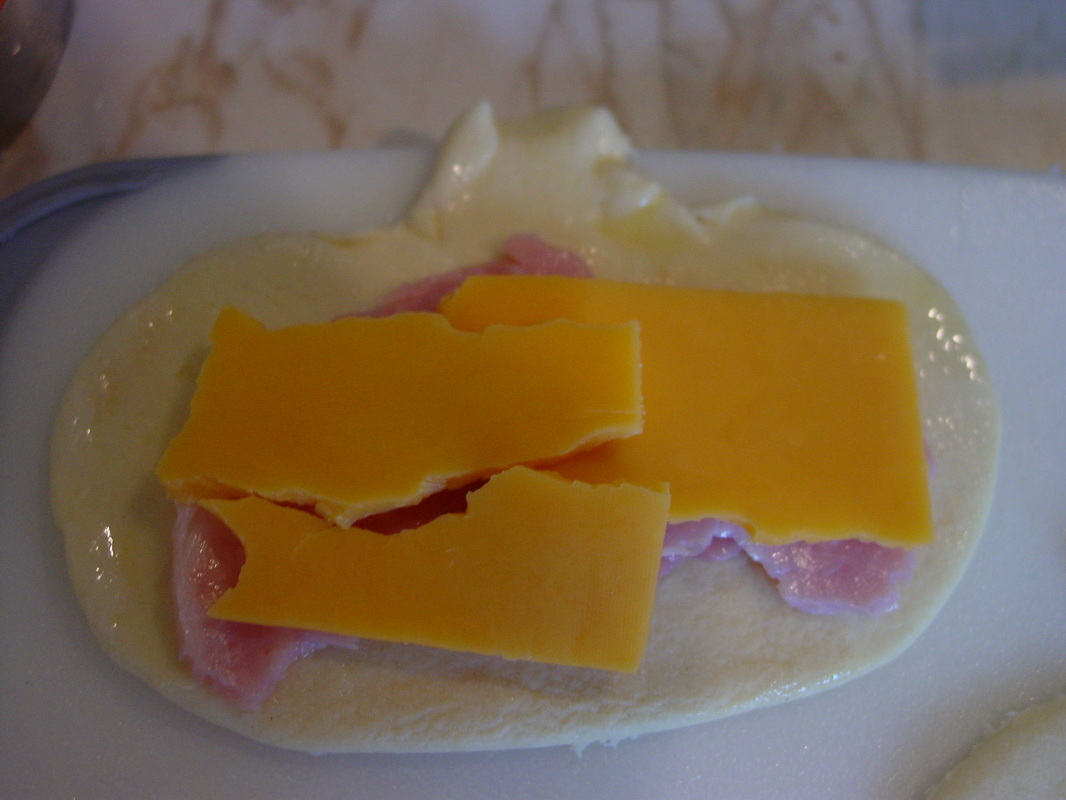
Unfold the puff pastry into a flat sheet. Cut out the shapes you will be using. After cutting out your shapes, re-roll any leftover dough on a lightly floured surface and cut out additional shapes.
Place a cut-out piece of dough on a parchment lined cookie sheet. Place small pieces of ham and cheese on the dough. Brush the edges with an egg wash. Place a piece of dough on top and press the edges together to seal. 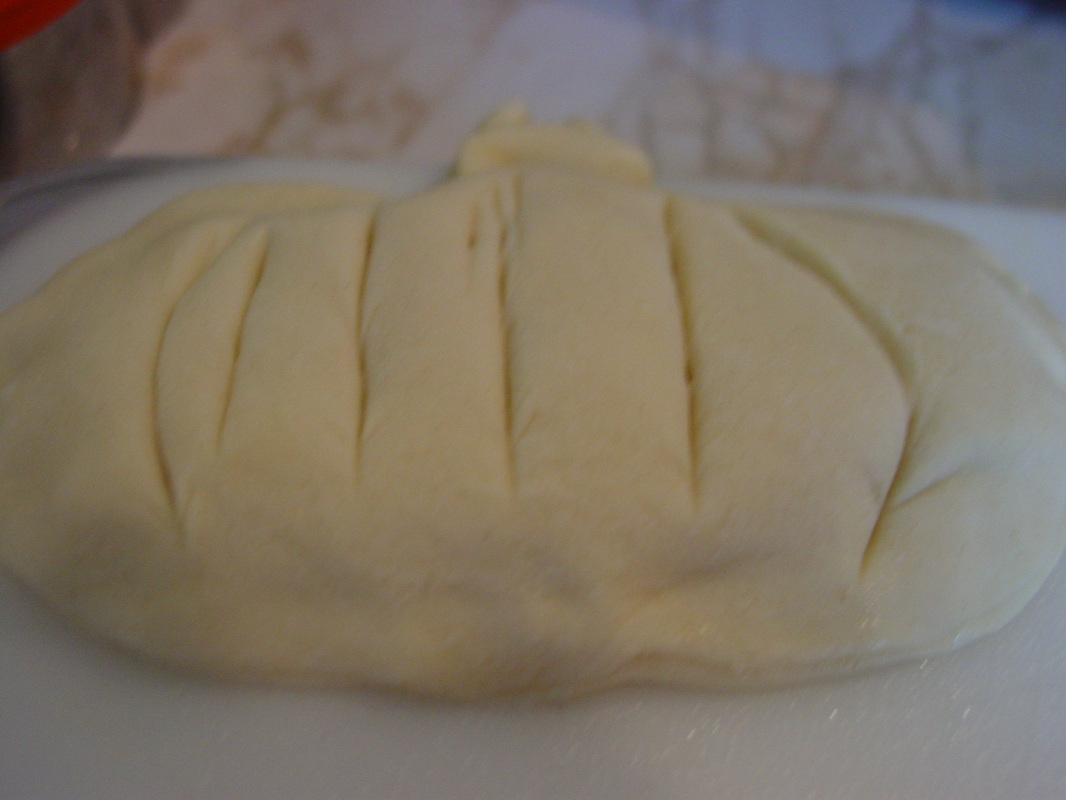
Using a butter knife, cut partway through the dough to make the lines that go up and down a pumpkin. Brush the top with the egg wash.
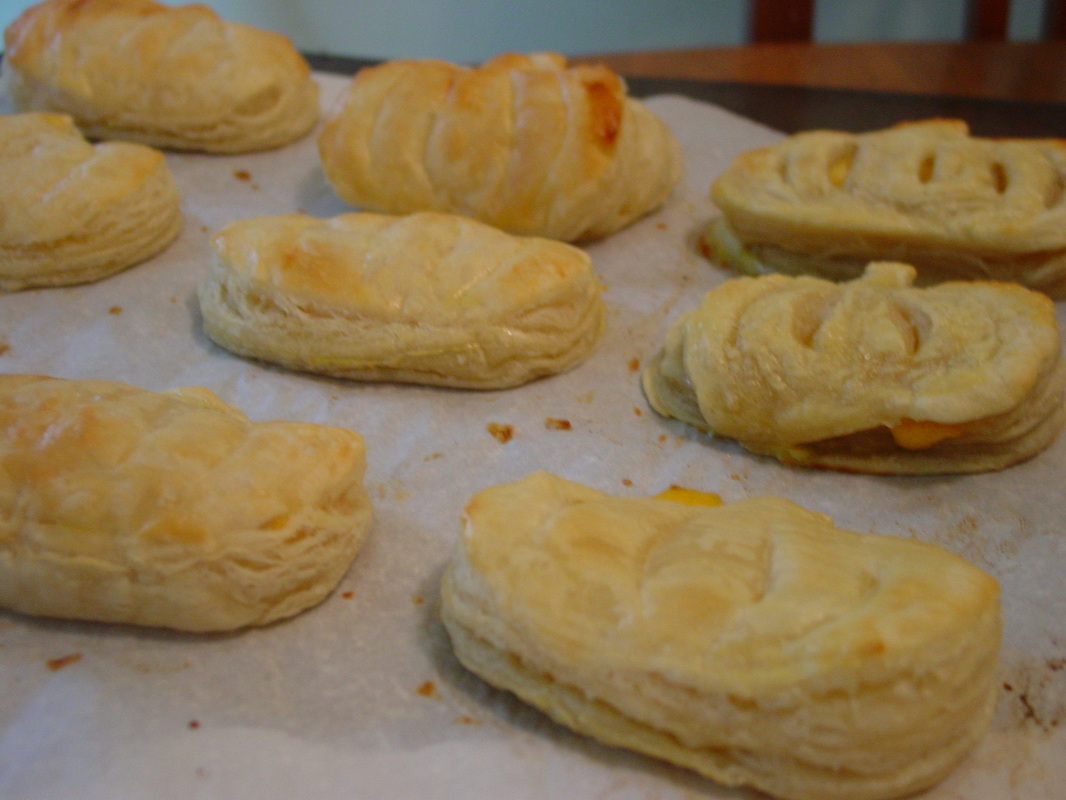
Bake in a 400 degree F. oven for about 15 minutes or until the tops are golden brown.
Linking up at Create with Joy
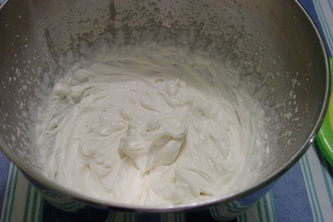
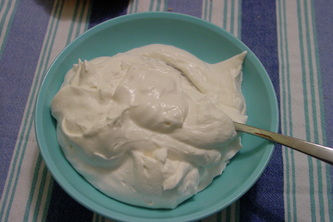
Ingredients:
Heavy whipping cream or whipping cream Sugar Vanilla 1. Using an electric mixer, whip cream with sugar and vanilla until it reaches desired consistency. I use 1/2 to 1 tsp. vanilla and 2 to 3 Tbsp. sugar for each cup of whipping cream. You can use more or less sugar and vanilla depending on your preference. Honestly, I don't usually measure when whipping cream. |

Welcome to Home Ec @ HomeHi, I'm Faith, a former Family and Consumer Science teacher turned food blogger. I love God, my family, and food. You can usually find me in the kitchen preparing family friendly, homemade recipes and taking lots of pictures. 
Still Goldens, Southern, IL
 Fan Favorites

The Best Dry Brined Turkey with Citris and Fresh Herbs

 Dehydrating Pears and Apples in the Instant Pot Duo Crisp Dehydrating Pears and Apples in the Instant Pot Duo Crisp
 
 |
 RSS Feed