|
Venison stew is one of our favorite winter meals, so when my husband decided he wanted to try eating a low carb diet, I wanted to figure out a way to lower the carbs. This stew was overall very healthy to begin with, but potatoes are high in carbs and carrots while healthy vegetables, did add extra carbs.
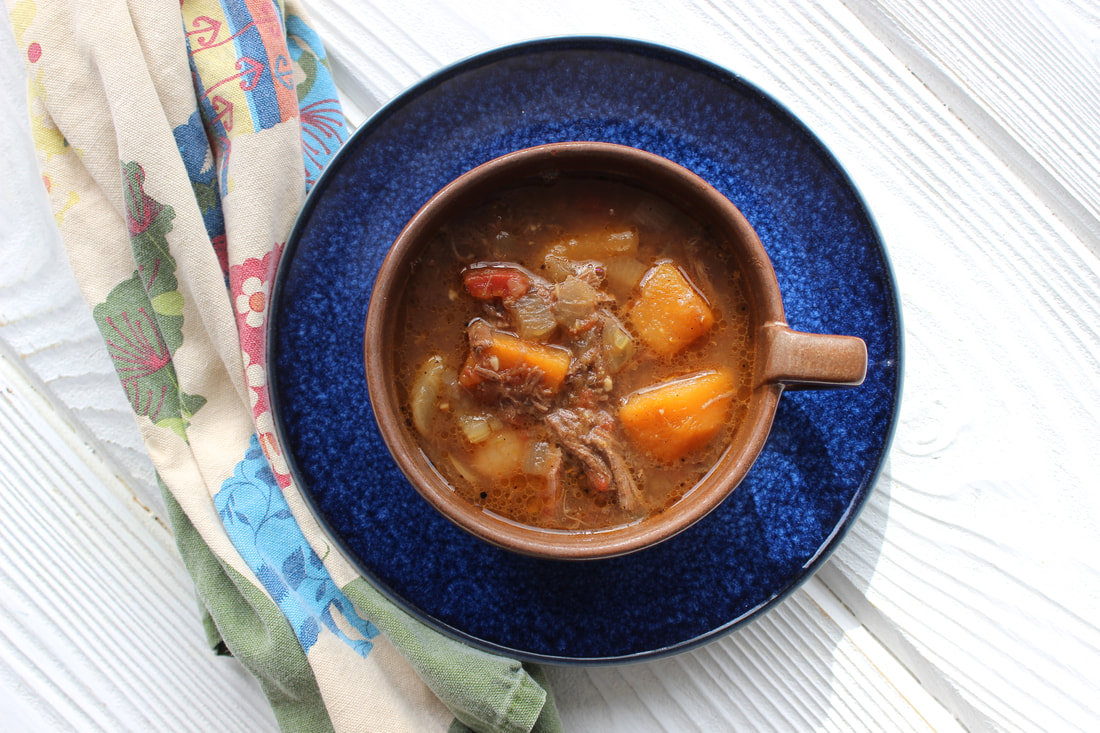
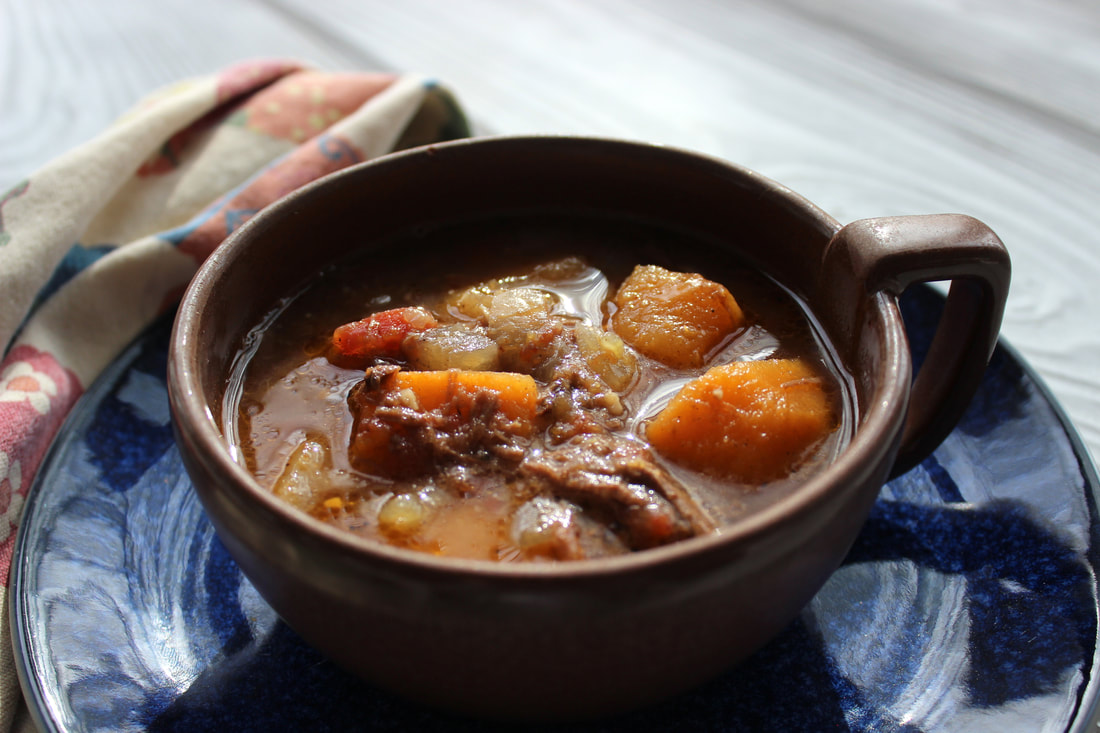
I made this stew as usual, but substituted one large rutabaga for the potatoes and one pound radishes for the carrots. This lowered the overall carb content. While rutabagas have carbs, they have substantially less than potatoes and radishes have hardly any at all.
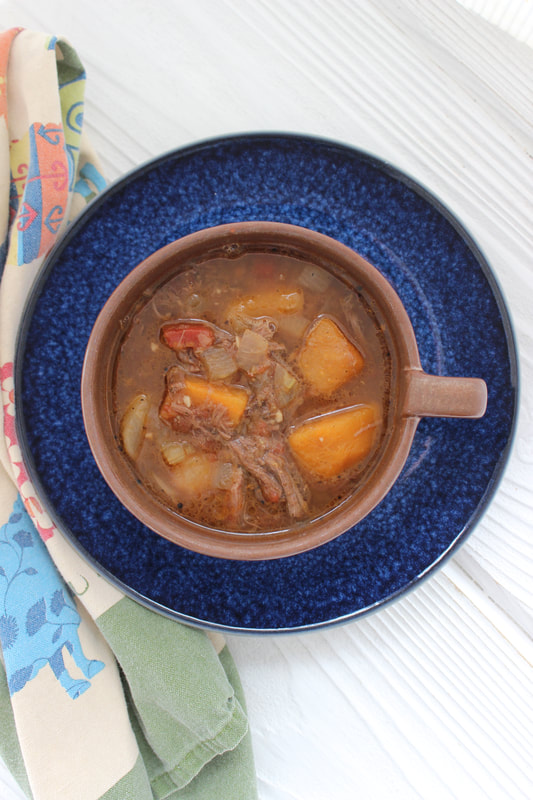
I wasn't sure how rutabaga and radishes would taste in a stew, but they were delicious. I was actually a little afraid to tell the kids I put radishes in the stew, but they all loved it so much and wanted to know what the new ingredients were. When I told them radishes and rutabaga they just commented on how much more they liked it than before.
If putting radishes in soup sounds weird, just sub rutabaga for the potatoes and use carrots as usual. Carrots are actually low on the glycemic index and are rich in fiber, vitamin C and potassium adding lots of nutritional value. Either way, it will have less carbs than if using potatoes and will be a nourishing hearty soup.
This is an amazing stew. If you don't have venison, you can use beef. I always add butter since venison is so lean, but you may not need it, if using beef.
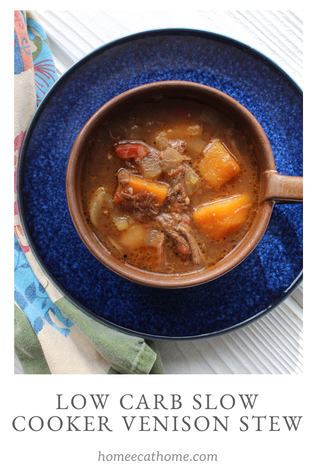
Low Carb Slow Cooker Venison Stew
Ingredients: 1 ½ to 2 lbs. venison roast or steak, (can use beef for stew) Olive oil Salt Pepper Garlic powder 1 rutabaga, peeled and cubed (tutorial here) 1 lb. radishes, halved 2 ribs celery sliced 1 onion diced 4 cloves garlic minced 1/4 cup butter (1/2 stick) 1 (15 oz.) can diced tomatoes 1- 2 tsp. creole seasoning (I use 2 tsp) 2 bay leaves 1 tsp. seasoned salt freshly ground black pepper to taste water 1. Brown meat in about 2 Tbsp. olive oil in a skillet. Sprinkle meat with salt, pepper, and garlic powder while browning. 2. Combine all ingredients except water in large slow cooker. Then almost cover the ingredients with water. 3. Cover slow cooker. Cook on low 8-10 hours. Take out any large chunks of meat and shred/chop before returning to the stew. Remove bay leaves before serving.
Pin on Pinterest

Yum on Yummly to easily save this recipe.
3 Comments
Disclosure: We are a participant in the Amazon Services LLC Associates Program, an affiliate advertising program designed to provide a means for us to earn fees by linking to Amazon.com and affiliated sites. This post may contain affiliate links.
A couple of weeks ago, my husband decided he wanted to try the low-carb lifestyle. We saw an old friend at a party and he talked him into it. I call it a lifestyle, because it is different than a diet in that there are still so many things that you can eat and not feel hungry all the time. I have been reading a lot, trying, modifying, and creating recipes and supporting him 100%. I really enjoy all of this recipe work so it's fun for me, a little challenging at times, when I have to go to an additional store or order something online, but that's only because I have been doing some low-carb baking too. This new low-carb lifestyle is very doable. I don't know if we'll always follow it so strictly, even The Rock has cheat days, but for now it is something we are doing.
I have been mostly following this new low-carb lifestyle too and I already see a lot of benefits. We are eating a larger amount and variety of vegetables and really enjoying them. The biggest thing is we are not eating sugar! It seems crazy to type that, my husband has always had a sweet tooth and I have always had a weakness for chocolate, but we haven't had sugary food in over two weeks and we feel fine. I have made a few things with stevia or monk fruit, but that is it.
I asked my husband a couple of days ago if he still had heartburn. He always had heartburn before. He even took proton pump inhibitors almost daily for it. He stopped to think about it, then said it's been a couple of weeks since he had heartburn. It's early to say if this new way of eating is why he hasn't had heartburn, but also very promising. 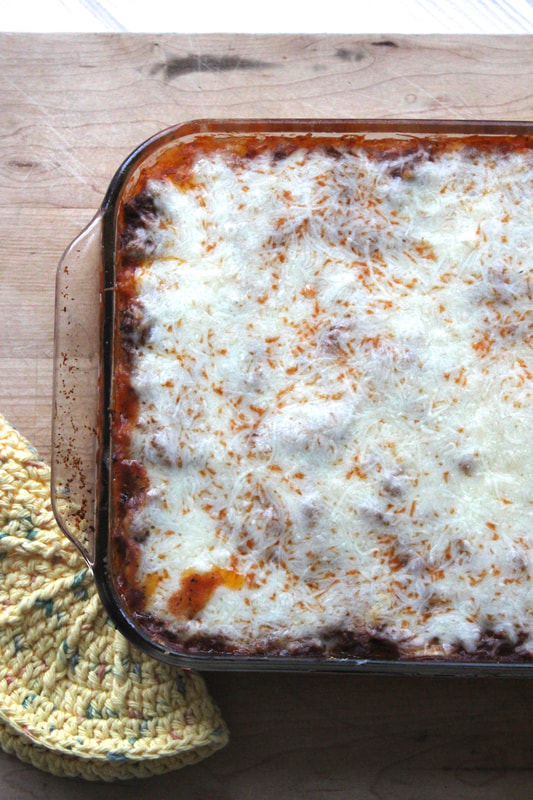
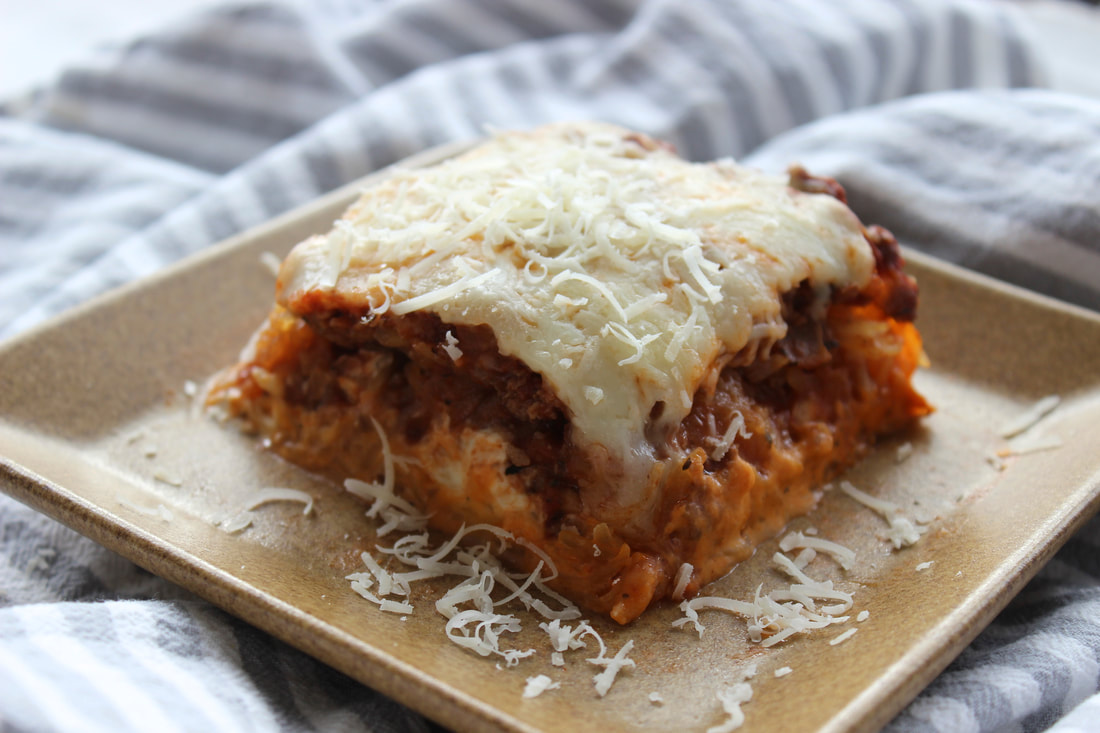
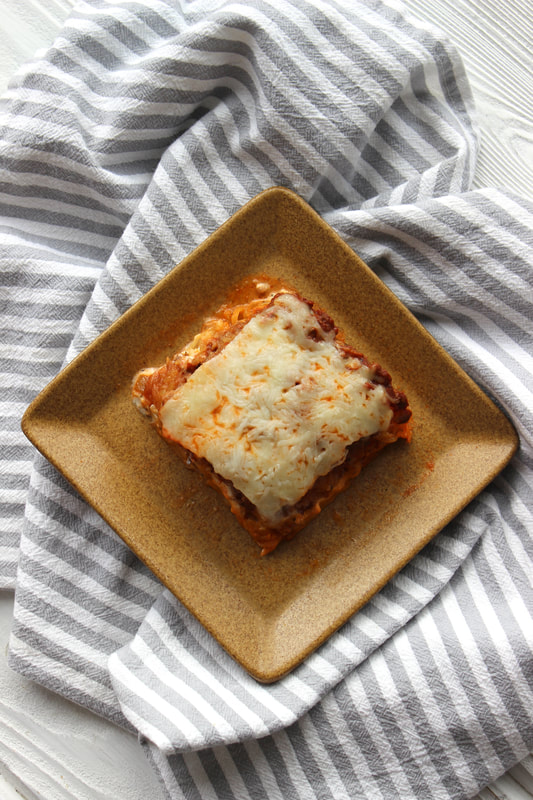
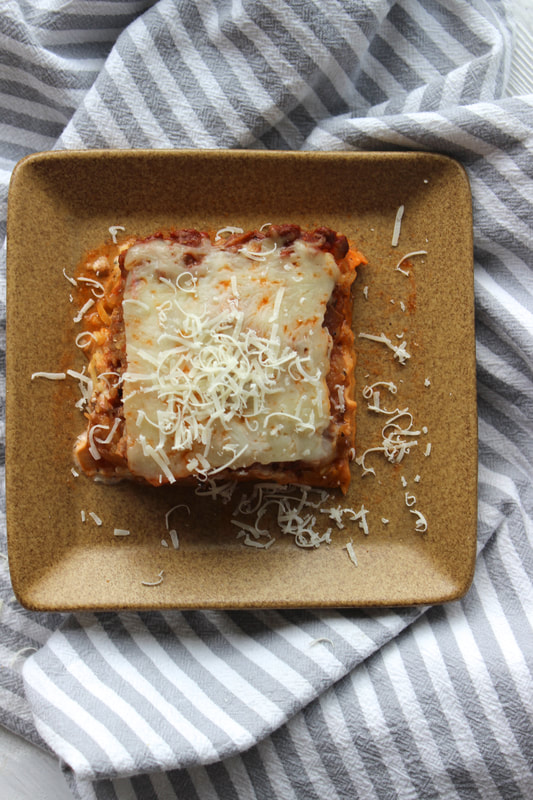
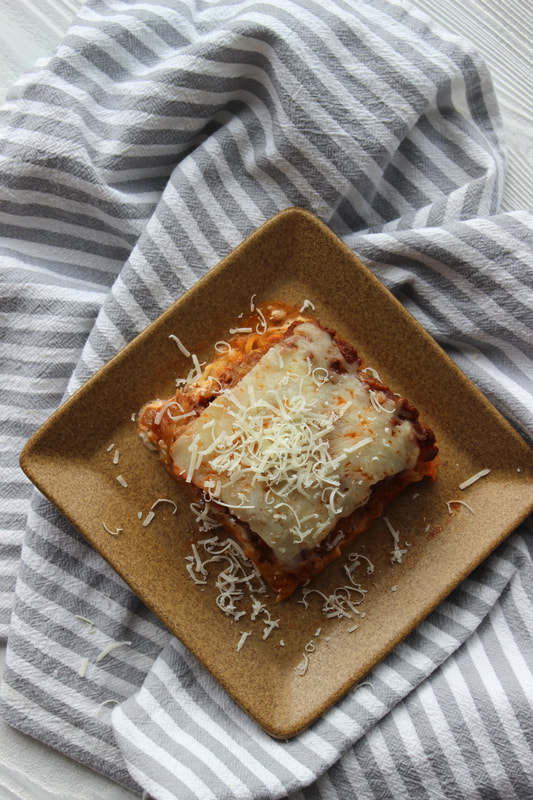
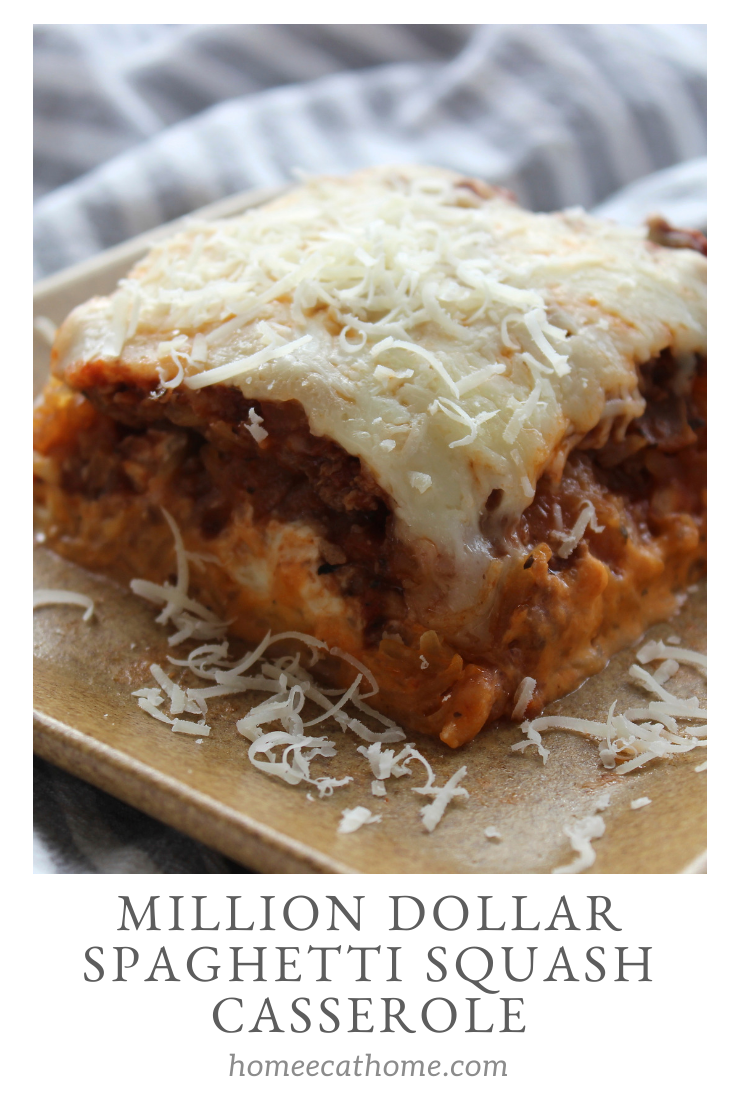
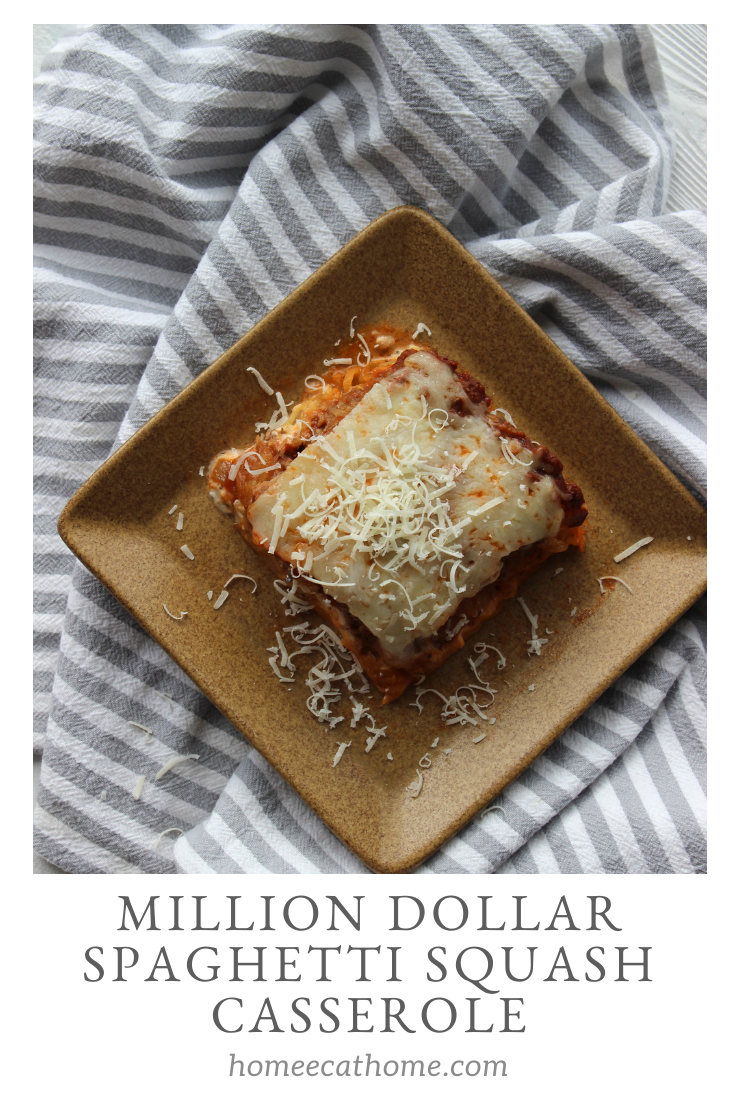
Since we are going low-carb, I made this million dollar spaghetti casserole with spaghetti squash instead of spaghetti pasta. It was amazing and I didn't even miss the pasta. We devoured the entire pan (kids too) in a couple of days. This is so yummy leftover!
Spaghetti squash is so easy to prepare. Simply poke holes in it with a fork microwave 7 minutes. Flip it over. Microwave another 7 minutes. Slice in half, scoop out the seeds then scrape the inside out with a fork pulling the squash strands to make "spaghetti".
When you buy pasta sauce if you are paying attention to carbs and/or sugar, look for sauce that says "no added sugar" and read the label for carb grams and sugar grams. You can probably find something without added sugar if you look.
Million Dollar Spaghetti Squash Casserole
Ingredients: 1 large spaghetti squash 1/2 tsp. salt 1/2 lb. ground pork sausage 1/2 lb. ground venison or beef 1 onion, diced 2 cloves garlic, minced 1 (25) oz. jar marinara sauce 8 oz. cream cheese* 1/2 cup sour cream or ricotta cheese* 1 tsp. dried basil 1 tsp. Italian seasoning 3 cups shredded mozzarella or Italian style cheese 1. Preheat oven to 350 degrees F. 2. Poke holes in the spaghetti squash with a fork then microwave 7 minutes. Flip it over. Microwave another 7 minutes. Slice in half, scoop out the seeds then scrape the inside out with a fork pulling the squash strands to make "spaghetti". Put in a bowl and toss with salt. Drain any water if needed. 3. In a skillet brown meat, onion, and garlic. 4. In a bowl mix cream cheese, sour cream, 1 cup of the shredded cheese and Italian seasoning. 5. Add basil and marinara sauce to browned meat. 6. Spray a 9 X 13 pan with olive oil (amazon link) or cooking spray. 7. Layer half the squash in the pan. 8. Layer all of the cheese mixture. 9. Layer half the meat sauce. 10. Next, layer the second half of the spaghetti squash. 11. Layer the rest of the meat sauce. 12. Top with remaining shredded cheese. 13. Bake for 20 minutes until hot and bubbly. *If you would like to substitute ricotta cheese for some of the cream cheese and sour cream you can.
Pin on Pinterest
Yum on Yummly to easily save this recipe.
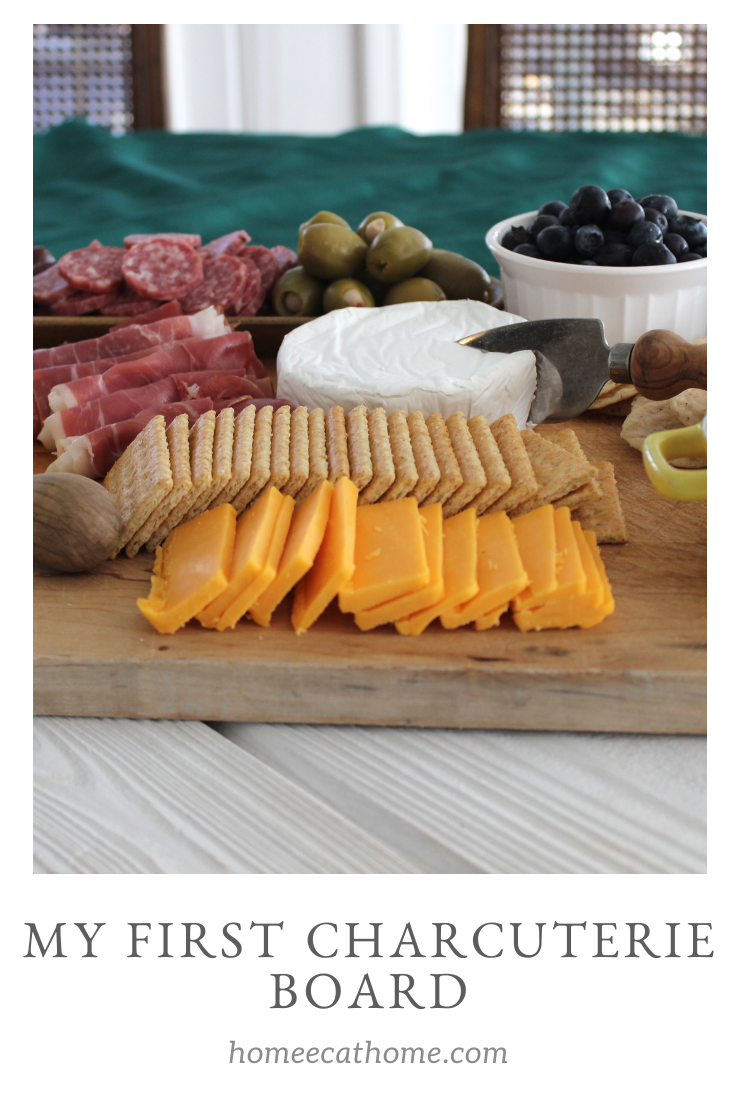
Since Charcuterie boards are all the buzz these days, I decided I wanted to make one. I planned on creating a charcuterie board for our Christmas open house, but had so many other menu choices and limited time so it never happened. Since I had already purchased several things to make a charcuterie board, I threw one together for dinner one night last week to serve with our butter bean soup.
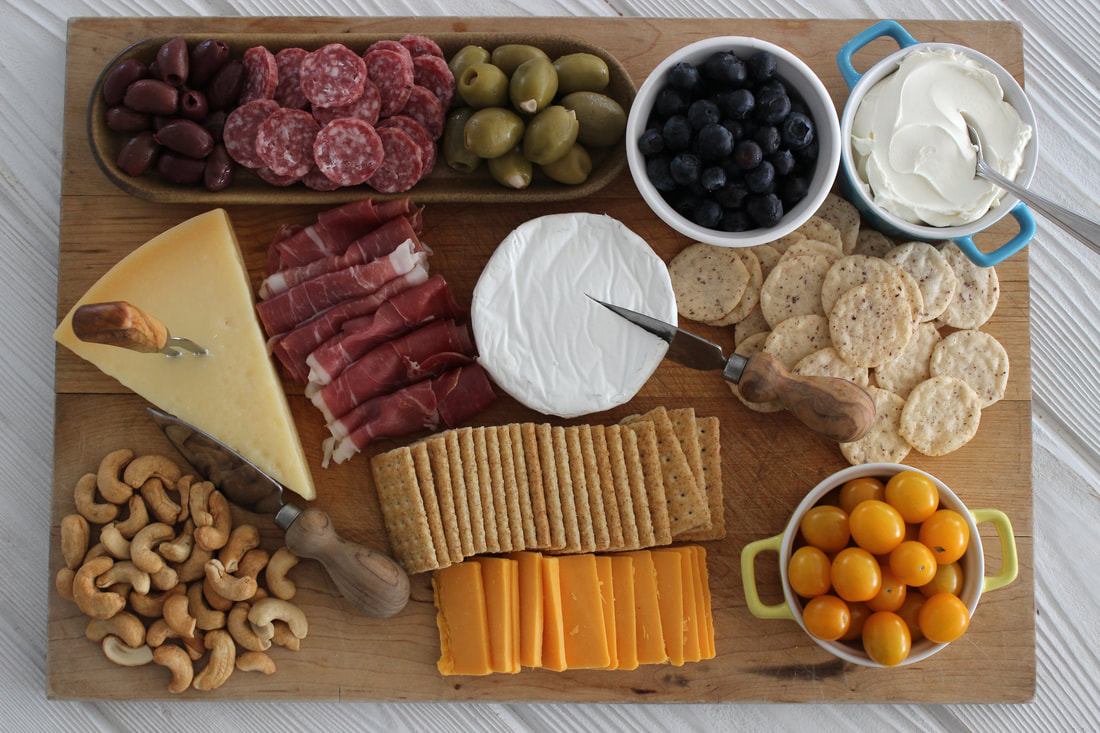
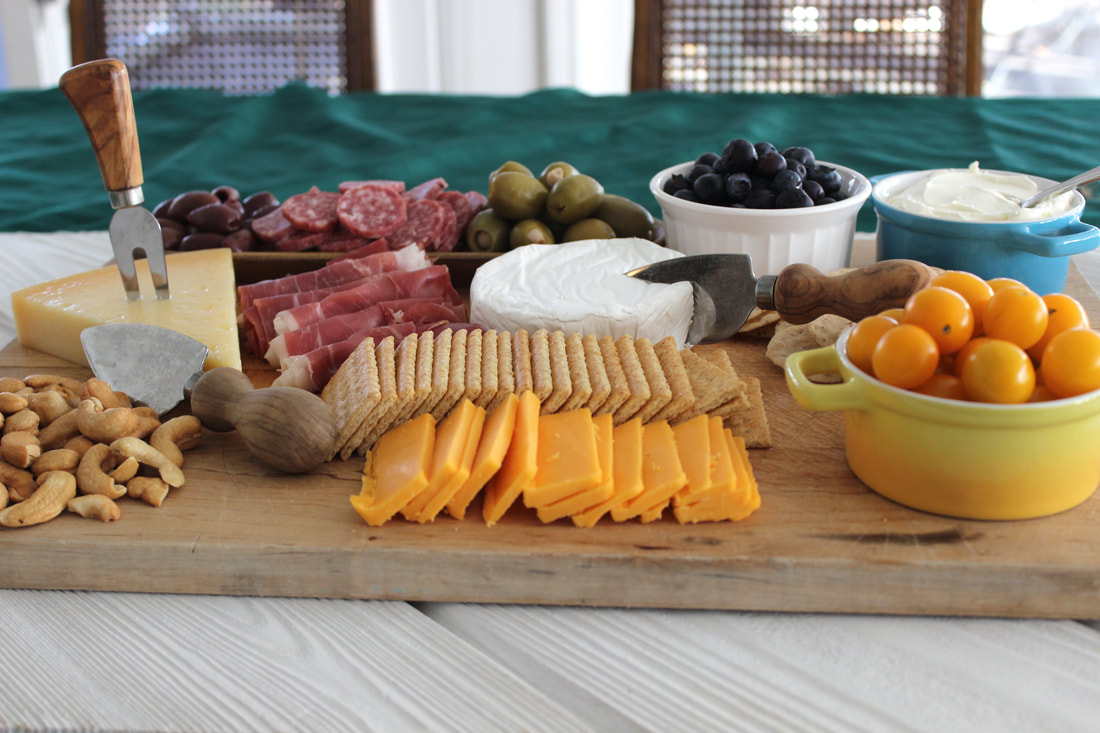
A charcuterie board is really just a fancy meat and cheese board. This is a simpler board created for our family of 6 (2 adults and 4 children). You can find images of epic charcuterie boards online that are huge and overflowing with goodies. I made this one with kids in mind. I left some space between things on this board so that little hands could more easily reach for things without touching everything else. I also included things I knew the kids would love like ordinary (sliced which is easier) cheddar cheese, blueberries, and yellow tomatoes. The kids actually tried and like most things on this board, but I wanted to make sure to include some favorite foods.
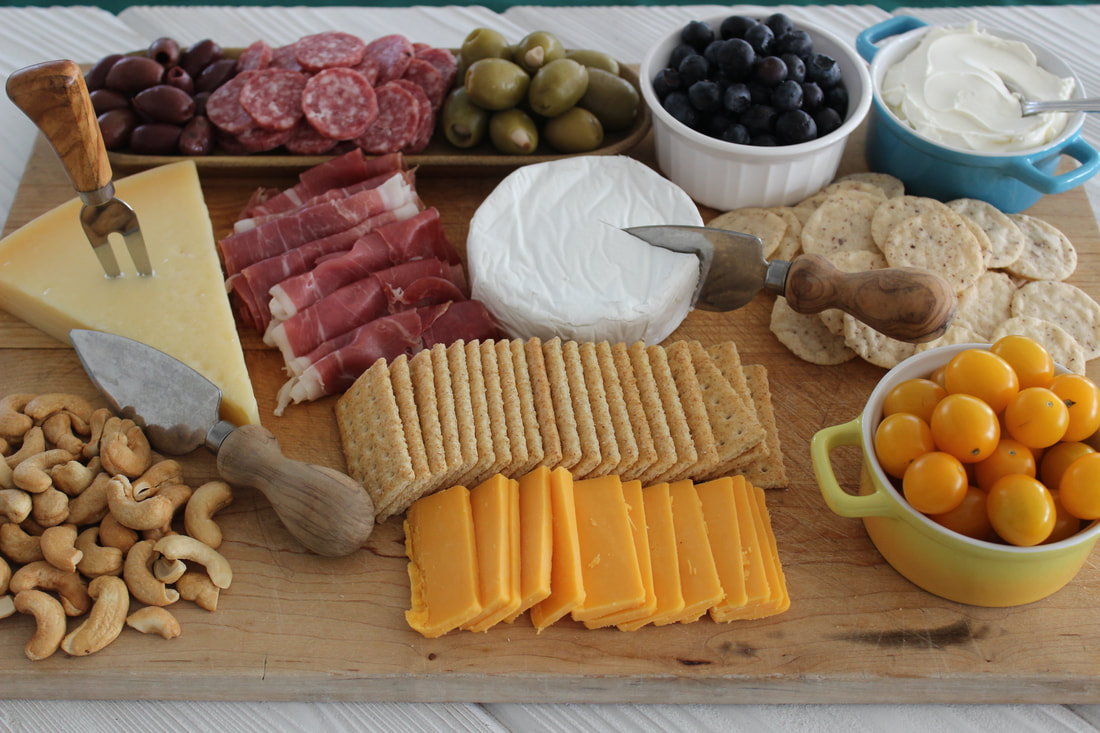
I started by putting my large cheese selections on the board to anchor everything else around. I used small dishes for some items to keep them from rolling off the board. Charcuterie boards can get expensive, but I purchased most of what you see here at Aldi. The nuts were on clearance at Walmart after Christmas.
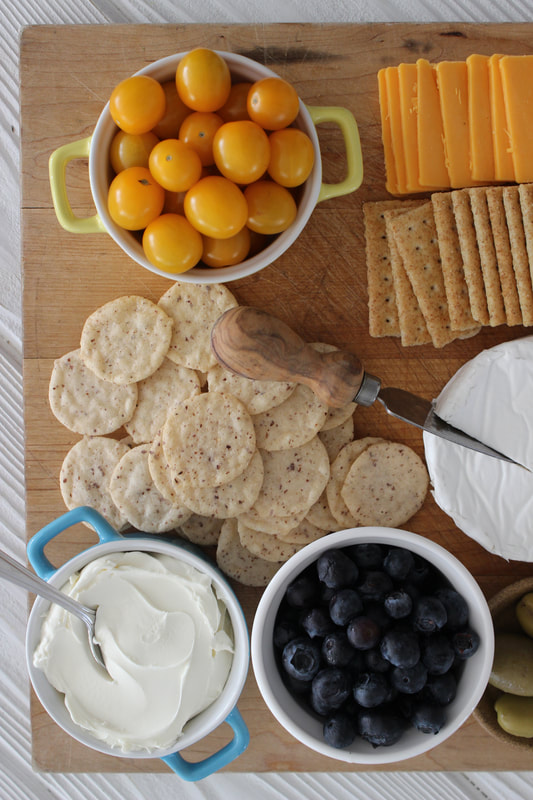
Here is the breakdown of what's on my simple, kid-friendly charcuterie board. Cherry-size yellow tomatoes, cheddar cheese, whole grain club style (Kroger brand) crackers, almond nut-thins, double creme brie, mascarpone cheese, and blueberries
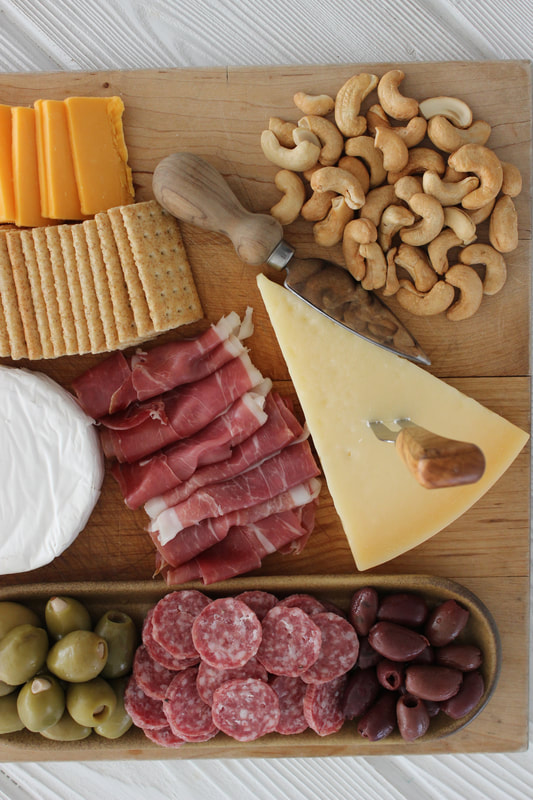
The other side: cashews, parmesan wedge, prosciutto, garlic stuffed olives, hard salami, and kalamata olives
In this picture you get a behind the scenes look at how I stage and photograph food. I photograph in our sunroom because it has the most light of any room in our house. I usually shoot closer to the windows, but when I photograph in the afternoon, I get shadows near the windows so I shot these pics on our dining table. This white board is one of my photo boards which I bought at a resale store years ago and painted. I can move it closer to window light or further away as needed to get the best shot.
I prefer to shoot in the daytime for better light, but I have a light that makes nighttime photo shoots possible. I will post an amazon link below. It is expensive, but I have used mine for years and it works great for quick and easy night shots. This is always on my sidebar because it is such a great resource for anyone interested in food photography. Tasty Food Photography by Lindsey from Pinch of Yum is the best resource I have found for improving food photography.
There are endless possibilities when it comes to creating a fabulous charcuterie board. You can make it simple or more complex, just be sure to include some things you know your family and guests will enjoy. Some more ideas I did not include are dried fruits, a small pot of honey or jam, and some fresh vegetables like sugar snap peas or sliced cucumber.
Pin on Pinterest
Disclosure: This post contains sponsored content and may contain affiliate links.
This has to be the simplest candy to make, but it will really wow your guests. Planning something fun like Mom's Night In or to cheer on your favorite team? You can make this simple cranberry and pistachio bark in no time and enjoy all of it’s yummy goodness.
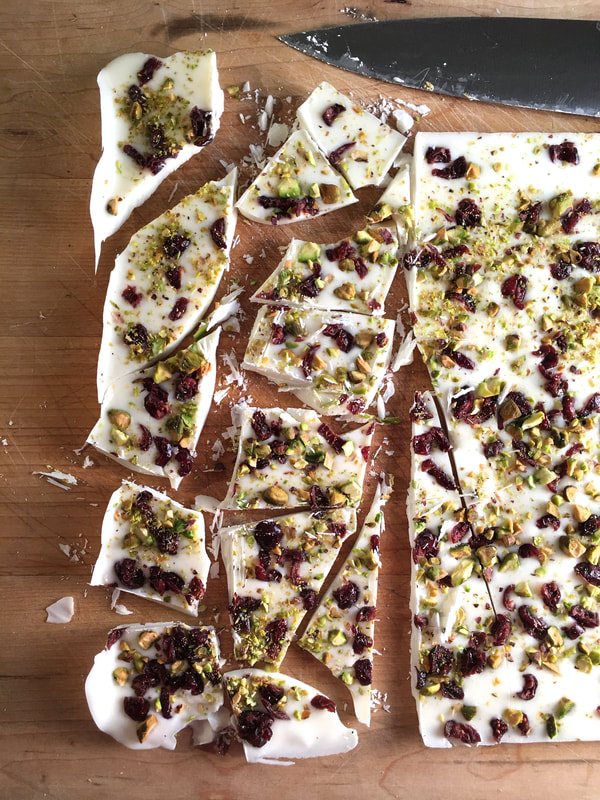
Sweet cranberries and salted pistachios in sweet almond bark make a delicious sweet and salty snack good enough for any occasion. Or just because...no reason needed to enjoy this delicious treat.
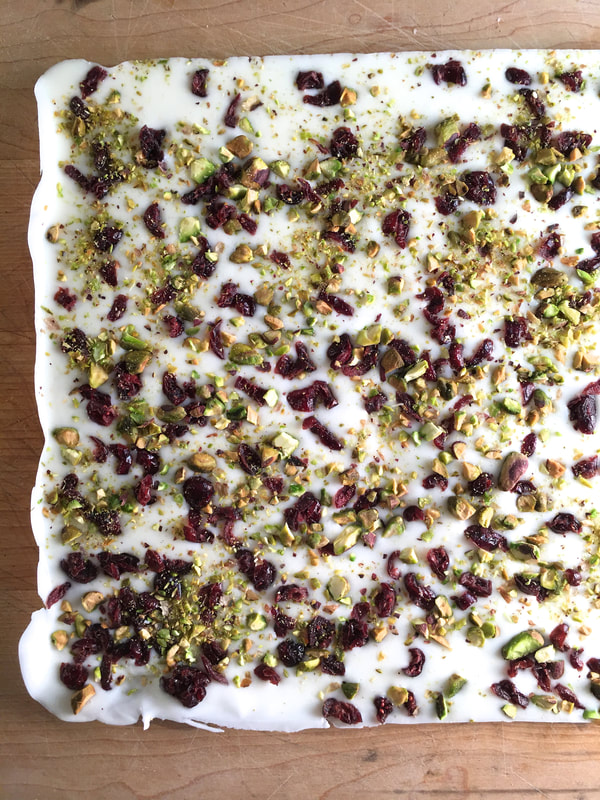
All you need to make this is almond bark, dried cranberries and pistachios. Three simple ingredients! If you want it a little saltier to counteract the sweet almond bark, simply add some fresh ground salt on top.
You line a sided baking sheet, like this one from Amazon, with parchment paper then spread the melted almond bark in the pan. Top with chopped dried cranberries, pistachios, and fresh ground salt if desired. Chill then cut into pieces. 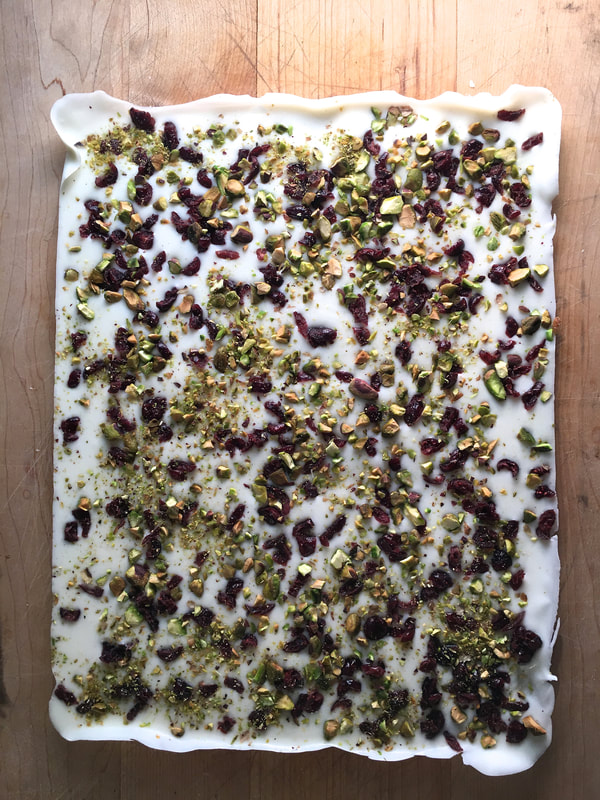
Ingredients:
1 pkg. Almond bark 1/2 to 1 cup chopped dried cranberries (you can buy them chopped) 1/2 to 1 cup chopped pistachios (you can buy them shelled and they are easy to chop) Fresh ground salt (optional) Equipment: Parchment paper Jelly Roll pan 1. In a microwave safe bowl, melt almond bark following package instructions. This is so easy to do in the microwave. 2. Spread melted almond bark in a parchment lined sided baking pan. 3. Top with chopped cranberries and pistachios. Then add fresh ground salt if desired. 4. Set pan in the fridge to harden, then lift bark out of the pan and transfer to a cutting board to cut into pieces. It comes out easily with the parchment paper. 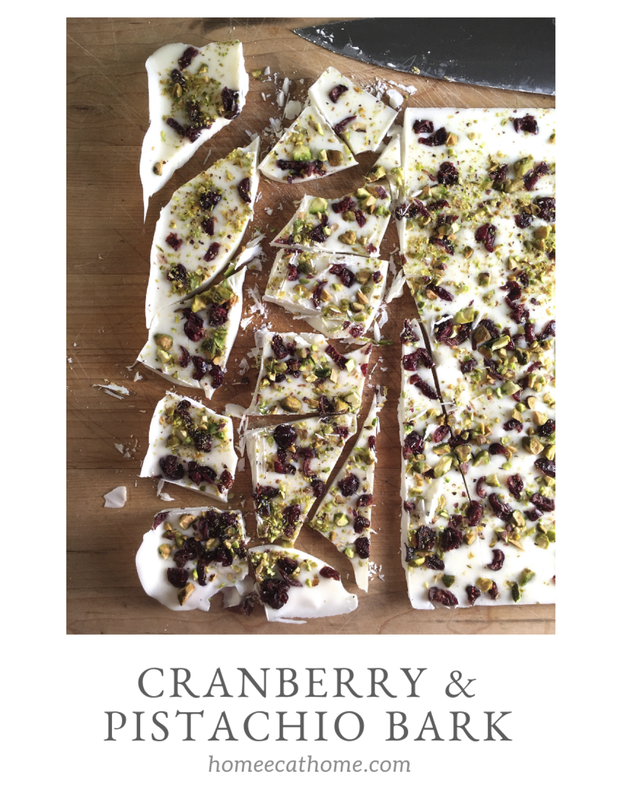
|

Welcome to Home Ec @ HomeHi, I'm Faith, a former Family and Consumer Science teacher turned food blogger. I love God, my family, and food. You can usually find me in the kitchen preparing family friendly, homemade recipes and taking lots of pictures. 
Still Goldens, Southern, IL
 Fan Favorites

The Best Dry Brined Turkey with Citris and Fresh Herbs

 Dehydrating Pears and Apples in the Instant Pot Duo Crisp Dehydrating Pears and Apples in the Instant Pot Duo Crisp
 
 |

 RSS Feed