|
This is one of our all time favorite things to make and eat. I first posted this recipe in 2011 when this little corner of the internet was only 9 months old. I've come a long way since then, especially in how I style and photograph food so when I made these bread machine cinnamon rolls recently, I took new photos. This recipe has evolved some over the years too so I have updated with ingredient changes and hopefully better instructions.
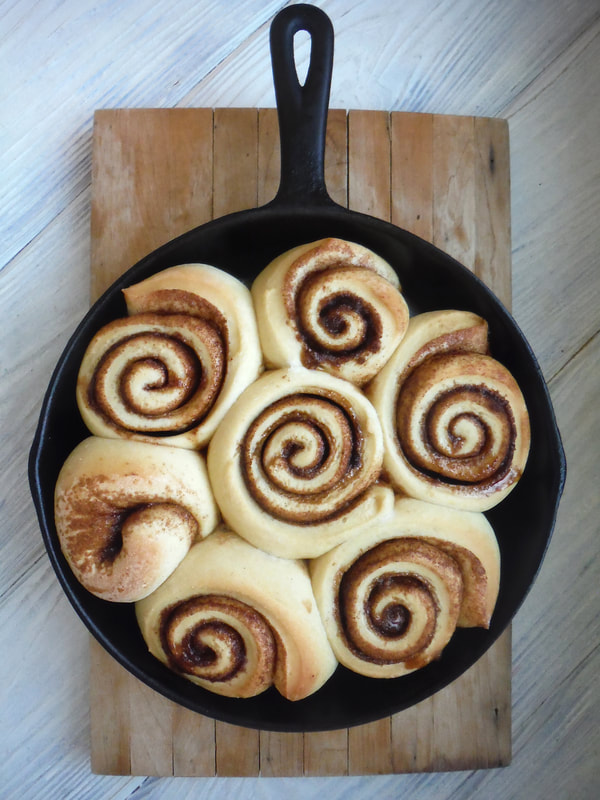
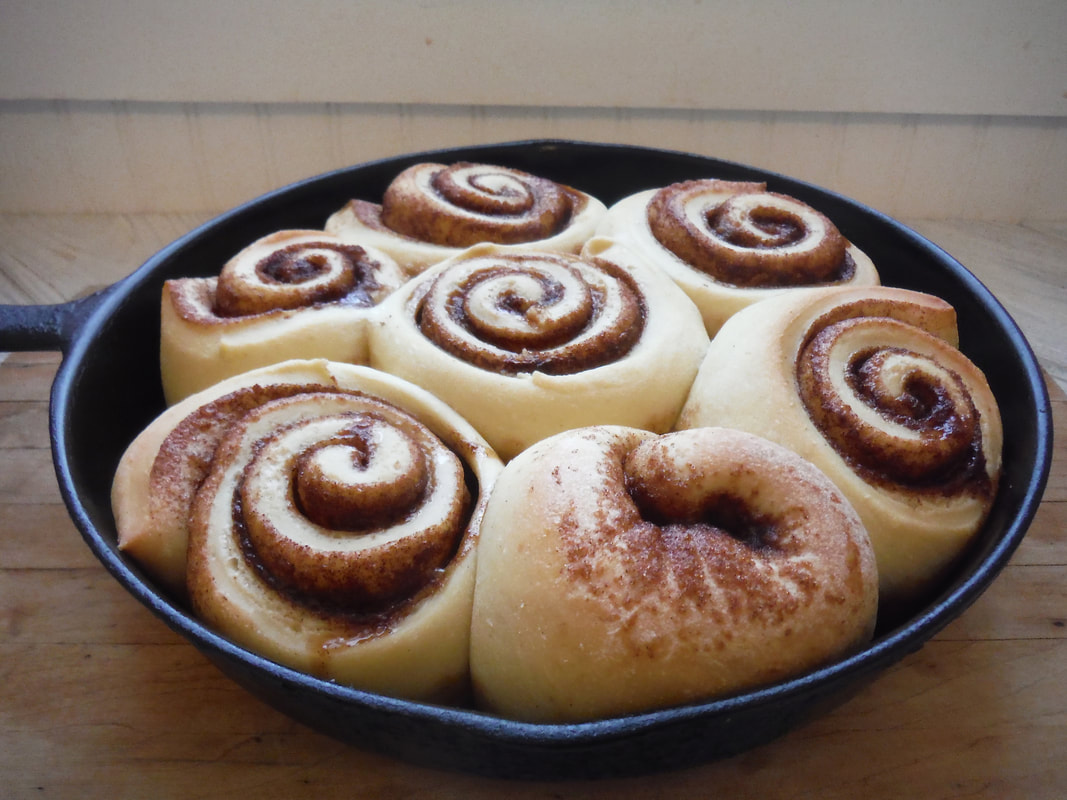
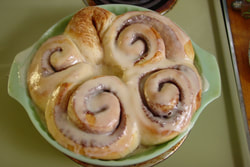
It doesn't get much better than fresh warm cinnamon rolls to start your day or for a cozy sweet treat anytime. Warm sweet dough spiraled with buttery sweet cinnamon. I love the pretty spirals before the frosting goes on and the out of this world amazing flavor once frosted.

My favorite part is that this dough is made in the bread machine. Believe me as a mother of four and a graduate student these cinnamon rolls would never happen if I had to make the dough from scratch. But put ingredients in the bread machine and press the dough cycle button...that I can do. Plus, I always make ahead and refrigerate or freeze the rolls to bake later. Any real hands-on work is usually done when the kids are in bed.
1. Put the dough ingredients in the bread machine in the order listed and run on the dough cycle. 2. After the dough is done, roll the dough into a large rectangle (on a lightly flowered surface) and spread it with 2 Tablespoons melted butter. 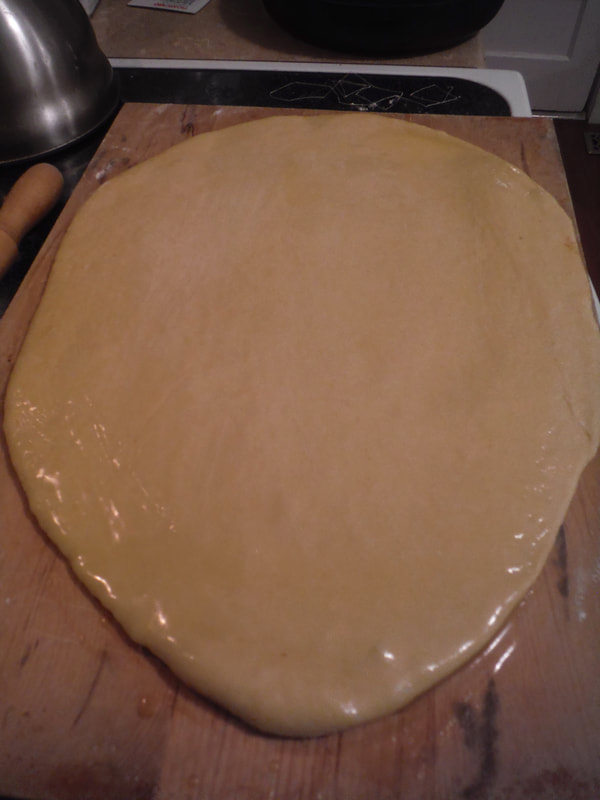
I don't have good lighting in my kitchen for photographs, but I wanted to show you how big I roll out the dough. This dough has been brushed with melted butter and is ready for cinnamon sugar.
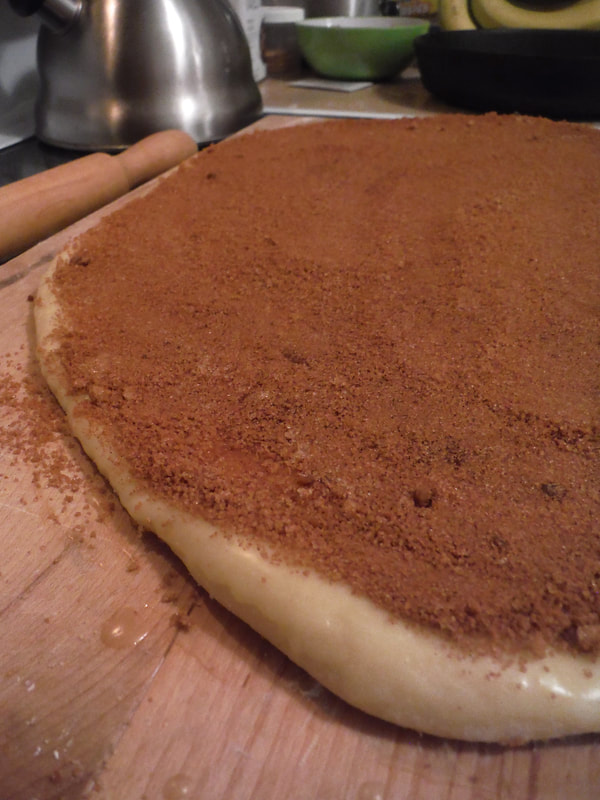
3. Mix together the brown sugar and cinnamon then spread over the melted butter. Make this dough rectangle pretty large so that you can have more surface area covered with cinnamon sugar. Then when you roll it up, you will have more cinnamon sugar spiraled into the dough which makes them so yummy.
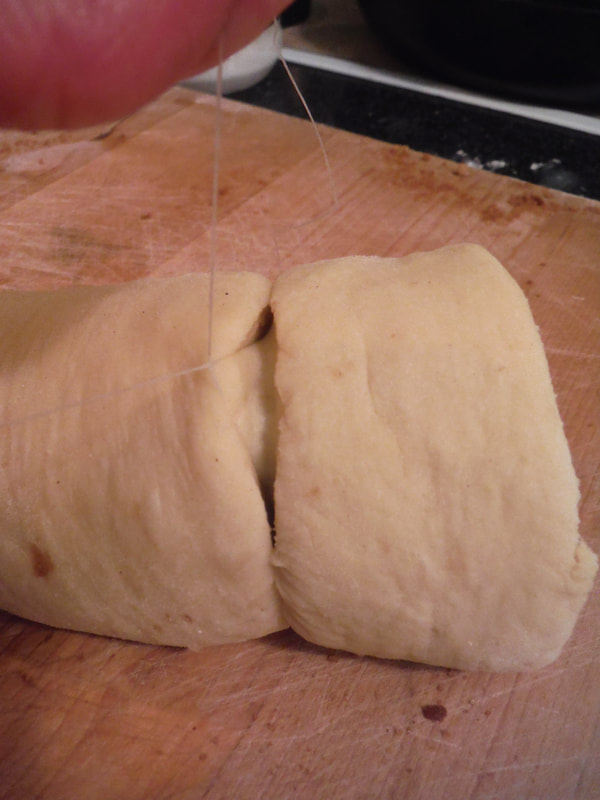
4. Roll up and cut into 10-12 rolls and place in two greased round pans or one large lasagna pan. An easy way to cut the rolls is to use dental floss as seen in the above picture.

You want to space them out a little so they have room to rise.
5. Let rise covered with a tea towel for a while (an hour or so) or cover with plastic wrap and slow rise in the fridge overnight. If freezing, put directly in the freezer without rising. Then let them rise while thawing. Bake at 325 degrees for 20 to 25 minutes or until lightly browned. 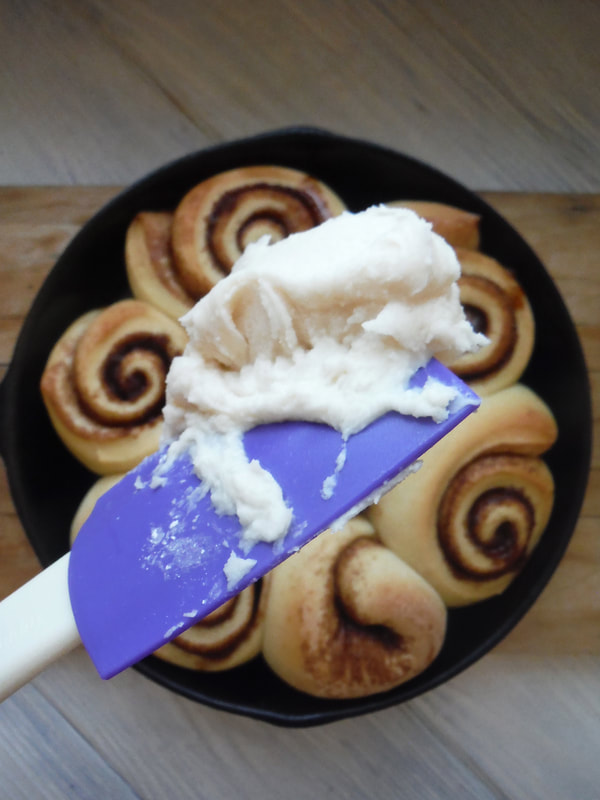
Spread the icing on soon after they come out of the oven. The icing will be thick, but spreads easily on warm rolls.
These travel well and are perfect for bake sales and breakfast potlucks. I recently made a double batch for my son's academic quiz team fundraiser.
I like to have my directions in one place, so here you go
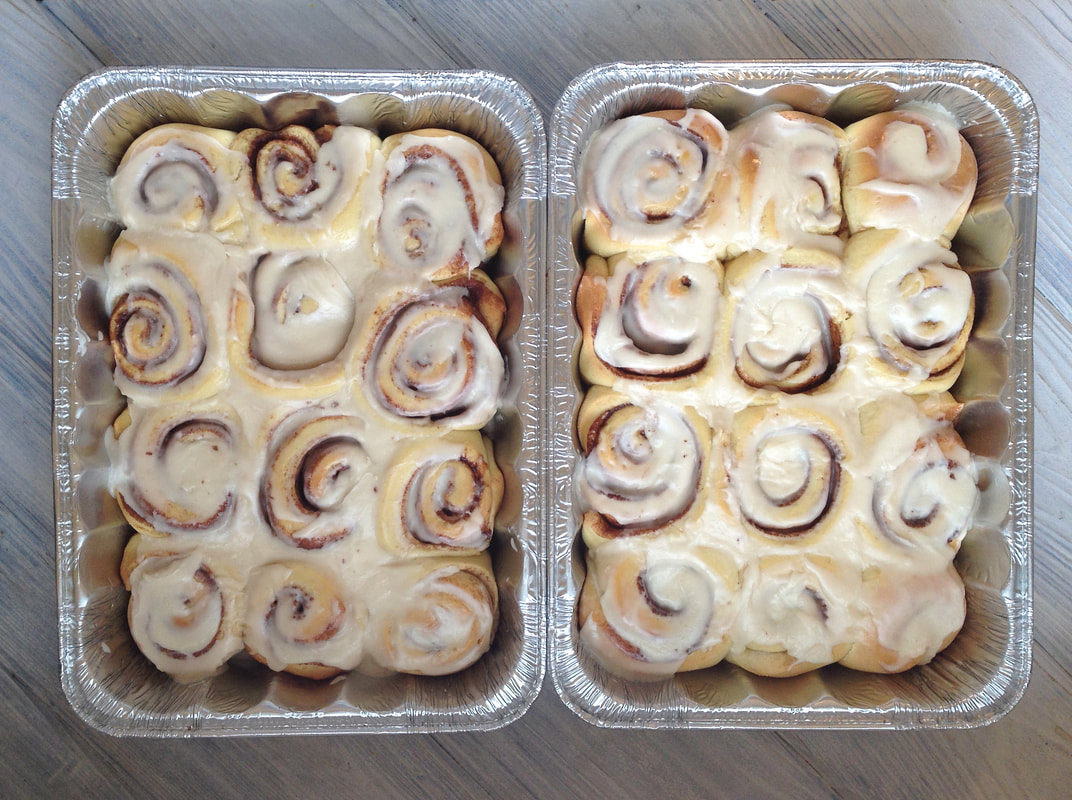
Dough Ingredients: 1 cup plus 2 tablespoons warm milk 3 tablespoons olive oil 2 eggs 1/2 cup sugar 4 cups flour 1 teaspoon salt 3 teaspoons yeast Cinnamon Sugar Ingredients: 2 tablespoons butter 2/3 cup brown sugar 1 tablespoon cinnamon Icing Ingredients: 1 to 2 T. milk 1 1/2 cups powdered sugar 3 T. butter, melted 1 teaspoon vanilla Directions: 1. Put the dough ingredients in the bread machine in the order listed and run on the dough cycle. 2. After the dough is done, roll the dough into a large rectangle (on a lightly flowered surface) and spread it with 2 Tablespoons melted butter. 3. Mix together the brown sugar and cinnamon then spread over the melted butter. Make this dough rectangle pretty large so that you can have more surface area covered with cinnamon sugar. Then when you roll it up, you will have more cinnamon sugar spiraled into the dough which makes them so yummy. 4. Roll up and cut into 10-12 rolls and place in two greased round pans or one large lasagna pan. An easy way to cut the rolls is to use dental floss as seen in the above picture. 5. Let rise covered with a tea towel for a while (an hour or so) or cover with plastic wrap and slow rise in the fridge overnight. If freezing, put directly in the freezer without rising. Then let them rise while thawing. Bake at 325 degrees for 20 to 25 minutes or until lightly browned. Spread the icing on soon after they come out of the oven. Makes about one dozen rolls. I cover the unbaked rolls with plastic wrap, stick them in the refrigerator overnight, and then bake in the morning. This makes two pans full. If you can’t eat them all, freeze one pan then thaw in fridge and bake later. If you don’t have a bread machine, you can do this instead: Let the yeast dissolve in the milk, add all but the flour and stir. Then add flour until you have a good consistency to knead. Turn it onto a lightly floured surface and knead for a good 5-10 min- adding flour as needed to keep it from sticking to you. Cover and let rise till doubled. Punch down. roll out and finish as directed above. I bought my bread machine at a thrift store for about $7 and have been using it for years. 
This is what my old photography looked like before reading Tasty Food Photography by Lindsay from Pinch of Yum, a highly successful food blogger. See my affiliate link below if you need to up your food photography game.
10 Comments
With the start of the new year, I have been more mindful in thinking about the foods that we eat. Although I do make homemade meals frequently which are mostly healthy, I know that I should be incorporating more vegetables into our diet.
One of my favorite ways to get a lot of veggies into our diet during the colder winter months is in delicious homemade soups. Luckily the boys love soup!
We also love this veggie filled red pepper and tomato soup and this creamy cauliflower soup which inspired this broccoli soup.
I love this hearty veggie filled soup made with onion, celery, garlic, and of course fresh broccoli. And for my fellow Catholics, this is perfect for the lenten season since it is meat free. Although, lenten fish fries are pretty awesome! I know we'll be heading to ours soon.
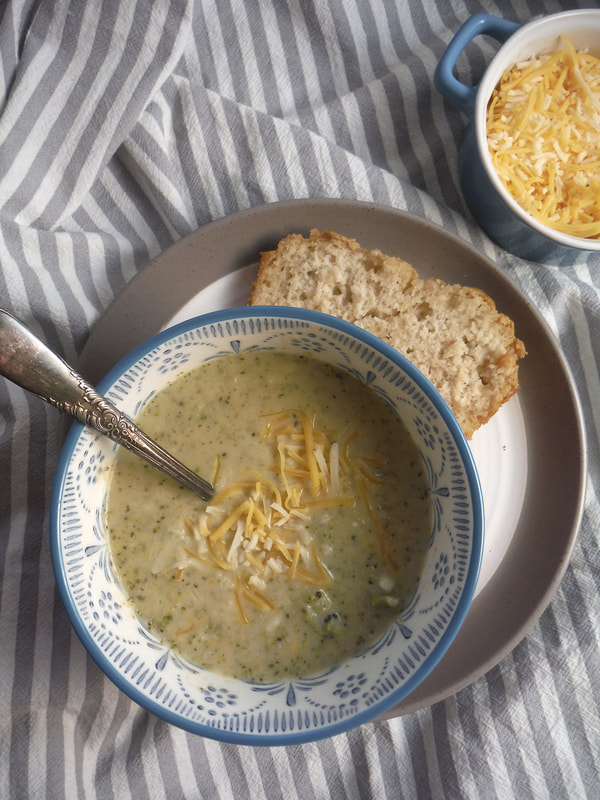
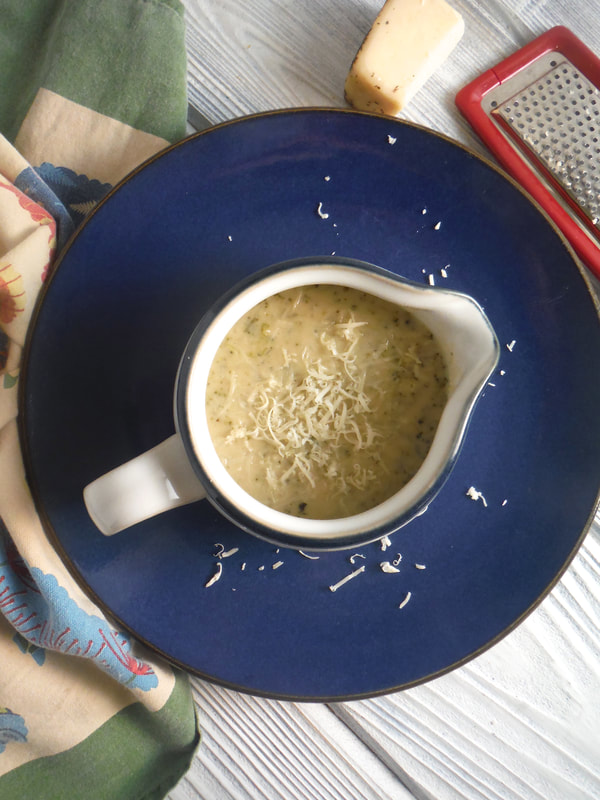
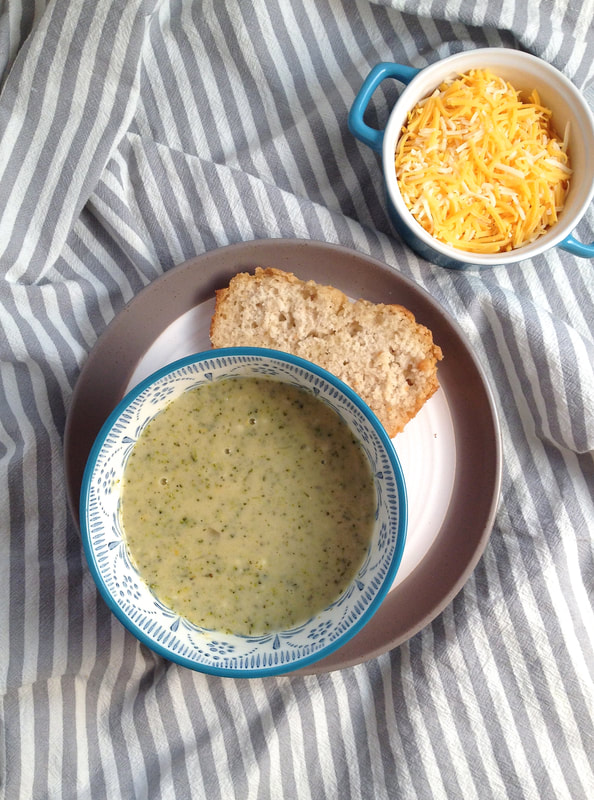
Bake up some fresh beer bread and serve with extra cheese for a delightful winter meal!
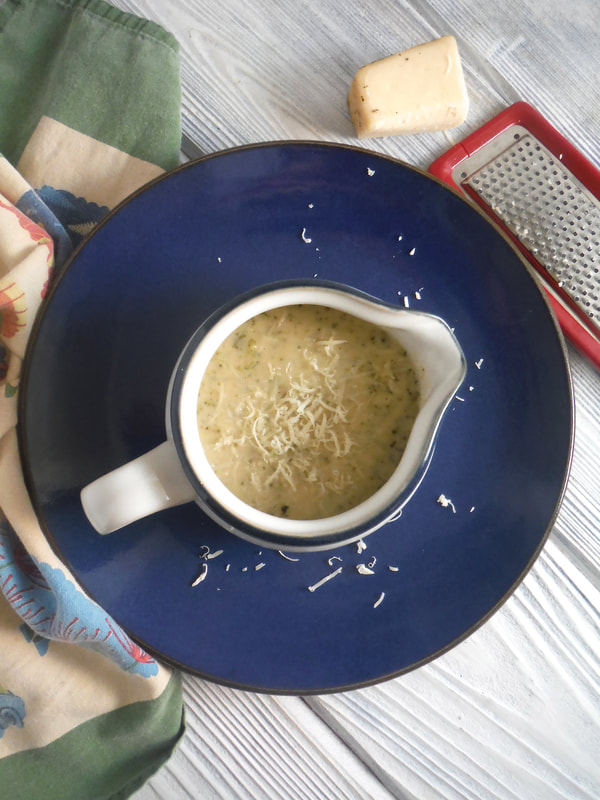
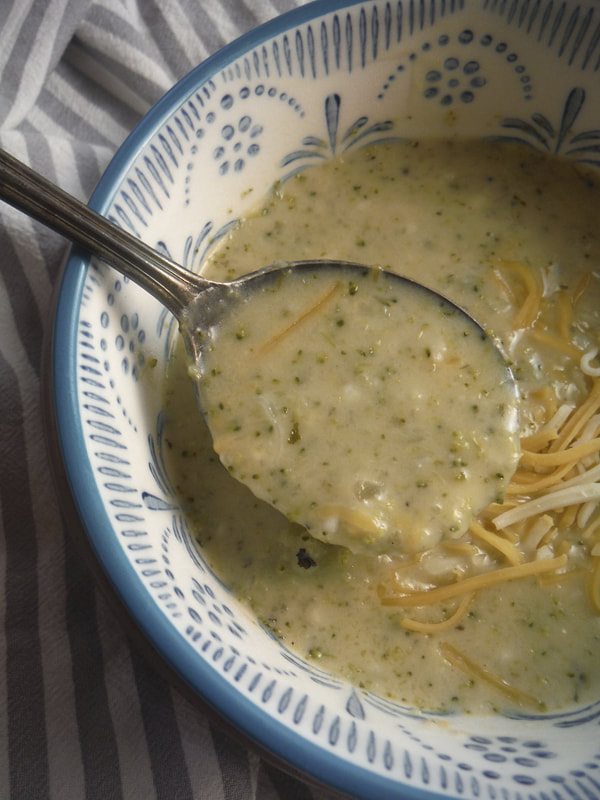
Creamy Broccoli Soup
1 sweet onion, diced 1 rib celery, sliced 2 cloves garlic minced 10 T. butter, divided Splash cooking Sherry or white wine, (optional) 3 medium heads broccoli, cut into florets (I don't use much of the stems) 6 Cups vegetable broth 1 T. dried parsley 1 tsp.salt 1 tsp. fresh ground pepper (It's ok not to measure here...just grind some fresh pepper into the pot.) ½ tsp. dried basil ¼ tsp. Creole seasoning, (optional) 6 T. flour 1 Cup milk ½ Cup whipping cream Your favorite shredded cheese for serving. I add a couple big handfuls to the pot and stir in, then serve with extra cheese on the side. We like cheddar or cheddar-jack and parmesan. 1. Melt 4 T. butter in a Dutch oven or large pot over medium heat. Saute onion, celery and garlic until tender. 2. If you like, add a splash of cooking Sherry to deglaze the pan. Add broccoli, vegetable broth, parsley, salt, pepper, basil, and Creole seasoning. Simmer covered for about 30 minutes. 3. While soup is simmering, melt 6 T. butter in a 2 qt. saucepan. Stir in 6 T. flour, then milk and whipping cream and cook and stir to make a thick white sauce. 4. Use a potato masher (amazon link below) to mash up the soup or blend with an immersion blender, breaking the broccoli into smaller pieces. Then stir in the white sauce and continue to cook and stir until thickened. Serves 6 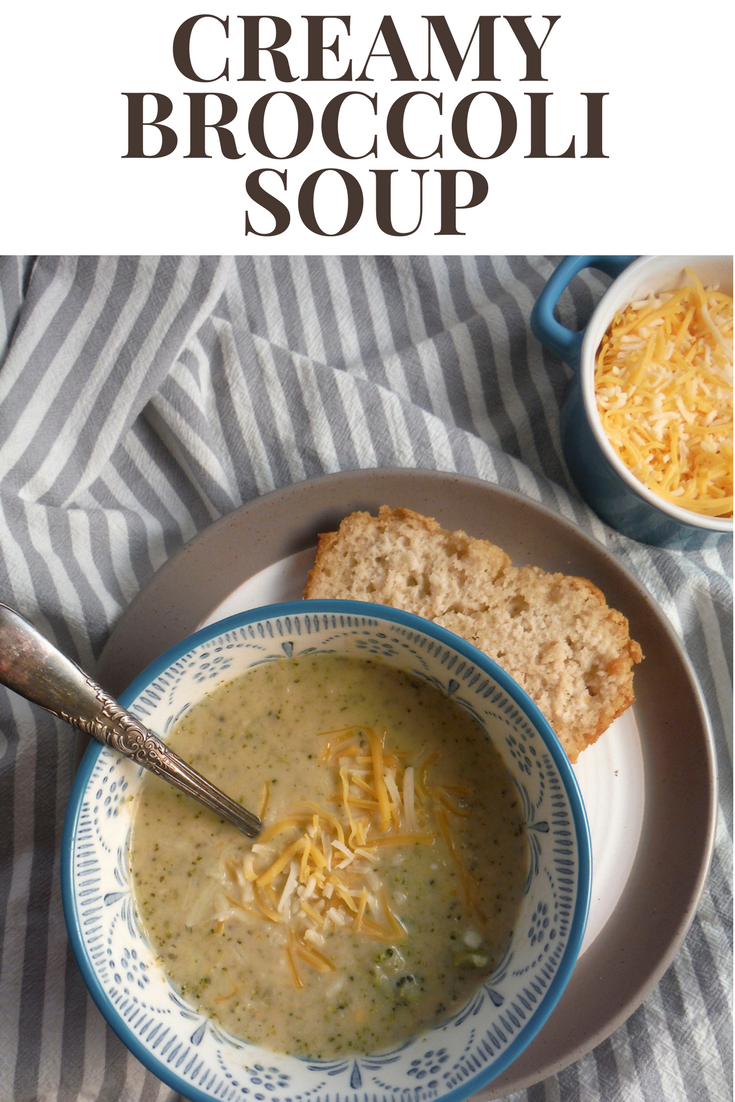
|

Welcome to Home Ec @ HomeHi, I'm Faith, a former Family and Consumer Science teacher turned food blogger. I love God, my family, and food. You can usually find me in the kitchen preparing family friendly, homemade recipes and taking lots of pictures. 
Still Goldens, Southern, IL
 Fan Favorites

The Best Dry Brined Turkey with Citris and Fresh Herbs

 Dehydrating Pears and Apples in the Instant Pot Duo Crisp Dehydrating Pears and Apples in the Instant Pot Duo Crisp
 
 |


 RSS Feed