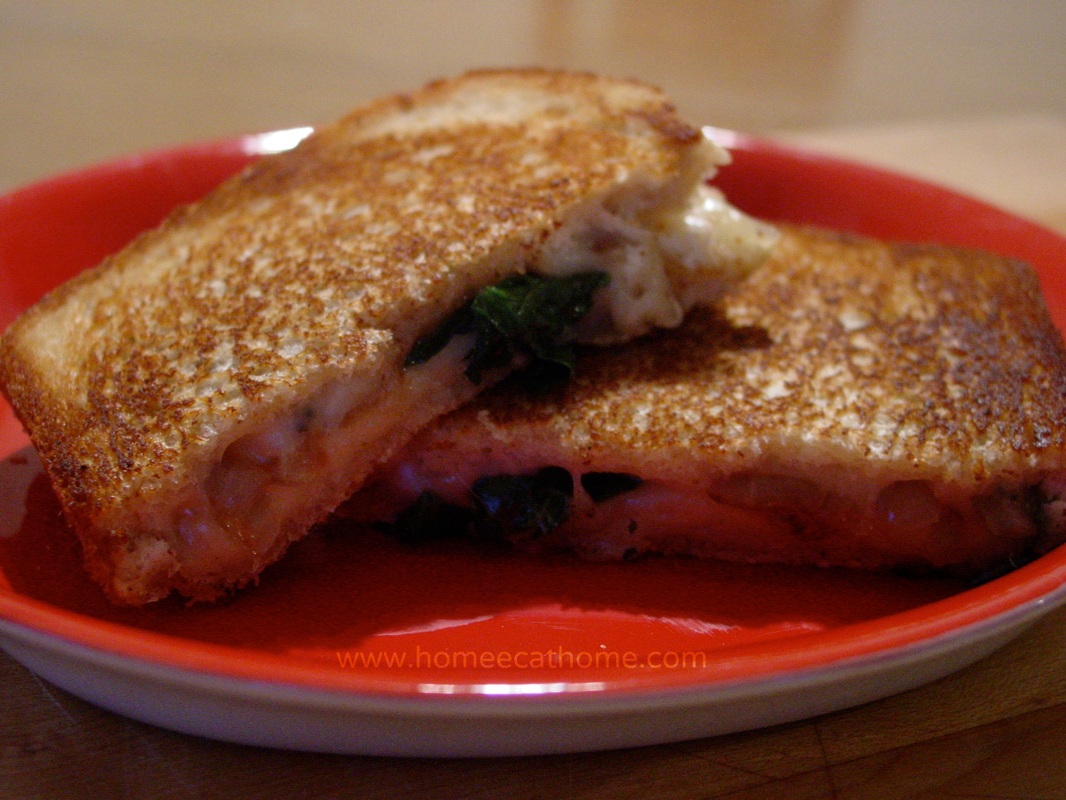
 I was making grilled cheese for dinner one night because I needed an easy dinner night. After making a couple standard cheddar cheese sandwiches, I had an idea. I had sweet onions and spinach and decided to take it up a notch. The resulting caramelized onion and spinach grilled cheese was delicious. So good I have found myself wanting more...in fact, I just had this for lunch. Ingredients:
butter sweet onions, sliced fresh spinach swiss cheese or your favorite cheese sourdough or another nice variety of bread 1. Saute some sliced onions with a little butter over medium heat. (A slice or two of onion for each sandwich.) Cook until the onion starts to turn golden brown and caramelize. Break the onion slices apart as they cook. Add a handful of fresh spinach. Continue to cook just until the spinach wilts. 2. Remove the onion and spinach from the skillet. Place a pat of butter in the center of the skillet. Add a slice of bread then place the onion spinach mixture on the bread. Add the cheese ( I use 2 slices) then top with the second piece of bread. Add a little butter on top of the sandwich so that when you flip it over, the other side will have a buttery crust too. 3. Cook on each side until golden brown.
0 Comments
Disclosure: Sponsored post. I received product from Hershey's and a stipend from Global Influence for my post. All opinions are honest and are my own.

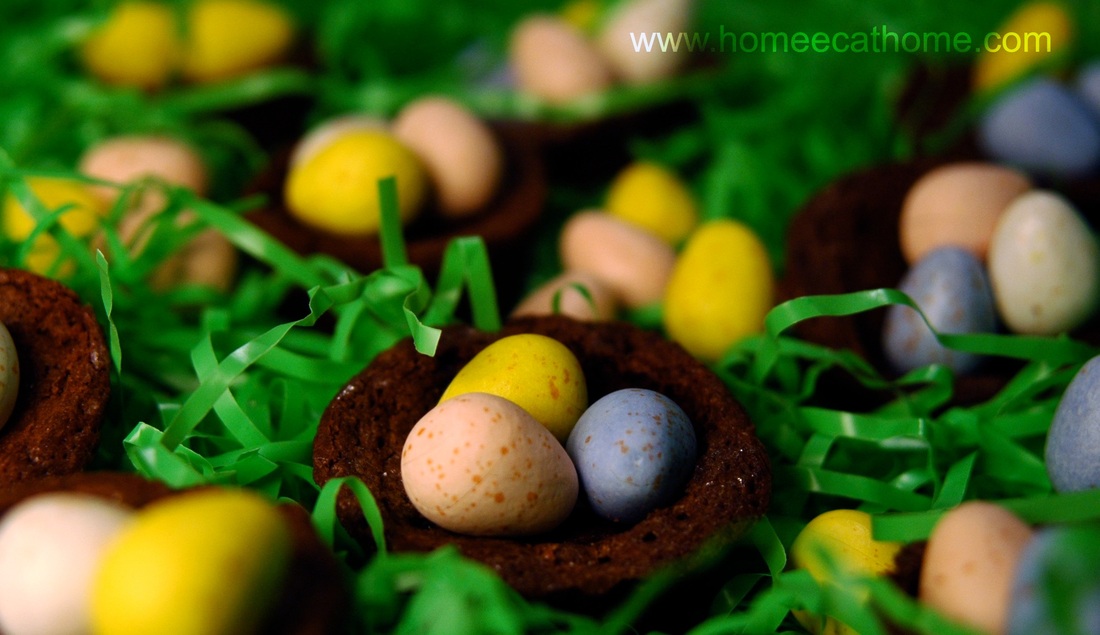
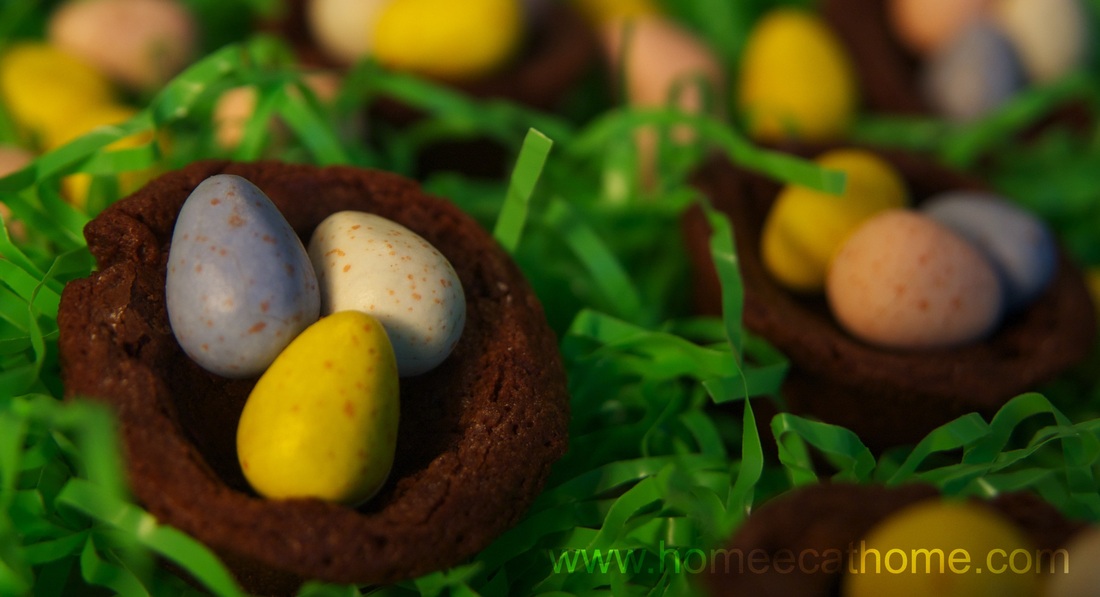
It doesn't get much better than brownie bites with CADBURY MINI EGGS. These are the perfect addition to your Easter celebration that will delight both young and old alike.
I love how easy these are to make. Simply bake your favorite brownie recipe in mini muffin pans. I made my favorite, Coconut Oil Brownies. You will need to reduce the cooking time and possibly the oven temperature depending on how crispy you want the edges to be.
I reduced the cooking time to 12-15 minutes and baked them at 350 degrees F. This recipe makes really moist brownies so it works well for the smaller mini muffin size. I used my cookie dough scoop to put the batter in the mini muffin cups. It was easy and just the right amount of batter. The boys assisted with scooping batter into the muffin pan too (with careful supervision). 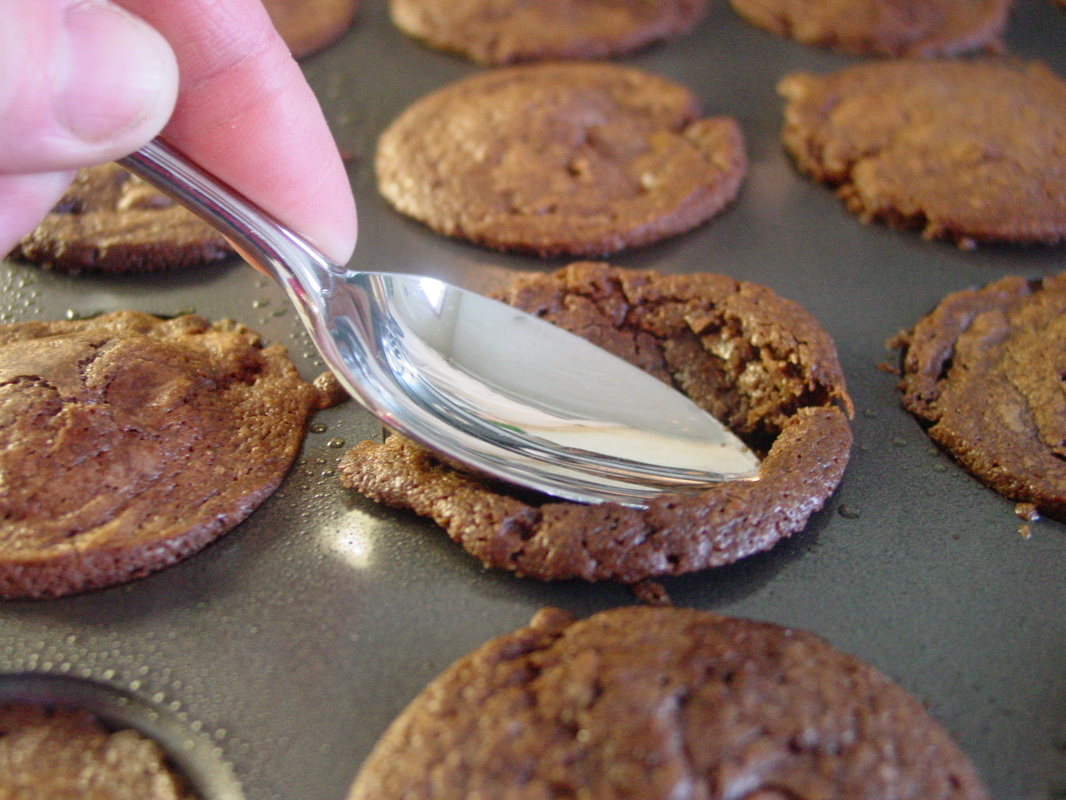
While still warm, I pushed in the tops of the brownies with a spoon to make little nests.
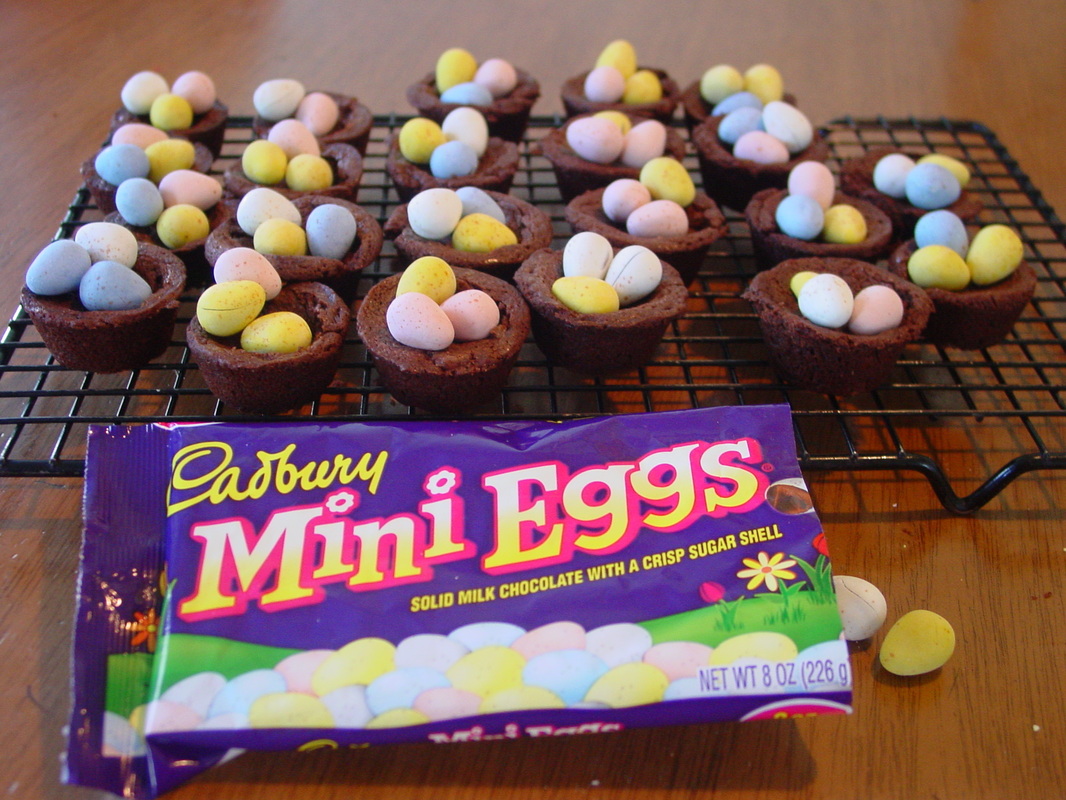
Cool on a wire rack. Then after they cool place CADBURY MINI EGGS in each nest. This is a fun job for any little helpers you may have.
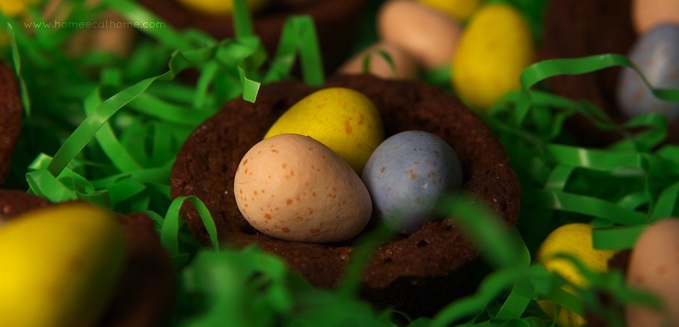
For an enchanting display, nestle them in Easter grass on your serving tray.

HERSHEY'S has everything you need for Easter. The boys will be excited to find their baskets filled with HERSHEY'S candy on Easter morning.
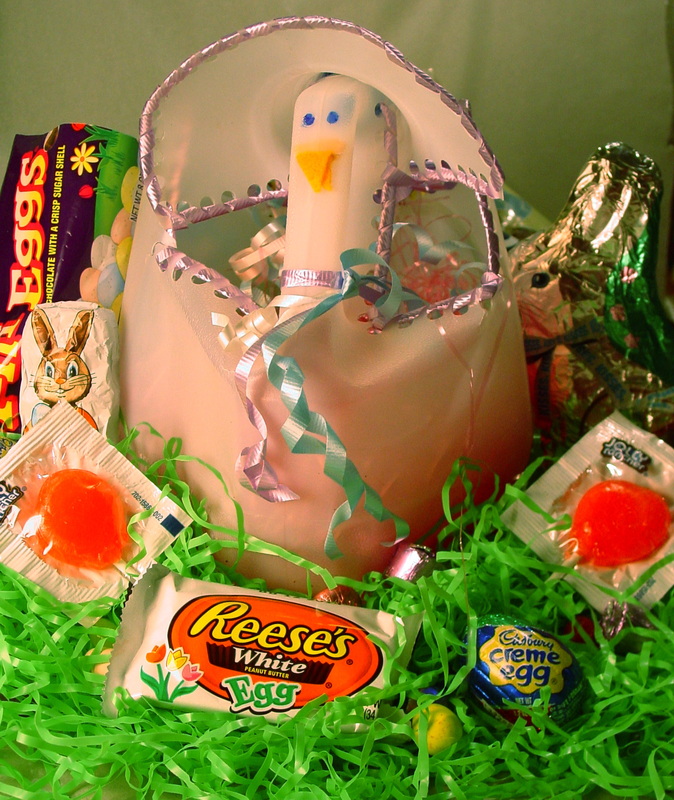
Feeling crafty? You can make a cute recycled milk jug Easter basket out of an empty milk jug. I found a cute edible craft to make candy race cars that the boys would love too. You can find all kinds of recipes and crafts at the Celebrate with HERSHEY'S site.
If you love HERSHEY'S Candy as much as we do, enter to win my giveaway featuring an assortment of HERSHEY'S Easter Candy (U.S. residents)
Disclosure: Sponsored post. I received product from Hershey's and a stipend from Global Influence for my post. All opinions are honest and are my own.
Linking up at Friendship Friday, Create with Joy
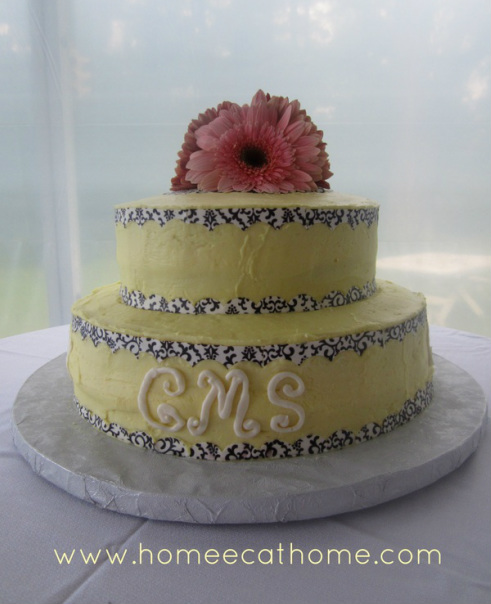
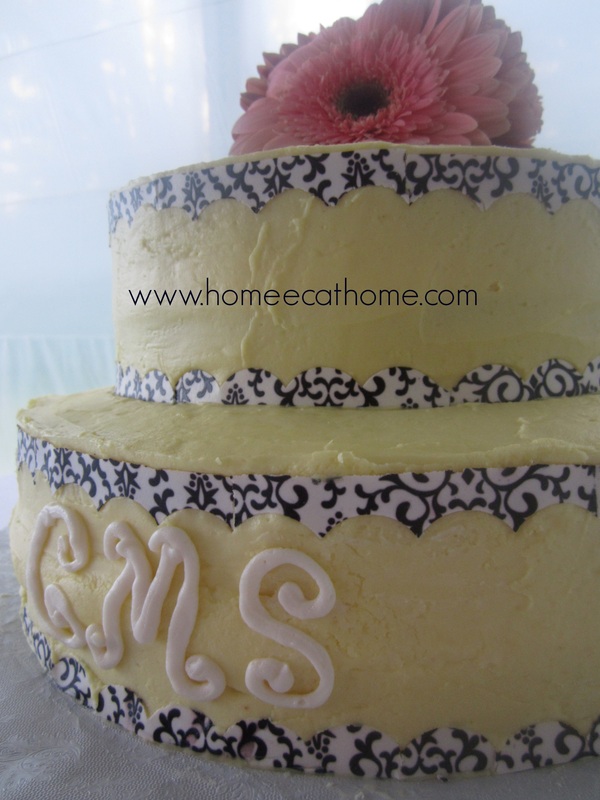
In the fall, we celebrated my mother-in-law's birthday. I offered to make the birthday cake and went with a formal design. In keeping with the more formal theme, I kept the cake simple and put only initials on the sides. All four sides of the cake were embellished with initials.
I made three batches of Fluffy Yellow Cake batter from Annie's Eats, adding a little homemade crème bouquet and purchased princess emulsion to give it that wedding cake flavor. I think I used a tsp. or two for each cake recipe. I bought the Princess emulsion at Hobby Lobby, but could not find crème bouquet flavoring locally and made a homemade version.
This cake is constructed of two 9 inch layers stacked on top of two 12 inch layers. I placed two wooden and two plastic dowel rods through the layers to help hold everything together. I also spread a little frosting between the bottom layer and the cake board to help anchor the cake to the board. I used this recipe for Cream Cheese Celebration Frosting from Veronica's Cornucopia. This recipe makes a thick icing which is both delicious and lends itself well to decorating. It will hold its shape when used in piping designs. This recipe also uses crème bouquet flavoring which gives the icing a wonderful hint of citrus. I used paste and gel icing colors to create a warm light yellow frosting. I have found that icing gets darker the next day, so I tend to go slightly lighter when trying to get a light color. Homemade Crème Bouquet:
I combine the ingredients and store in a small squeeze bottle. 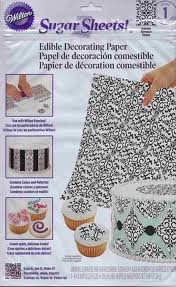
I used a scallop cutter designed especially for using with sugar sheets to achieve the scalloped edges on the cake. This was time consuming, but I thought the end result was worth the extra effort. I cut a circle out of the sugar paper and placed it on top of the cake to provide a place to set fresh flowers.
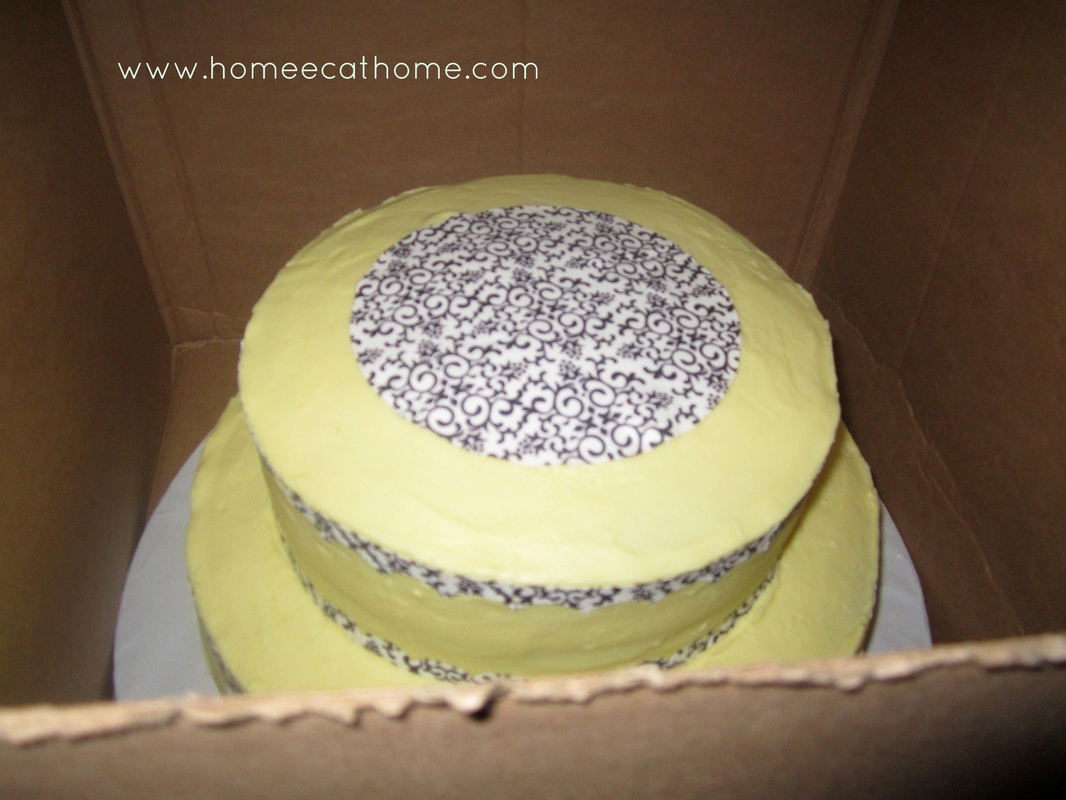
Since I needed to travel about 5 hours with this cake, I repurposed a large box as a cake box large enough to safely hold the cake. The cake board should fit snuggly into the box so that it does not shift. The cake board should also be larger than the base of the cake so that the cake does not touch the sides of the box.
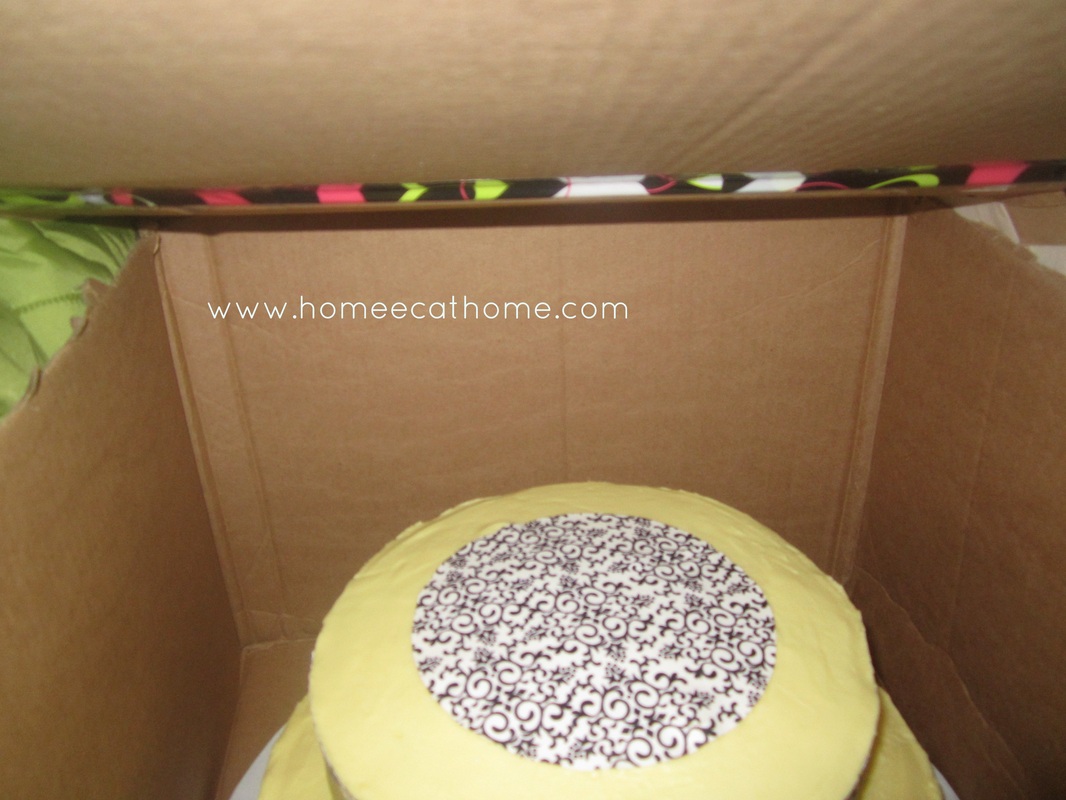
I taped a large piece of cardboard to the top of the box as a lid that hung over the edge so that it would not fall into the box and damage the cake. I first removed the original lid which flapped in and could have fallen into the cake.
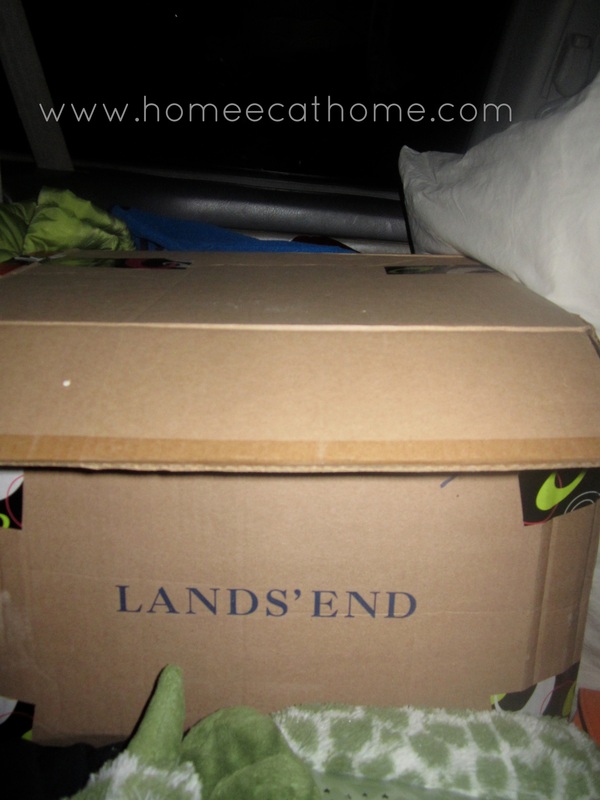
I positioned the cake box on the back bench seat and wedged it in securely with pillows, blankets and coats. We had plenty of padding in the car since we were traveling with kids.

For a finishing touch, I found some pretty flowers at Trader Joe's and placed them on top of the cake. I was pleased with both the flavor and the look of this cake and would use these recipes again. The icing was especially delicious and easily gave a smooth finish.
Veronica's Cornucopia gave a great tip for using a water spray bottle to help achieve smooth icing. In the past I have used a straight edge dipped in water, but found the spray bottle much easier for smoothing icing. 
|

Welcome to Home Ec @ HomeHi, I'm Faith, a former Family and Consumer Science teacher turned food blogger. I love God, my family, and food. You can usually find me in the kitchen preparing family friendly, homemade recipes and taking lots of pictures. 
Still Goldens, Southern, IL
 Fan Favorites

The Best Dry Brined Turkey with Citris and Fresh Herbs

 Dehydrating Pears and Apples in the Instant Pot Duo Crisp Dehydrating Pears and Apples in the Instant Pot Duo Crisp
 
 |
 RSS Feed