|
I received this product for free from Moms Meet (momsmeet.com) to use and post my honest opinions. Compensation for this post was provided and this page may contain affiliate links.
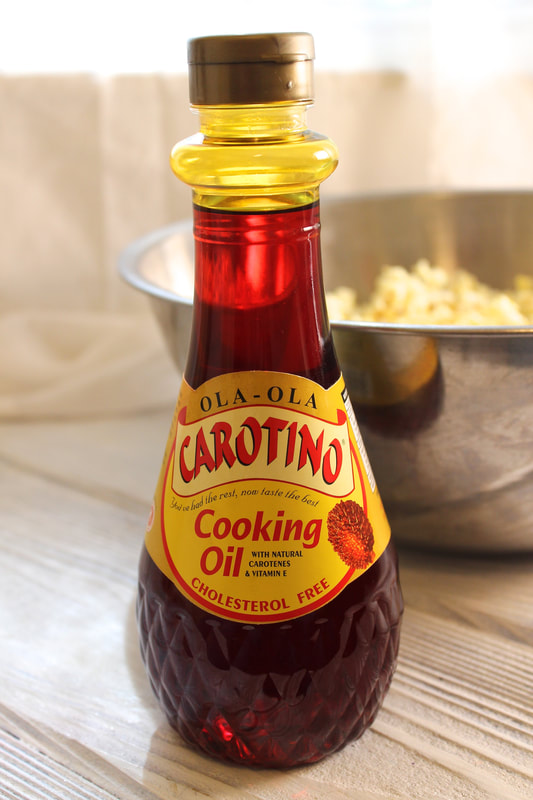
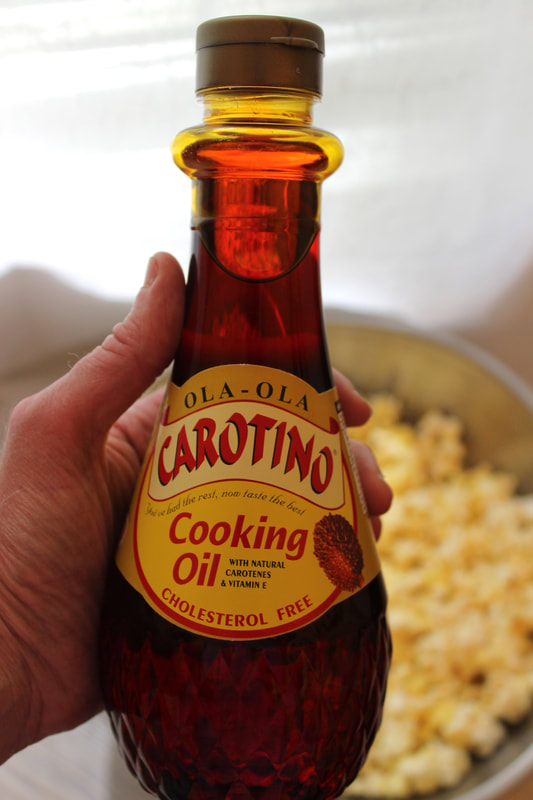
Have you tried cooking with red palm oil? This was my first time using it. I was sent a bottle of Carotino Malaysian Red Palm oil to try so I made one of our favorite things...popcorn!
Since I am new to cooking with palm oil, I am guessing many of you are too. Did you know that Malaysian Sustainable Palm Oil is a healthy replacement for partially hydrogenated oil because it is trans fat free and rich with nutrients? Palm oil is also non-GMO and ideal for high-temperature cooking making it perfect for homemade popcorn.
Want to learn where palm oil comes from? Malaysian Sustainable Palm Oil comes from the fruit of the oil palm tree, which can only grow near the equator. These trees have been producing abundant oil-rich fruit for decades. A one-acre palm oil plantation produces 11 times more oil than a one-acre soybean field. In 2008, Malaysia became the first to produce and export certified sustainable palm oil. What about nutrition? Malaysian Sustainable Palm Oil comes in golden and red varieties. Red palm oil is particularly rich in nutrients such as vitamin E (tocotrienols). In fact, bread baked with palm oil has nearly ten times the vitamin E of bread baked with canola oil. Plus, palm oil’s uncommon vitamin E form (tocotrienols) has 60 times the antioxidant power of the more typical form (tocopherols). In addition, Red palm oil is loaded with carotenoids and potent phytonutrients also found in squash, carrots, oranges, and apricots. 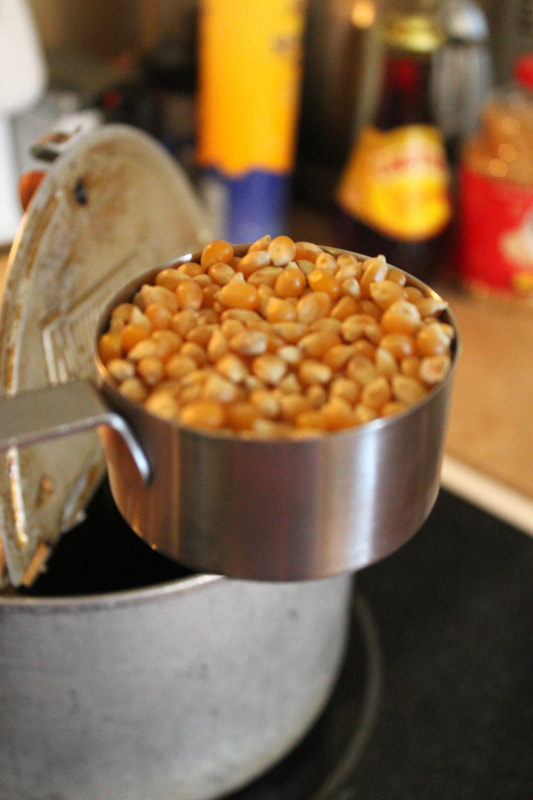
My parents always made oil popped homemade popcorn on the stove so naturally I do the same. In fact, when I was a kid the first thing that went on the Christmas tree was the homemade popcorn garland. We watched Christmas movies and strung popcorn with a needle and thread, of course eating some in the process. We haven't carried on the tradition of stringing popcorn garland in our home, but we continue to make oil popped homemade popcorn.
I have been making my homemade popcorn with coconut oil which is really good too, but now that I have red palm oil it is perfect for making popcorn. It tastes delicious, handles the heat well, and has many nutritious benefits. 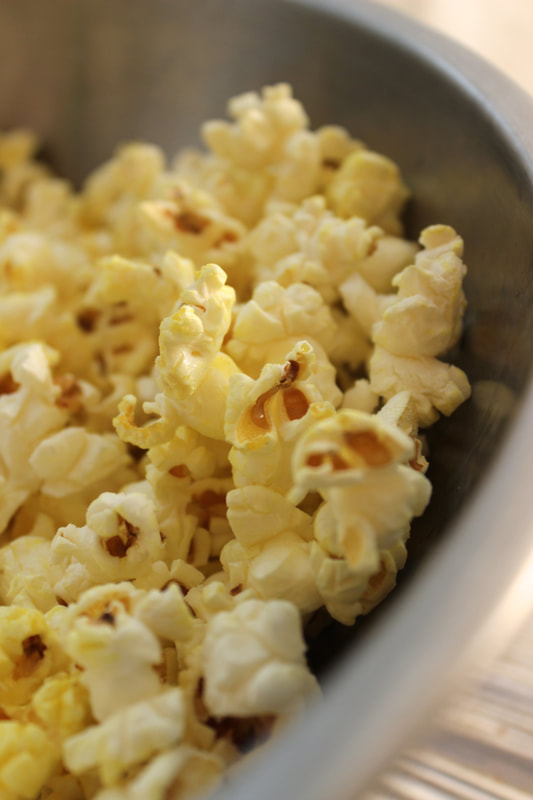
Look at the gorgeous golden color of the popcorn popped in red palm oil.
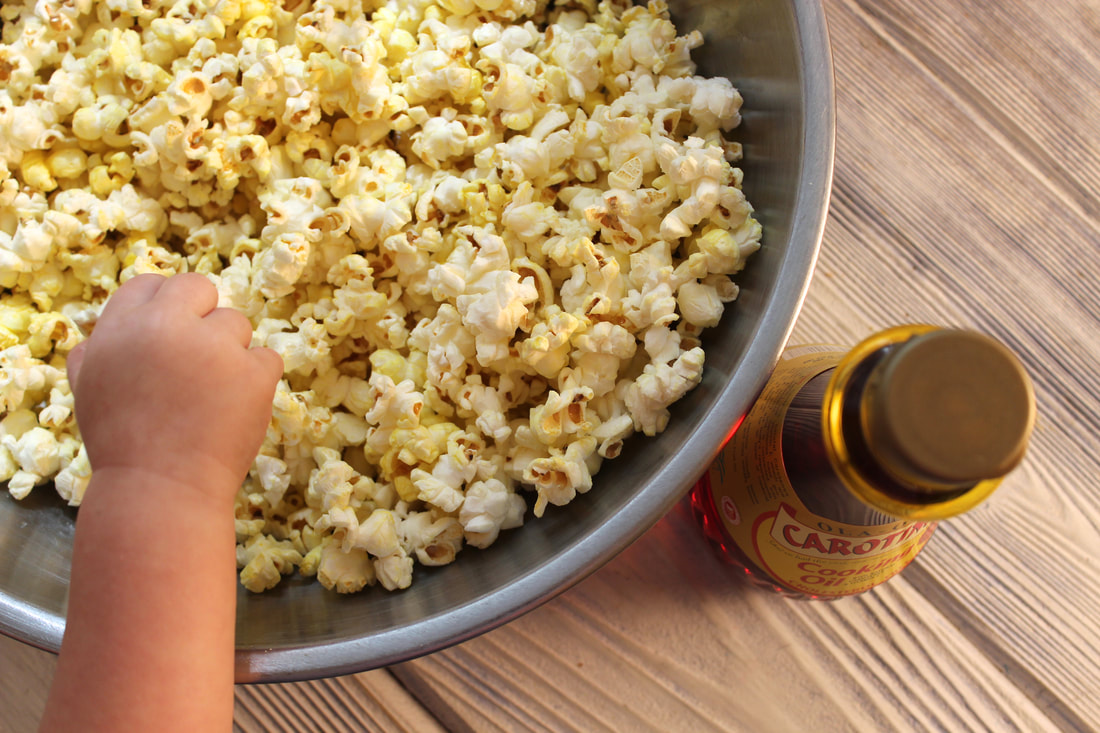
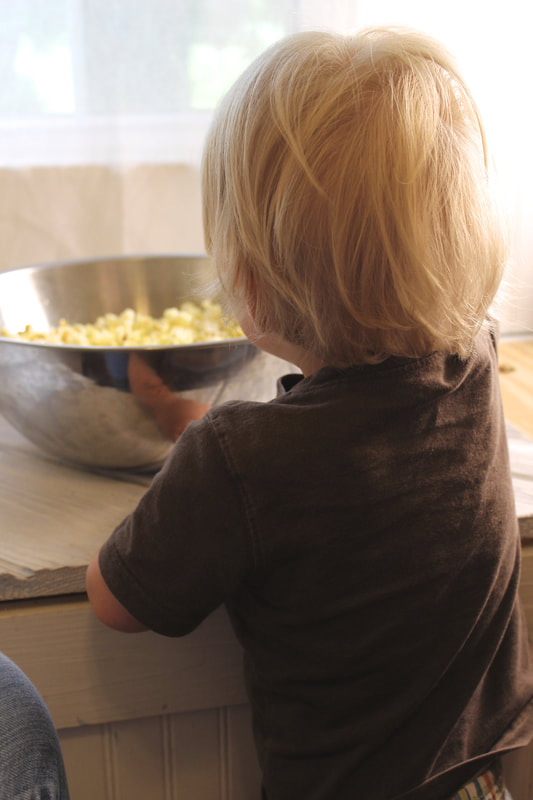
It tastes delicious too. My little "helper" just couldn't resist helping himself during my photo shoot.
Who can resist fresh homemade popcorn?

Ingredients:
1 Tbsp. Malaysian Red Palm Oil 1/2 cup popcorn seeds 3 Tbsp. melted butter, optional Salt to taste 1. Heat a stovetop popcorn popper or a large pot with a lid to medium high. 2. Pour about 1 Tbsp. Malaysian Red Palm Oil into the popper or pot. I don't measure this since I have been making popcorn forever so you can estimate about a T. 3. Pour in 1/2 cup popcorn seeds. I do measure the popcorn seeds since about a half cup makes the perfect amount for my stovetop popper. You may need to adjust this amount if you are using a large pot. 4. Next you cook the seeds until they pop making sure to shake or move the seeds while they are cooking. With a stovetop popper, you turn the crank on the lid to turn the stirring mechanism inside the popper. With a large pot with a lid, you will need to shake it intermittently while cooking to keep the kernels moving so that they don't burn. 5. Pop until most of the kernels have popped and you can count several seconds between pops. 6. Remove from the heat. Pour into a large bowl and pour half the melted butter over it and sprinkle with salt. Toss, then pour the remaining melted butter over it and sprinkle with salt again. 
0 Comments
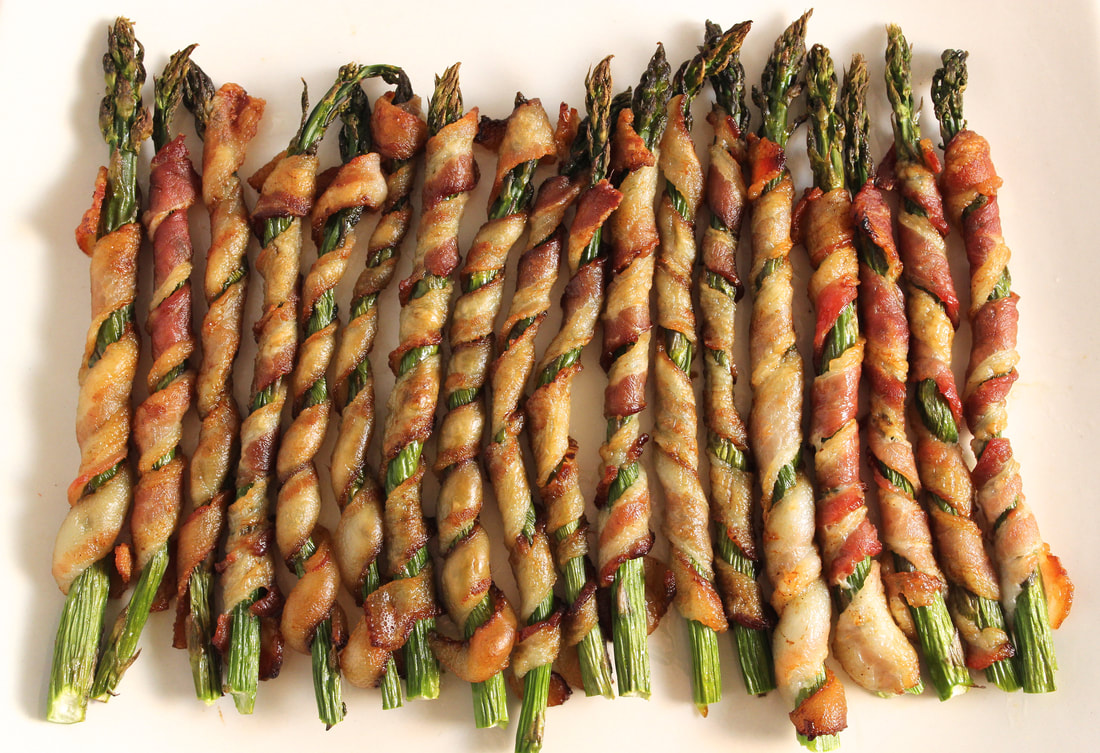
Bacon wrapped asparagus...need I say more? It's hard to describe how truly delicious it is. When you take two amazingly delicious things on their own and put them together it's like a flavor explosion!
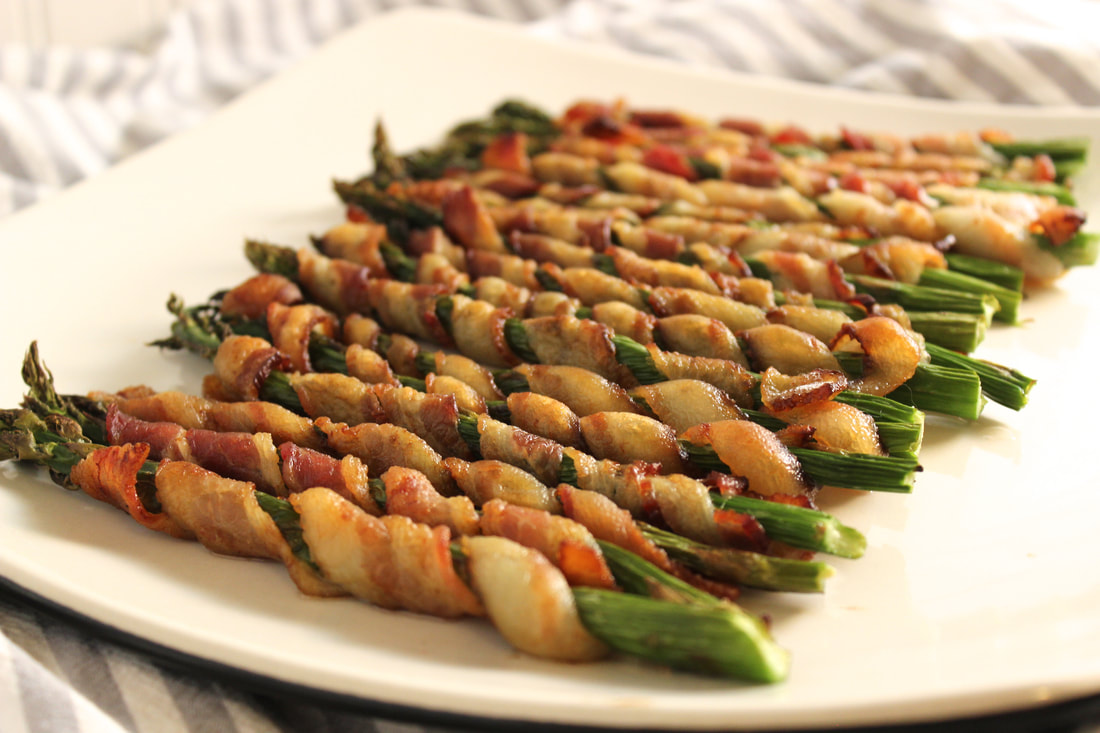
Of all the vegetables I have ever tried, asparagus has to be my favorite. And bacon, well bacon is just plain awesome! When you put the two together, the flavors compliment each other and come together to create an amazing flavor explosion.
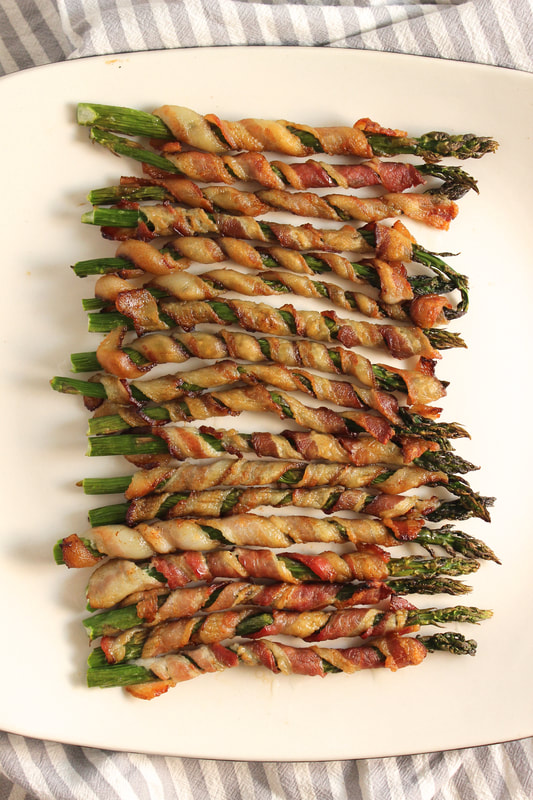


Want to experience this little flavor explosion? It takes a little time to prep (wrap bacon around asparagus spears), but then all you do is pop it in the oven and in a little over half an hour you have your very own bacon wrapped flavor explosion good enough to share. You can prep this ahead of time, cover with plastic wrap and refrigerate until ready to bake. Perfect for almost any occasion from graduation parties to anniversary dinners.
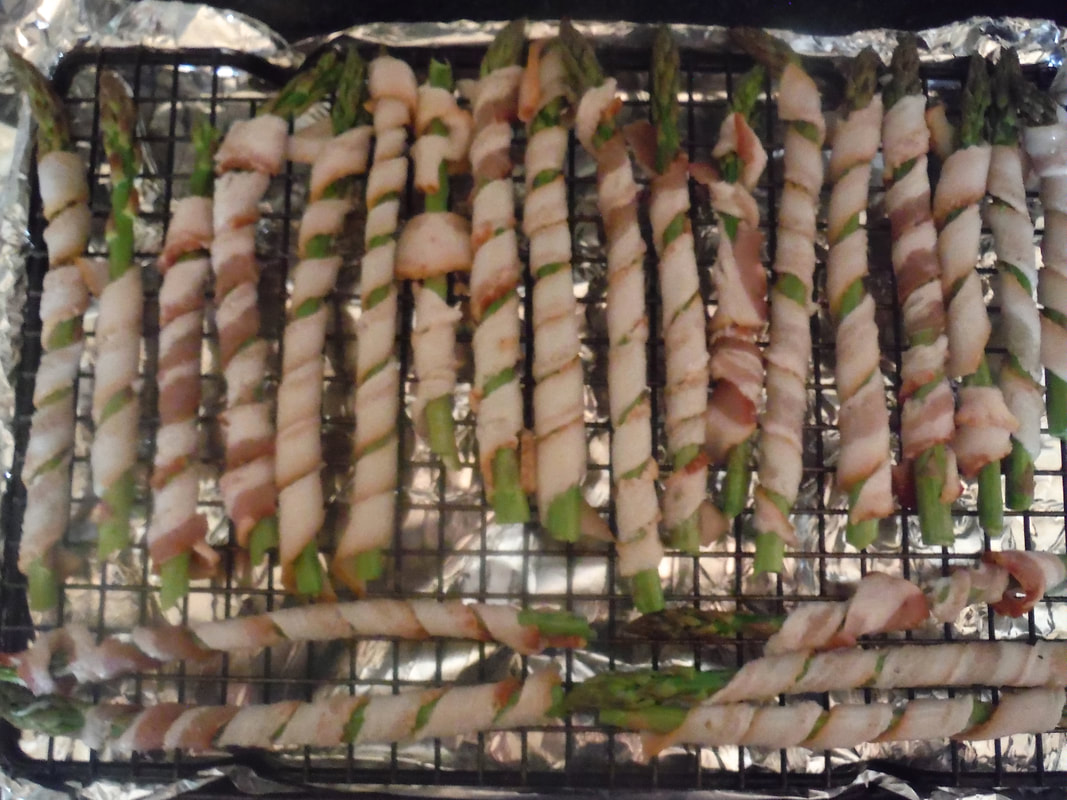
I am kind of partial to crispy bacon so I bake them on a cooling rack over a sided baking pan to get more air flow and crispier bacon. The baking pan underneath has to have sides (like a jellyroll pan) to keep the grease in the pan. I also line the pan with foil as shown to help with clean-up.
When prepping the asparagus, wash, then break each spear where it naturally breaks off at the cut end. Throw away or compost the two to three inch end pieces that break off. Then wrap the asparagus spears in bacon. I cut the bacon lengthwise with kitchen shears to make long thin strips that easily wrap around the asparagus spears.

Ingredients:
1 bunch asparagus spears 1 package bacon (not thick cut) 1. Preheat oven to 400 degrees F. 2. Prep asparagus (above paragraph) 3. Prep pans with foil and cooling racks (you will probably need 2 pans) 4. Cut bacon slices in half lengthwise then wrap around asparagus spears. 5. Place bacon wrapped asparagus on cooling racks over pans as pictured leaving a little space between each one. 6. Bake for 30 to 35 minutes or until asparagus is tender and bacon is getting crispy. 7. Then put under the broiler for a couple of minutes to finish crisping the bacon. 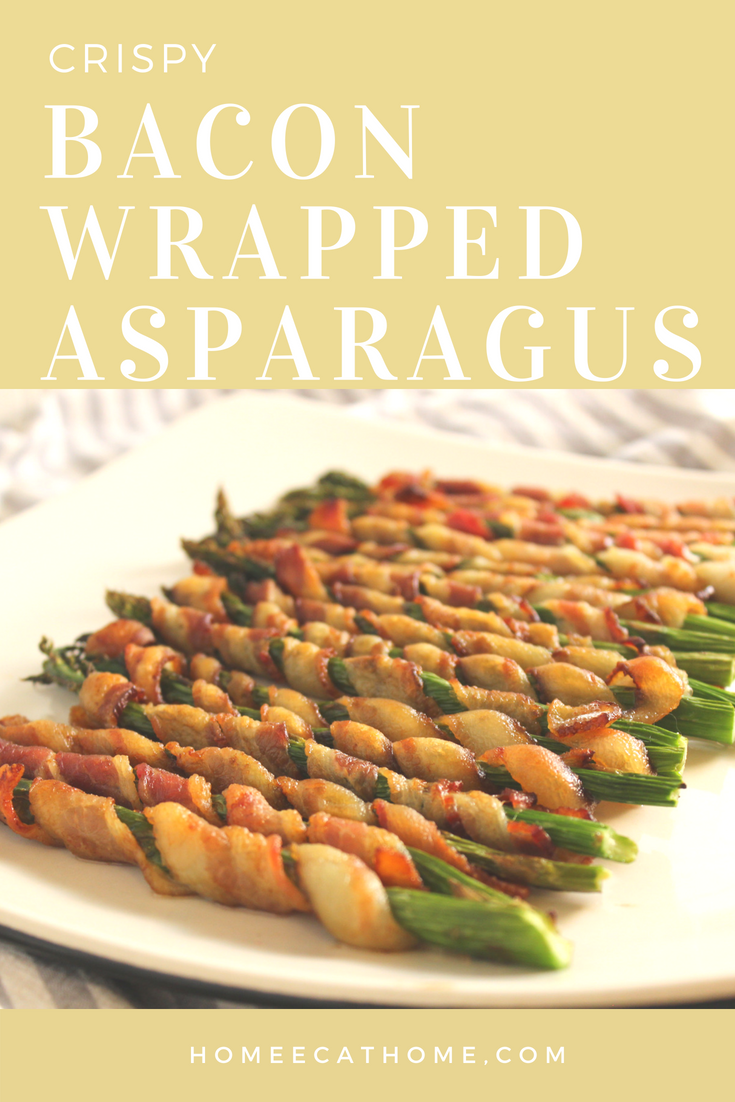
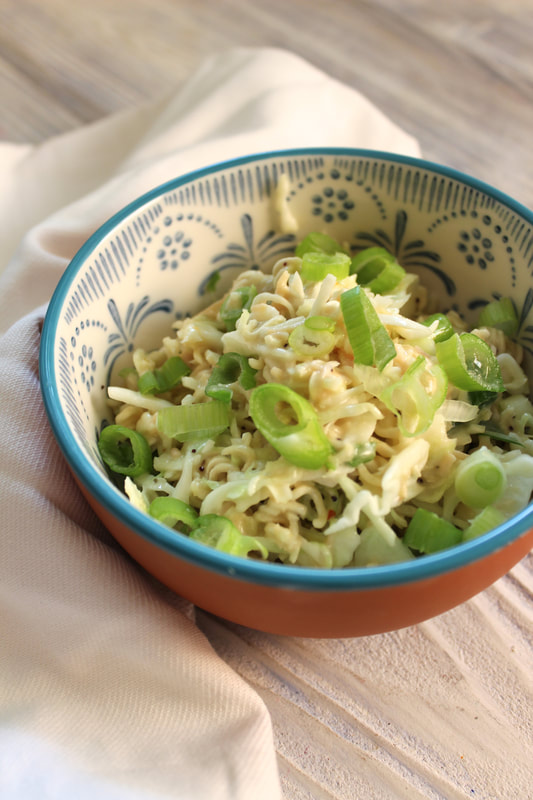
One of my favorite things about summer is the food. These hot days call for cool crisp salads and slaws. This is one of our old favorites. We love vidalia chicken slaw!
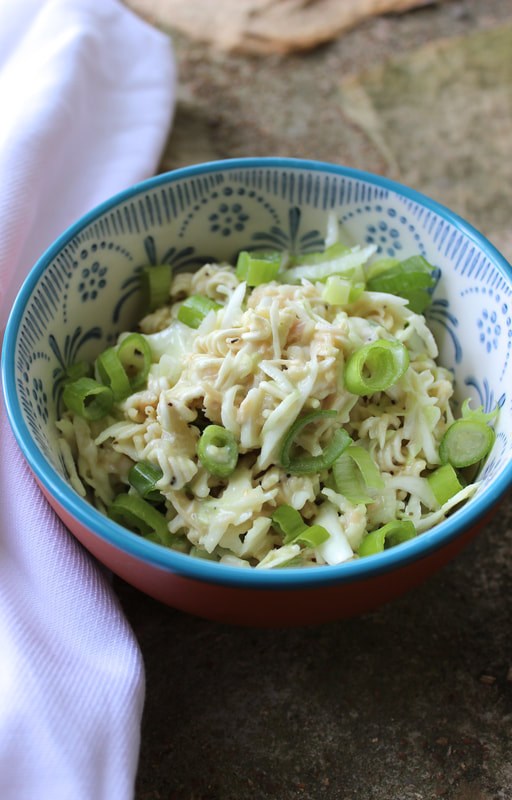
No need to turn on the oven and heat up the kitchen. I use a can of cooked chicken or slow cook a chicken breast. Delicious as a main dish or a side. You can also leave the chicken out and just make a delicious vidalia onion slaw. The ramen noodles add the yummiest crunchy texture with the cabbage but soak in the dressing so they aren't too crunchy.
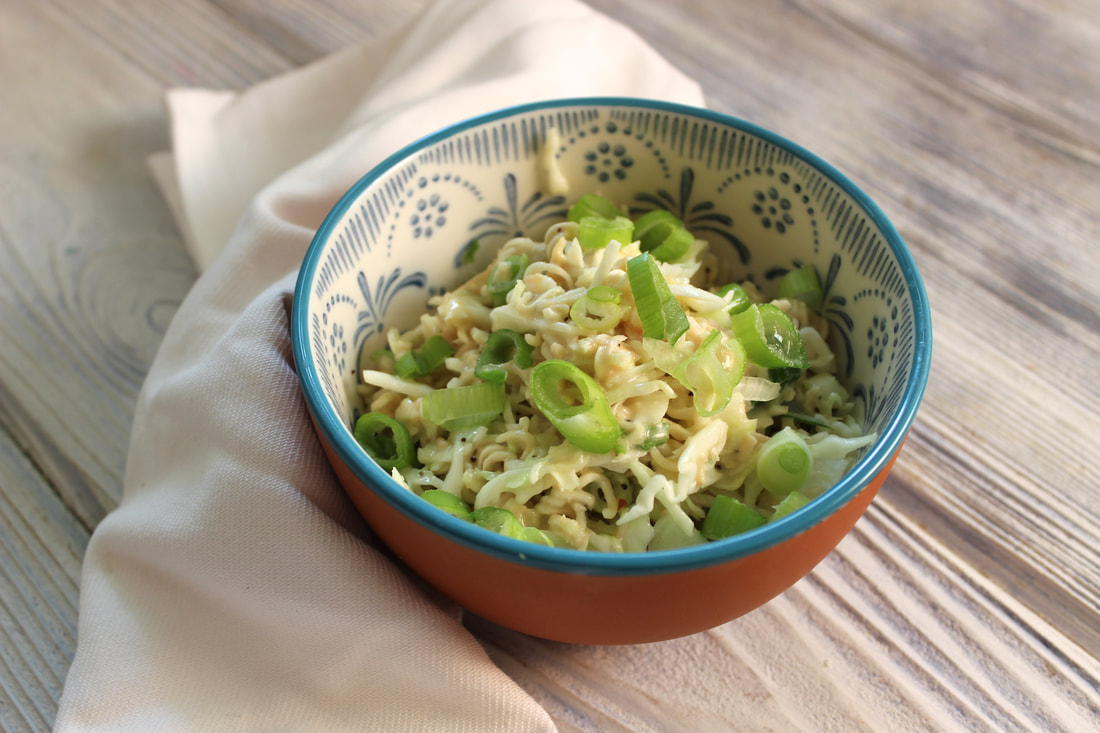
Vidalia onion slaw needs to sit in the fridge for a couple of hours to blend the flavors so it is a great make ahead dish and always goes over well at potlucks. The leftovers are great the next day too, great for packing in the lunchbox.
Ingredients:
Two 10 oz. bags angel hair shredded cabbage or about 9 cups shredded cabbage 2 packages chicken flavored ramen noodles 1 chicken breast cooked and shredded/diced* or 1 can chicken, drained 12 oz bottle (1 1/2 cups) Vidalia onion dressing 1 bunch green onions, sliced Break up ramen noodles. Mix all ingredients together including ramen noodle flavor packets. Chill in fridge to blend flavors. *I cook a chicken breast in the crock pot all day. Simply cover with water and cook on low in slow cooker. 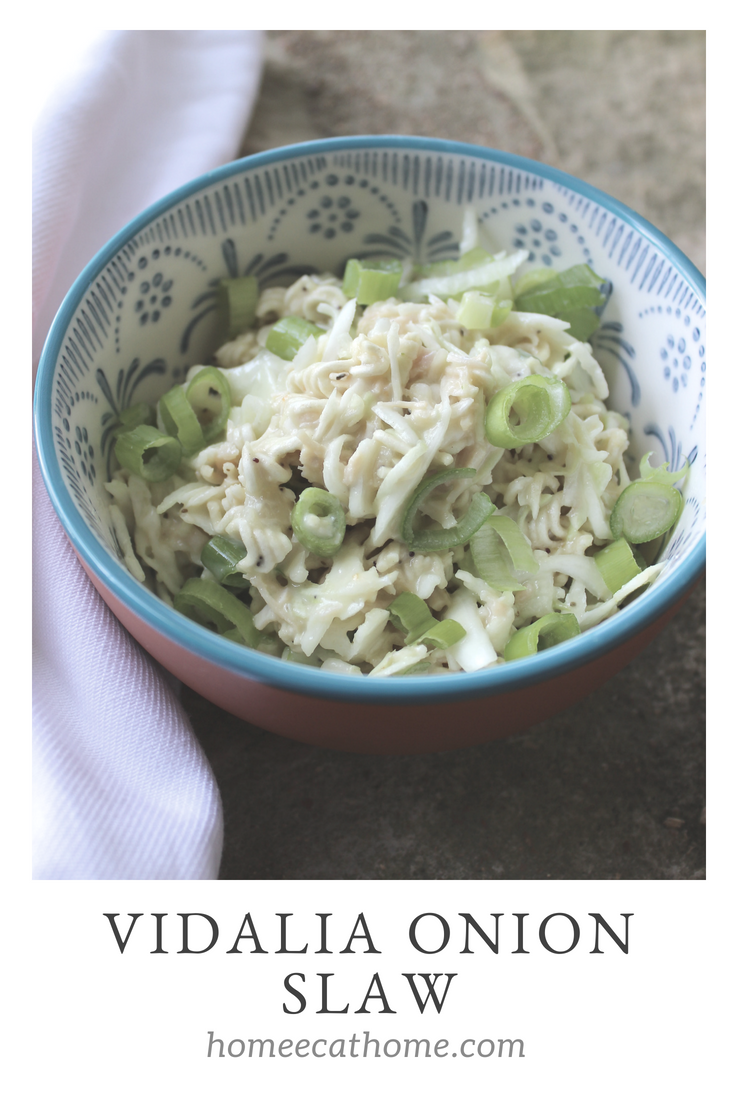
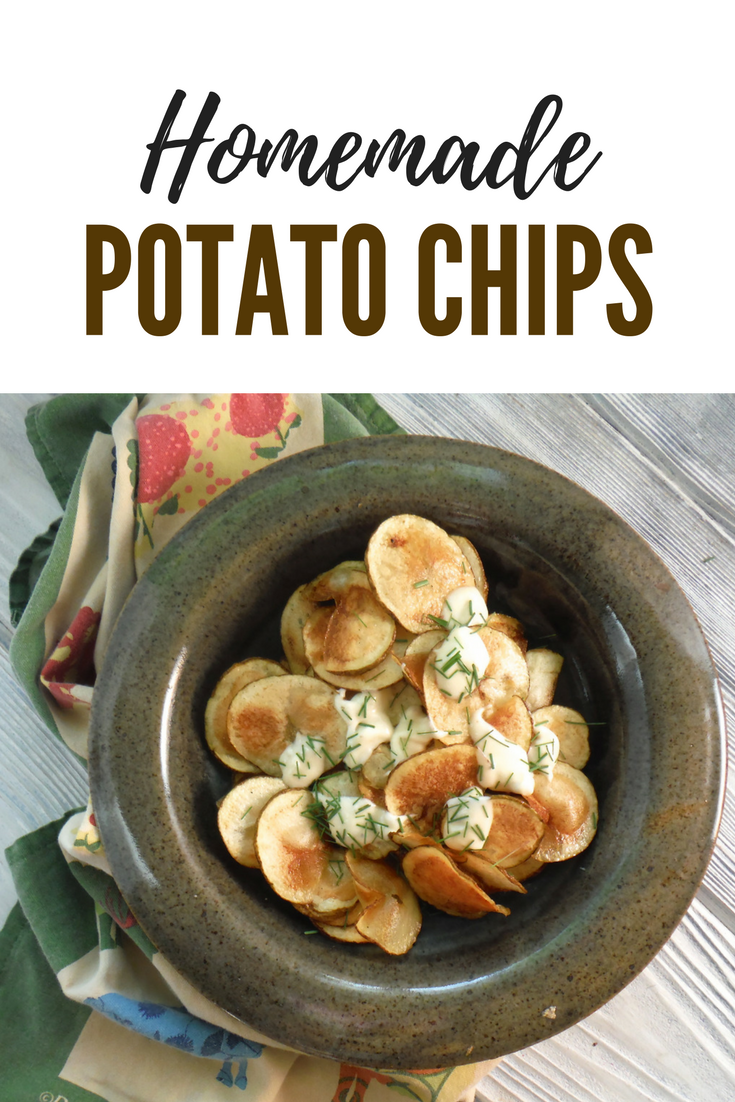
Since it is grilling season and when I think of grilling season I think of hamburgers and potato chips I thought I would share my favorite homemade potato chips. These are the best! Way better than store bought chips and really not that hard to make.

Years ago before we had children, we used to go to this little old fashioned bar/restaurant and we always got the homemade chips. We have since moved away and I don't even remember the name of the little unassuming restaurant that we loved so much, but we still enjoy the homemade chips made fresh in our own kitchen.
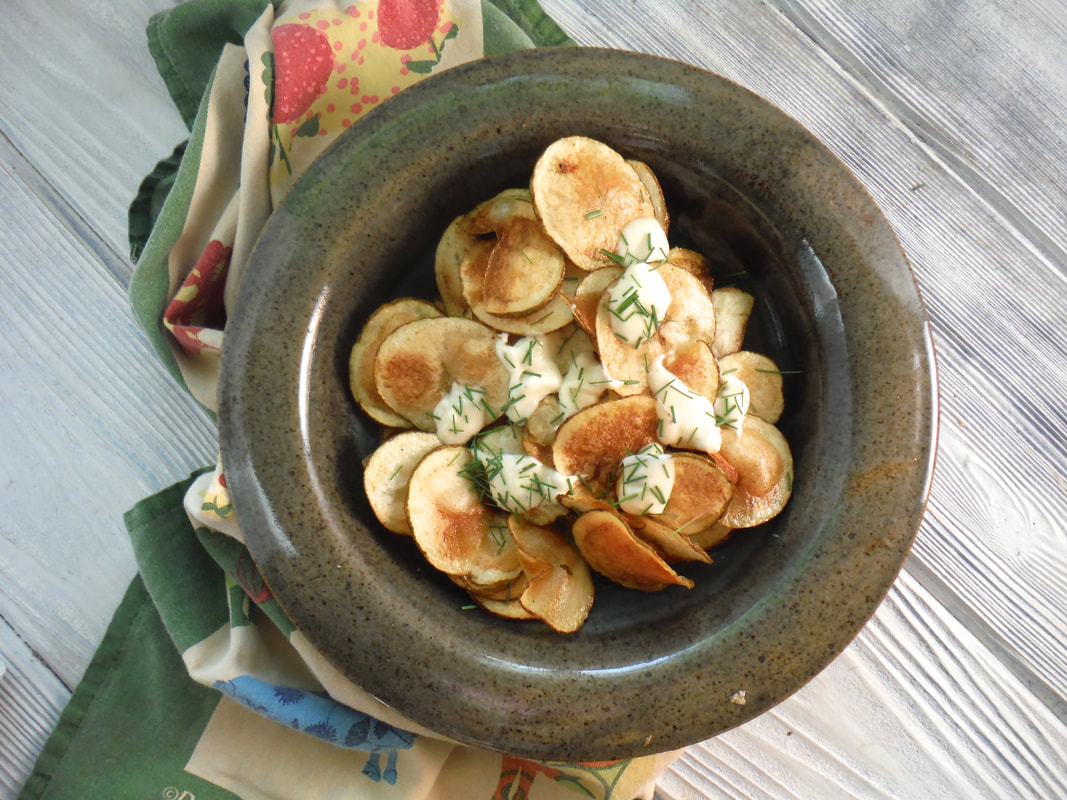
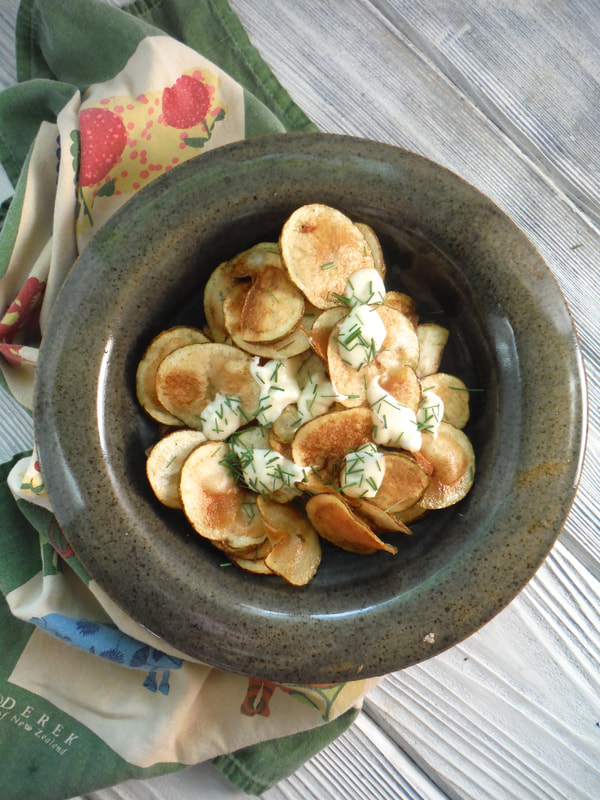
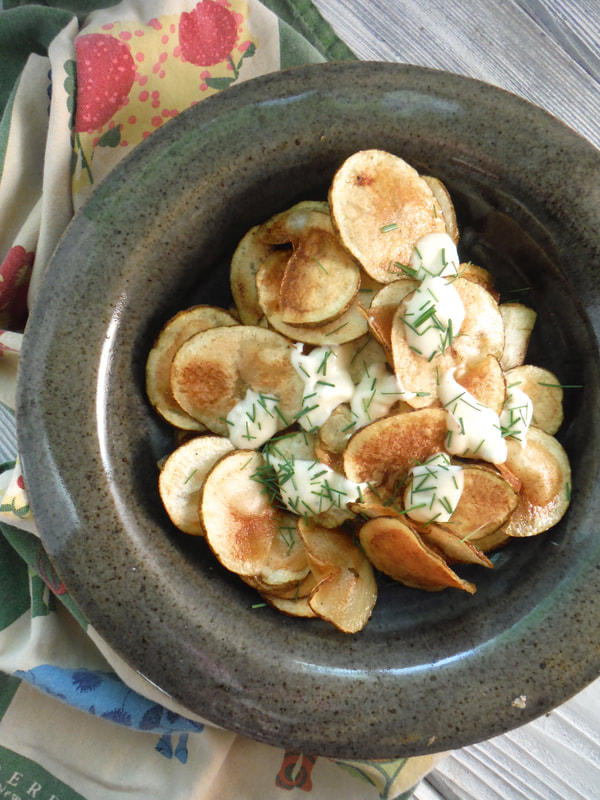
My favorite way to eat these delicious homemade chips is to drizzle them with blue cheese dressing and sprinkle with fresh chopped chives or green onions.
You want to slice your potatoes really thin so that they crisp up nicely in the hot oil, but don't worry, the softer pieces are yummy too.
Serves 4-6
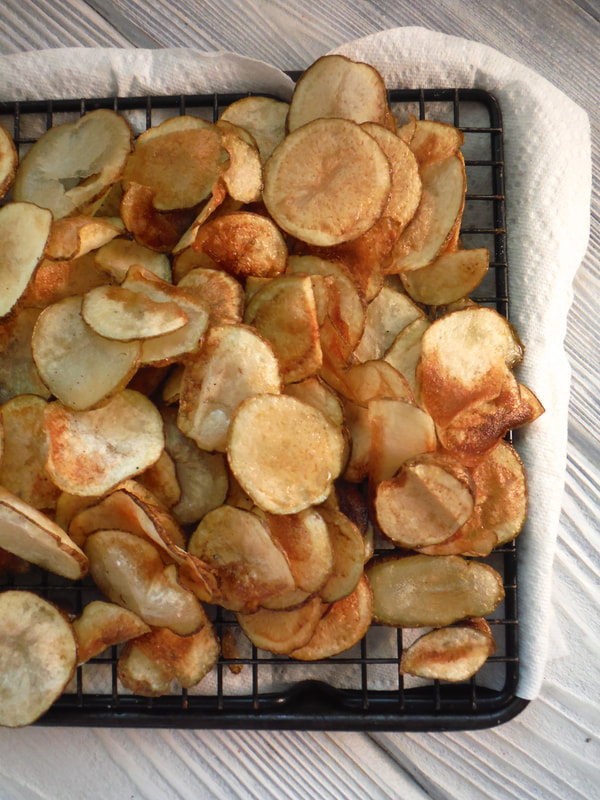
Ingredients: 4-6 Russet Potatoes (I make 1 potato per person) Peanut oil Sea salt Blue Cheese dressing, optional Chopped green onions, optional 1. Heat oil in a large dutch oven or deep skillet. I turn my burner up to high and then bring it down some later if I need to. I never check the temperature, but if you are using a thermometer, 350 degrees is where you want to be. 2. Slice potatoes into very thin rounds with a mandolin or sharp knife. I have made these with skins and without and we didn't see much difference between the two. Your preference - peel the potatoes or leave the skins on. I leave them on...it's easier:) 3. When the oil is hot, gently lower the potatoes into the oil. Deep fry until the potatoes are a deep golden brown. You want them to be nice and crispy, not soggy. I stir to separate them a little while frying. Also, fry in small batches. 
4. When the chips are a deep golden brown, remove them to a cooling rack that is over a paper towel lined pan. This helps the excess oil drip off and keeps the chips crispy.
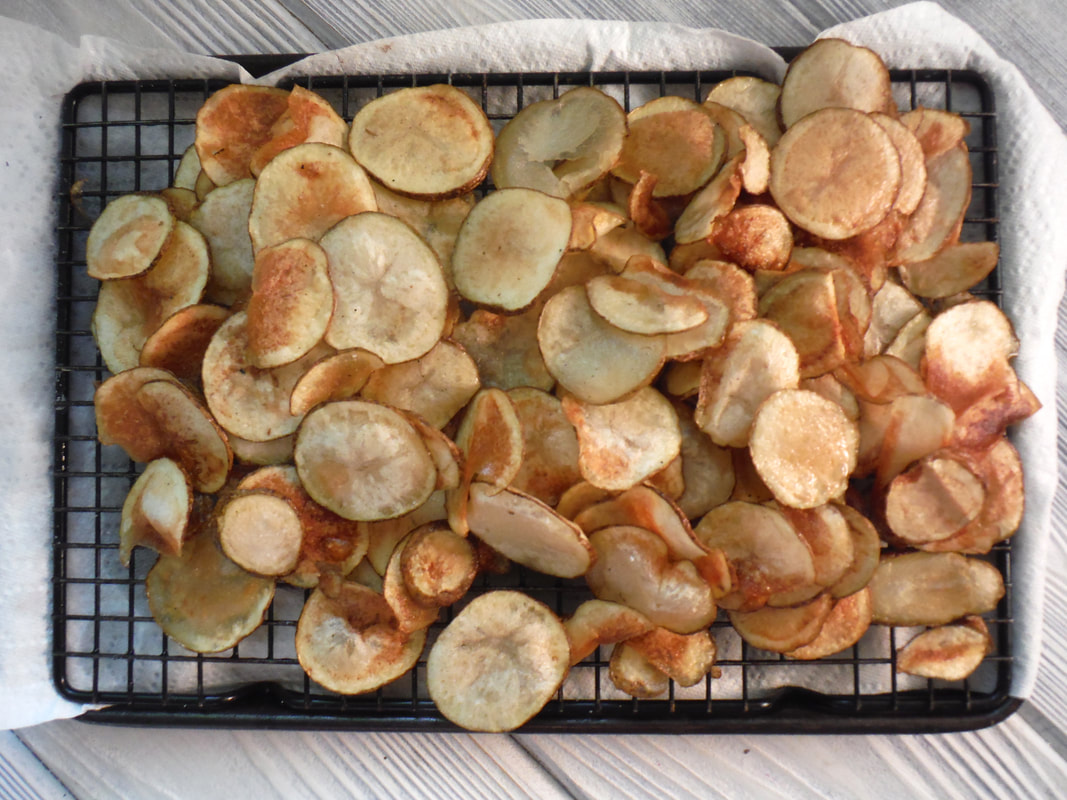
5. Sprinkle with salt and serve warm. These are delicious with blue cheese dressing and chopped green onions or chives.
|

Welcome to Home Ec @ HomeHi, I'm Faith, a former Family and Consumer Science teacher turned food blogger. I love God, my family, and food. You can usually find me in the kitchen preparing family friendly, homemade recipes and taking lots of pictures. 
Still Goldens, Southern, IL
 Fan Favorites

The Best Dry Brined Turkey with Citris and Fresh Herbs

 Dehydrating Pears and Apples in the Instant Pot Duo Crisp Dehydrating Pears and Apples in the Instant Pot Duo Crisp
 
 |

 RSS Feed