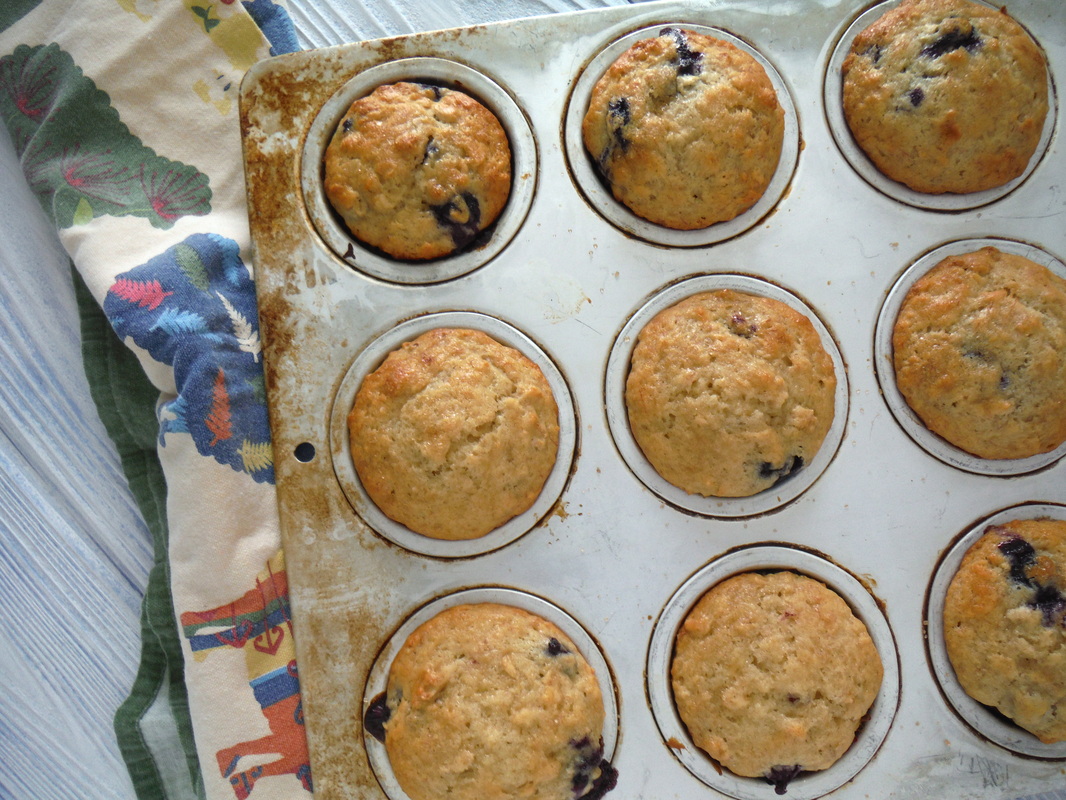
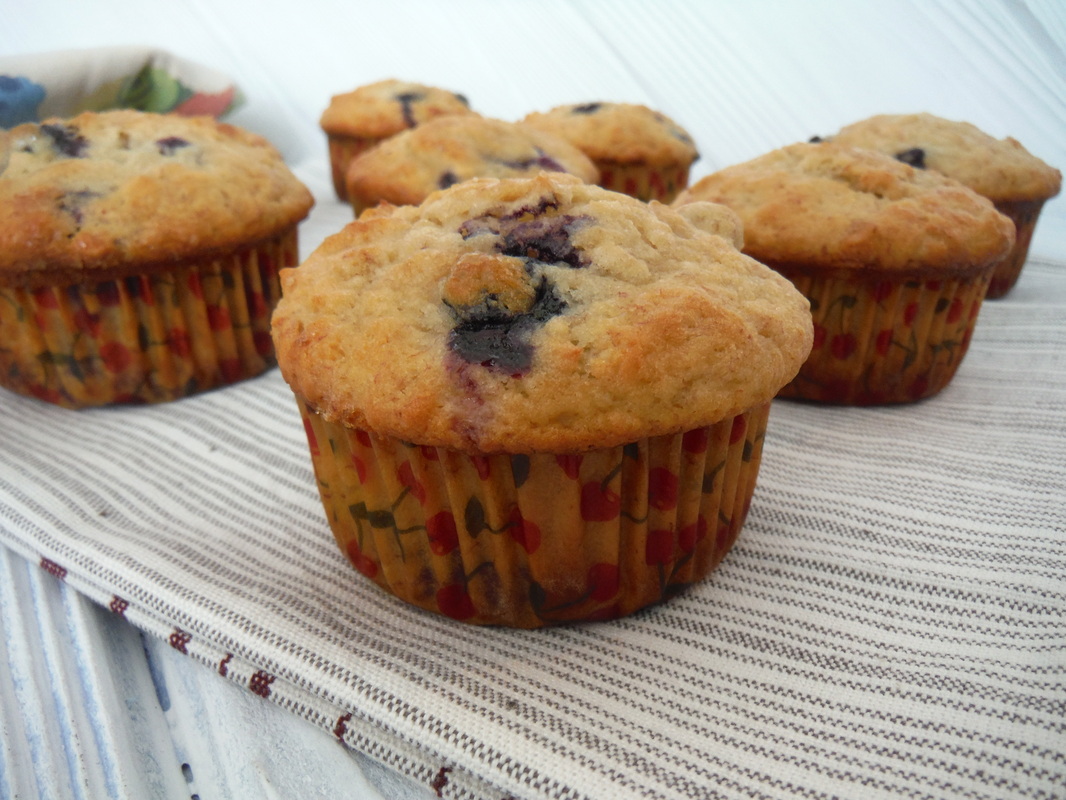
These banana blueberry muffins are by far my favorite muffins. The boys can't get enough of these. In fact, I should just plan on doubling the recipe every time I make these. I have to limit my oldest because he will easily eat 4 or 5 muffins in one morning.
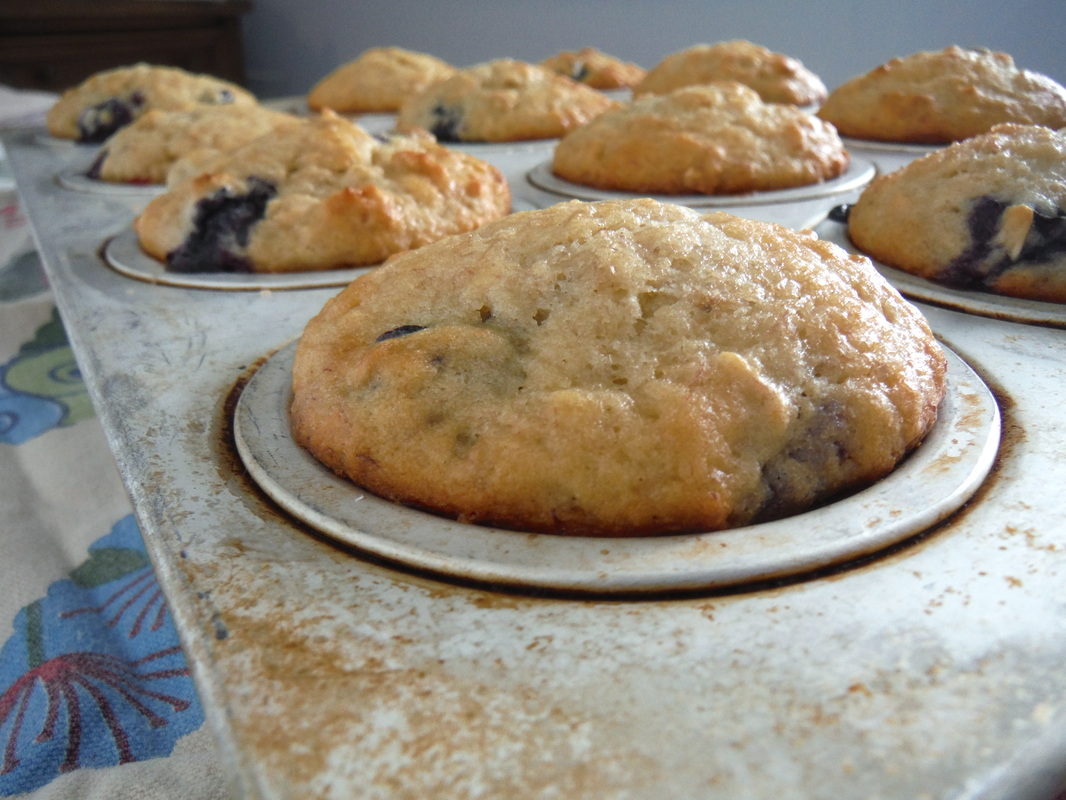
Look at those beautiful muffin tops.
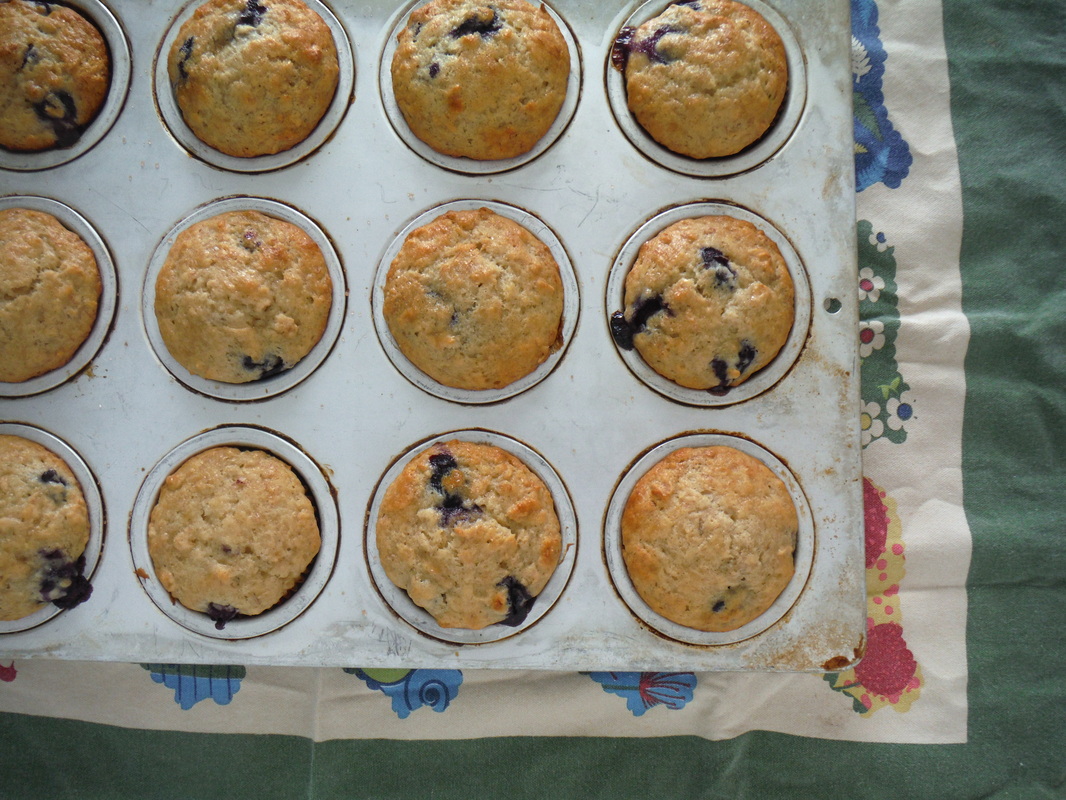
These banana blueberry muffins are truly wonderful and with honey, bananas, blueberries, and oats in them you can't feel too bad about eating that extra muffin.
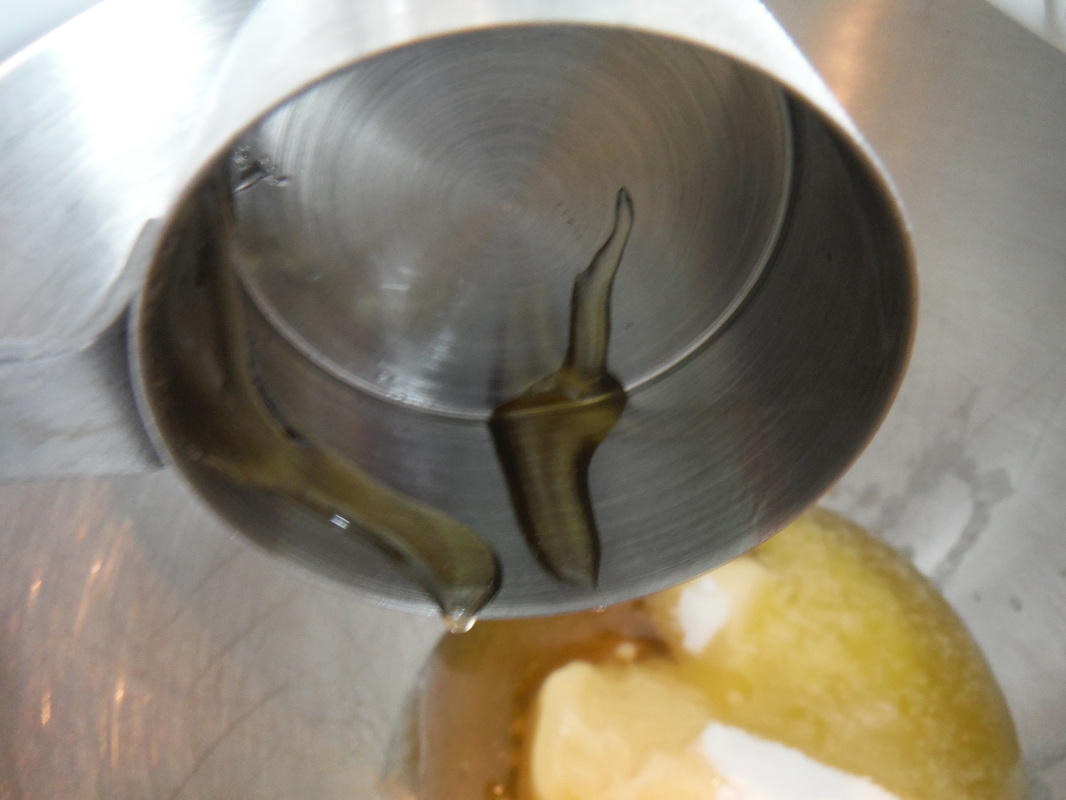
Spray your measuring cup with cooking spray before measuring honey and the honey will slide ride out into your bowl.
Banana Blueberry Muffins
1/3 cup butter (5 1/3 Tablespoons) softened ½ cup sugar ¼ cup honey 1 egg 1 cup mashed ripe bananas (about 3 medium) 1/2 cup buttermilk* 2 cups sifted flour 1 Tbsp. baking powder 1/2 tsp. salt 1/2 cup old fashioned oats 1/2 tsp. vanilla 1 cup fresh blueberries Directions: 1. Preheat oven to 400 degrees. 2. Line 12 muffin cups with paper liners 3. Cream together butter, sugar, and honey. Beat in egg, buttermilk, & mashed bananas. 4. Sift flour then measure, reserving 2 Tbsp. flour to coat blueberries. 5. Stir baking powder and salt into flour, mixing well. Stir in oats. Fold the flour mixture into the banana mixture. Stir in vanilla. 6. Sprinkle the reserved 2 Tbsp. flour over blueberries, then fold into batter. 7. Scoop batter into a prepared muffin pan. Fill muffins pretty full. The batter is thick and should fill 12 cups nicely without running over. 8. If you like sprinkle turbinado or sanding sugar on the tops of the muffins before baking. 9. Bake for about 20 minutes or until toothpick comes out clean. Makes 12 muffins *If you don’t have buttermilk on hand, simply pour ½ T. lemon juice or vinegar into your measuring cup then fill with milk to get ½ cup liquid. Let this sit for a minute before pouring it into the mixing bowl. I freeze leftover buttermilk and thaw it in the fridge when I need it for a recipe. 

Linking up at Create with Joy
0 Comments
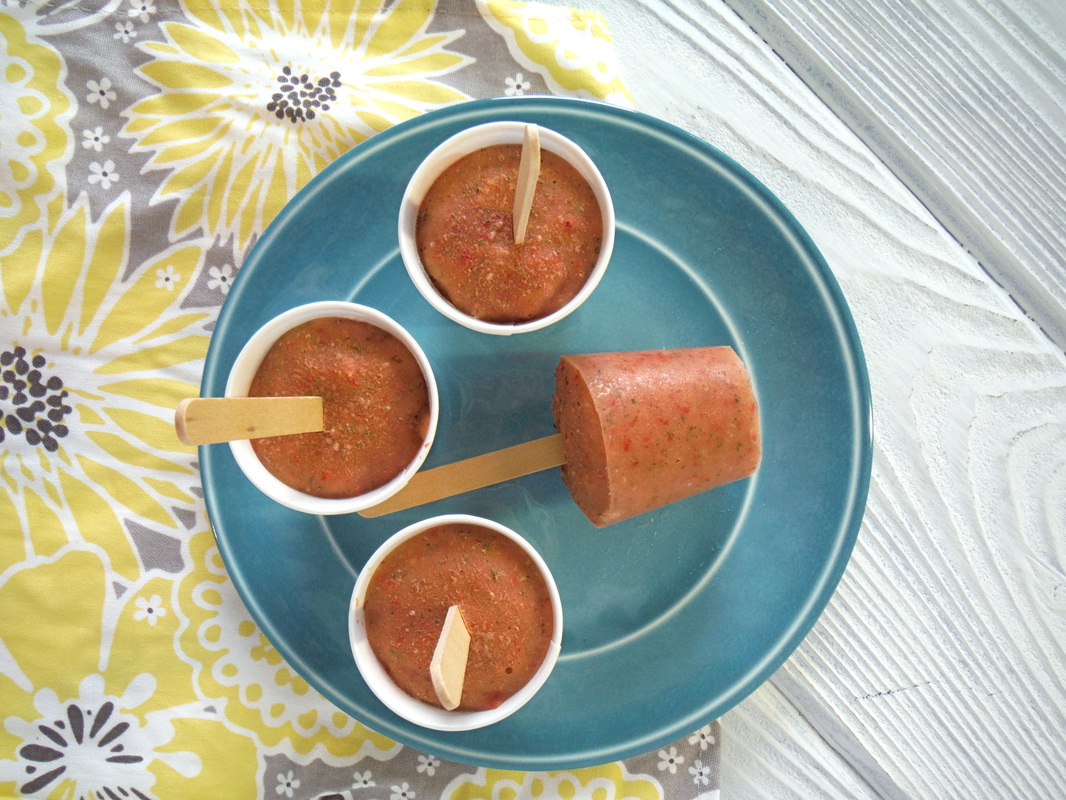 I made smoothies yesterday morning for my sick 3 year old and myself but he didn't feel like eating anything so I froze the extra smoothies into popsicles. The smoothie pops were a hit this afternoon for snack. I made these extra healthy by adding chia seeds and fresh spinach. See the tiny green flecks. They are tiny flecks of spinach. What a delicious way to eat your greens. I did not add any sweetener to these because I knew we would enjoy them without it, but you could add honey, monk fruit sweetener, whatever you like to taste. 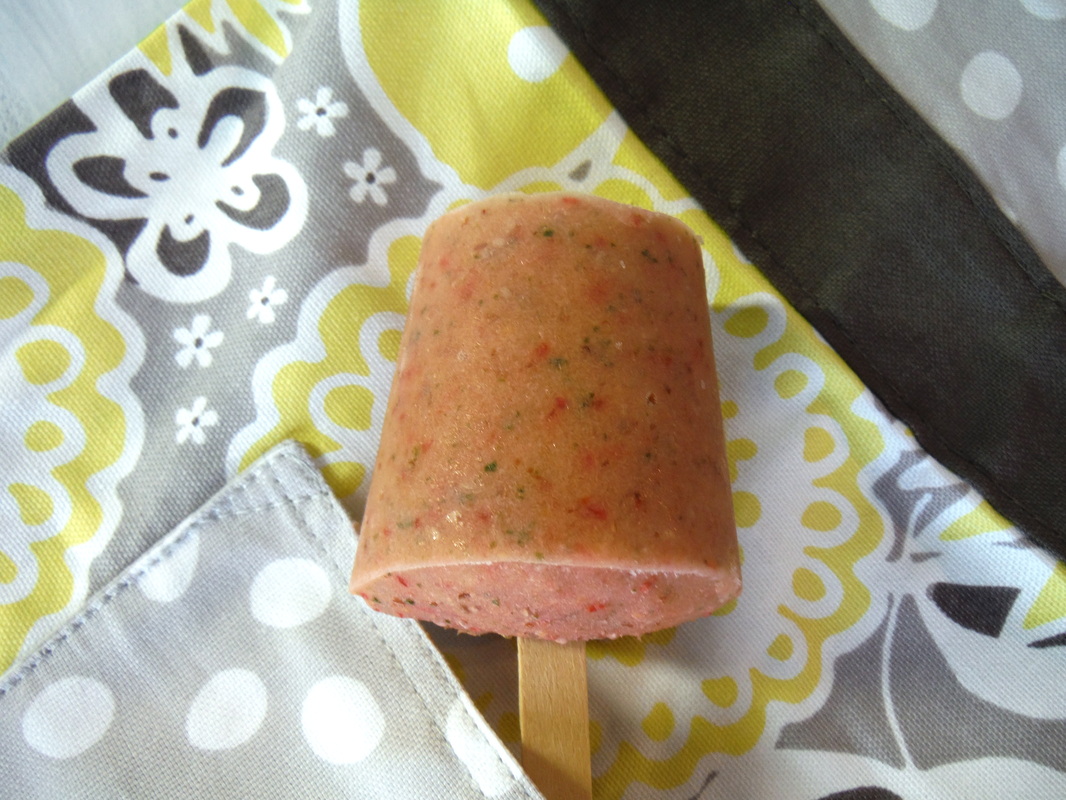 Make your favorite smoothie recipe and freeze in popsicle molds or small paper cups. I did not measure when making these smoothies, so these amounts are approximations: 2 cups frozen mango 1 cup fresh strawberries A handful of fresh spinach 1/2 cup vanilla yogurt 1/2 cup coconut milk 1 T. chia seeds Optional sweetener of choice A small amount of water to thin the smoothies probably 1/4 to 1/2 cup Blend until smoothies reach desired consistency then freeze in molds. Linking up at Create with Joy
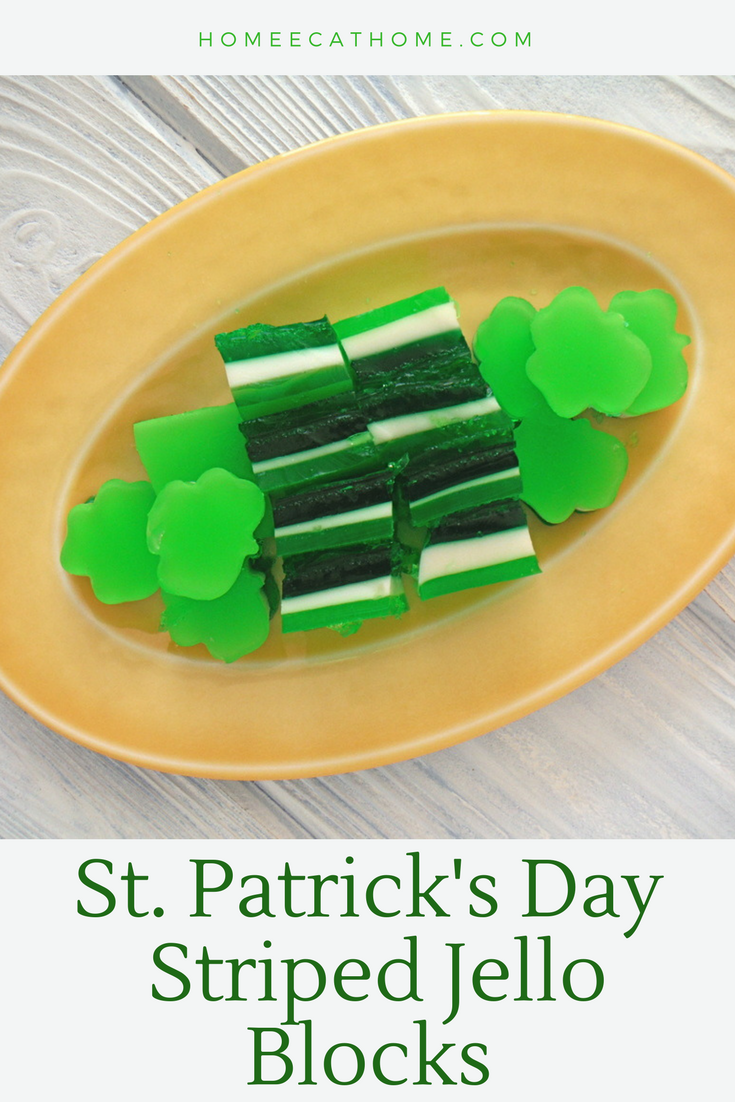
I love making jello jigglers for St. Patrick's Day. They are so easy to make, are easily made green, and my boys love them.
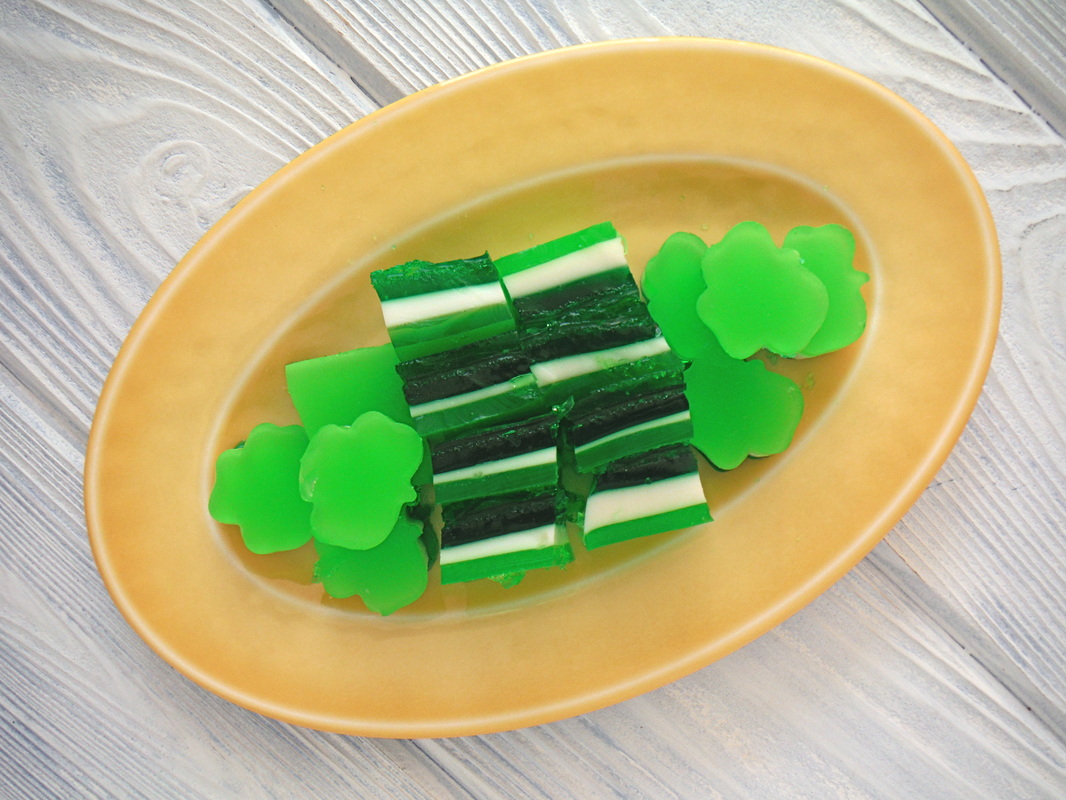
This year I decided to make striped jello blocks. You do have to plan ahead and refrigerate each layer until firm before adding the next layer, but otherwise this is a simple undertaking.
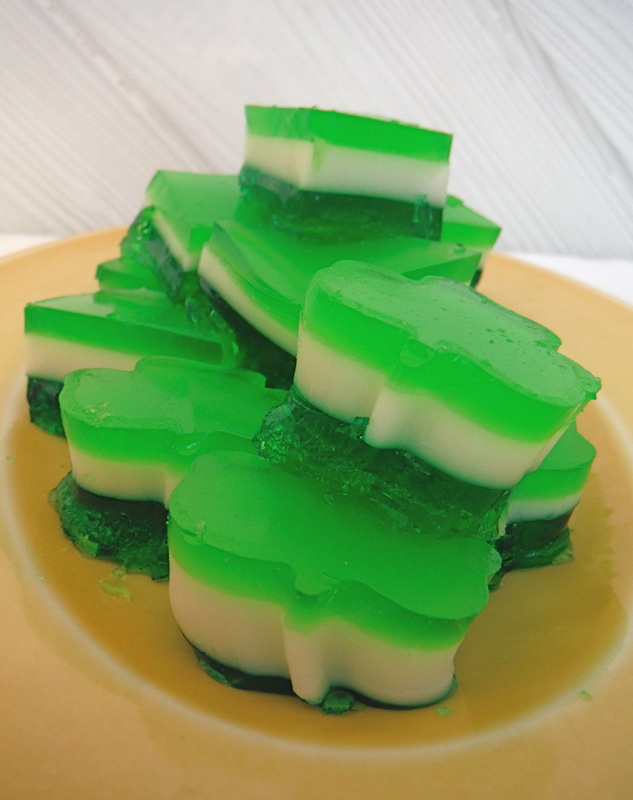
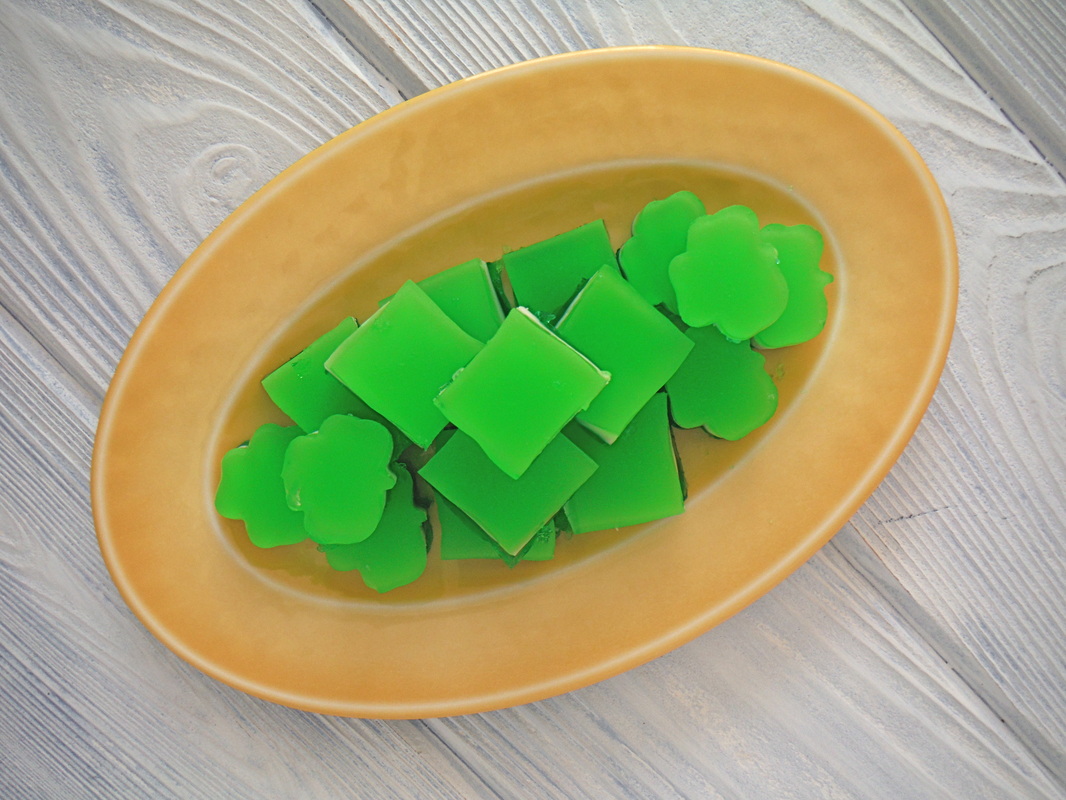
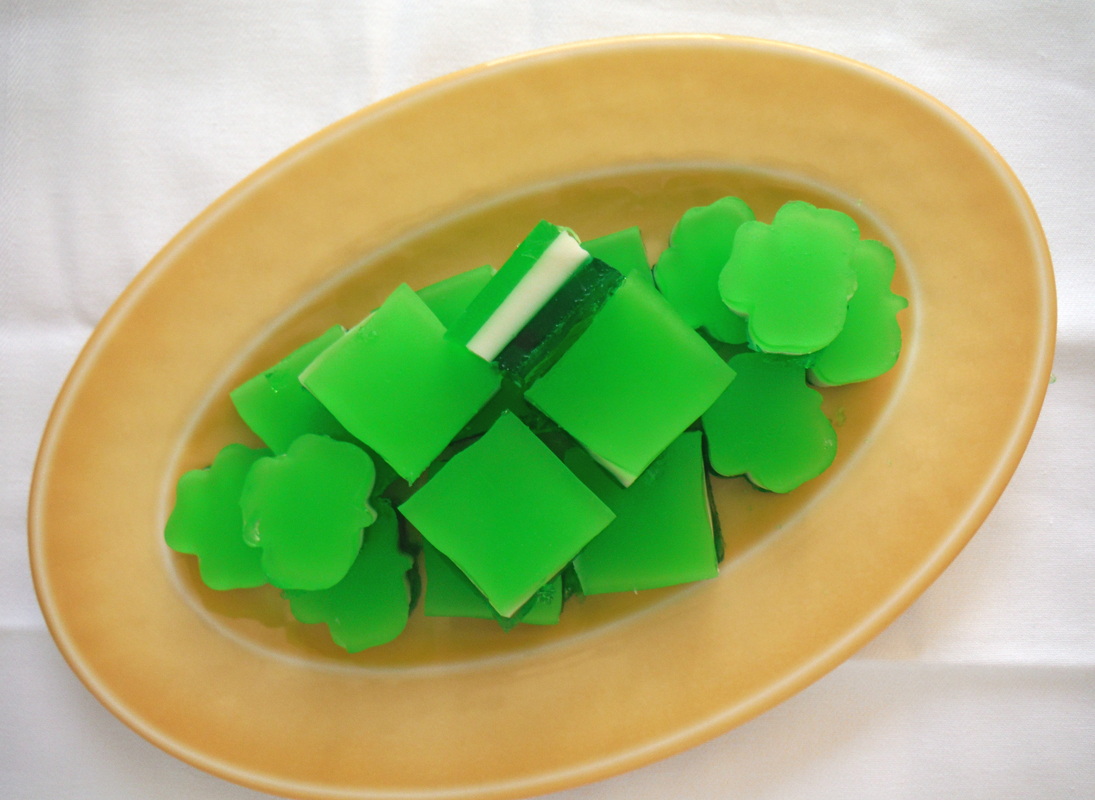
Simply make the jello jiggler style in layers. For each 3 oz. box of jello add 1/2 cup plus 2 T. boiling water. Dissolve then pour into pan to make a layer. I made very thin layers on the bottom that you can't see because they just blended together. I made a green layer, then a green/blue layer mixing a box of green jello with a box of blue jello. Unfortunately the two colors are so much alike that you cannot see a difference. I suggest using two boxes of jello with 1 & 1/4 cup boiling water for each layer to get about a 1/4 inch color stripe, less for a thinner stripe. To get a white layer, I dissolved 4 packets of unflavored knox gelatin in 1/2 cup cold water then added 1 1/4 cup boiling coconut milk and 2 T. monk fruit sweetener (use any sweetener you like, more or less to taste). I then made a light green by mixing unflavored knox gelatin made with water with a box of lime jello.
Happy St. Patrick's Day!
Linking up at Share the Wealth
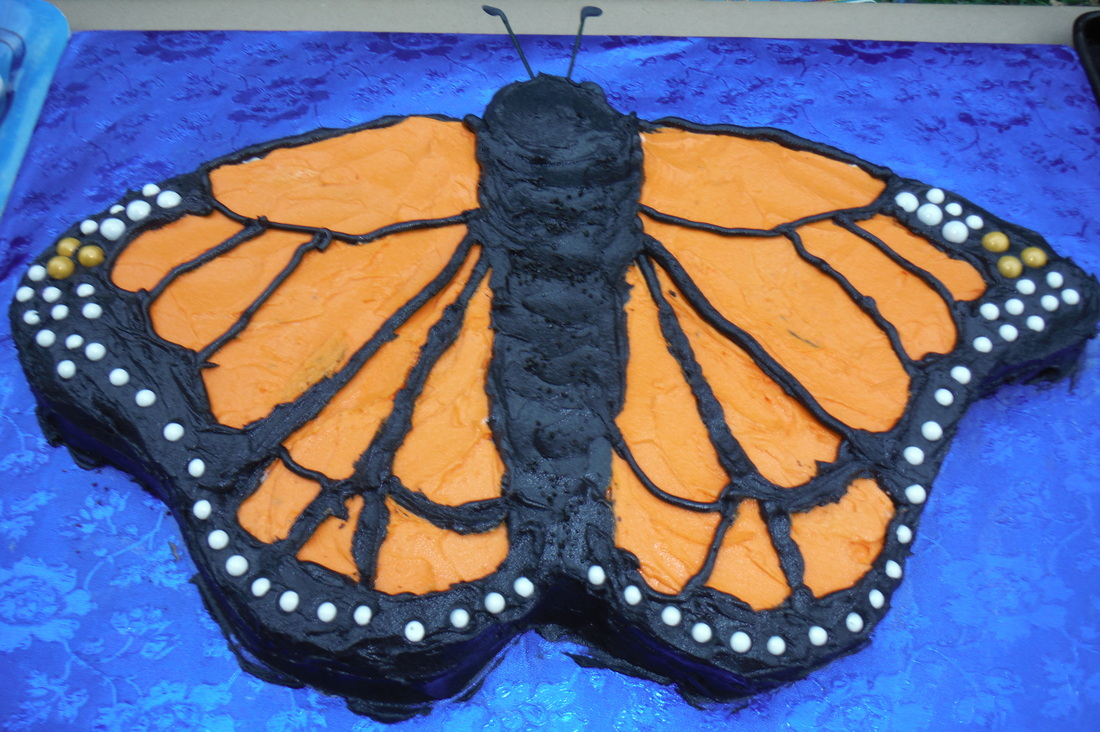 My son decided he wanted to have an Art in Nature birthday party so we came up with a butterfly cake. To stick with the nature theme, I frosted the cake to look like a real monarch butterfly. 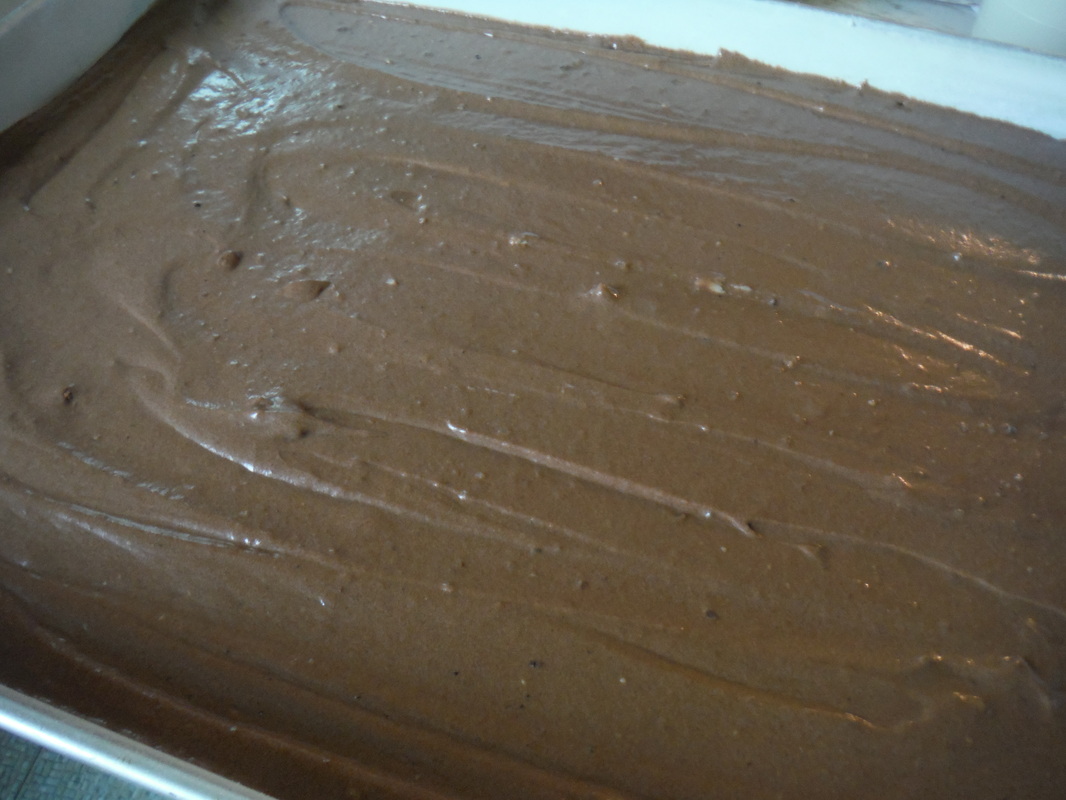 I made a giant chocolate sheet cake. Then cut the cake in the shape of a monarch butterfly using this image as a guide. 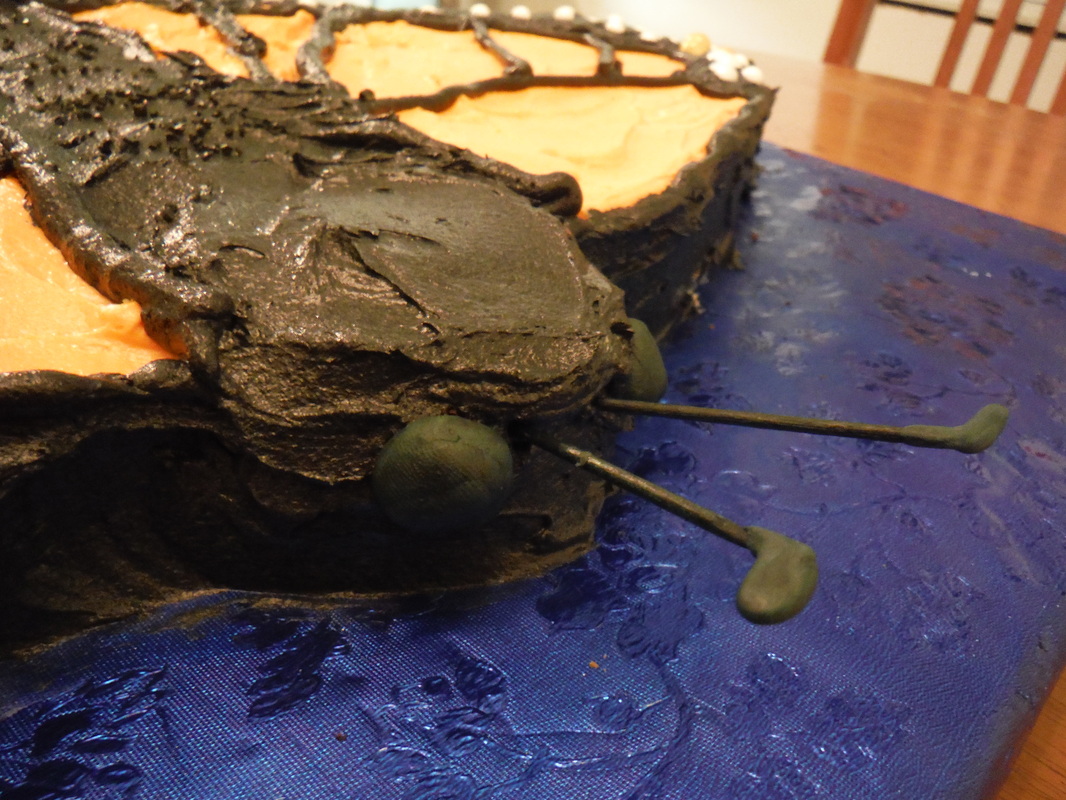 I frosted the cake with a basic buttercream tinted orange and black. Then I formed the eyes and the tips of the antennae from gum paste attaching the antennae tips to toothpicks to give the antennae some structure. 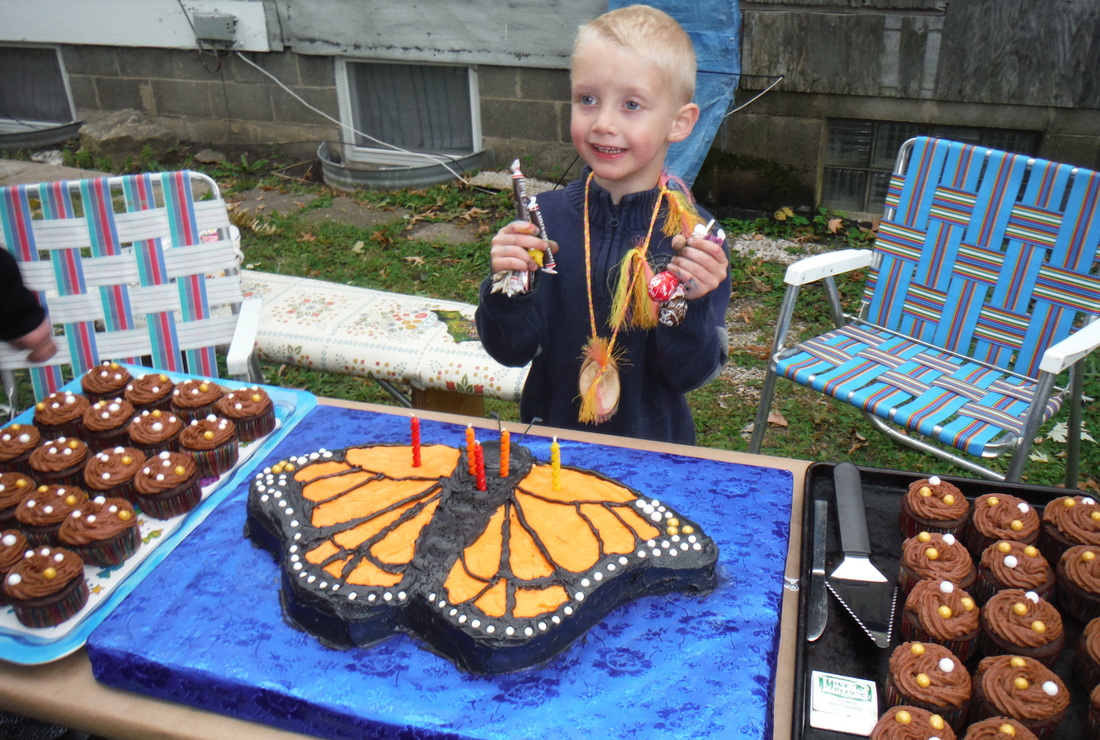 I found these gold and while pearled sixlet candies in the baking aisle at Walmart and used them to decorate both the butterfly cake and chocolate cupcakes. I was really happy with this cake. It was both beautiful and delicious. Linking up at Create with Joy
How I Am Improving my Food Photography and I Finally Made it onto Food Gawker and Taste Spotting!3/7/2015
I have been blogging for a long time and my photos have been mediocre to poor to say it nicely. It really does make a difference in the quality of your online presence and the information you are presenting if your images are captivating and make your readers want to read more.
I recently came across an ebook that has transformed the way I photograph food for my blog. The book is Tasty Food Photography. It is written by a very successful food blogger Lindsay, from Pinch of Yum. She shares everything she has learned over the years and practical information that will improve your food photography.
I have completely changed the way I photograph food since reading this ebook. I used to quickly snap a few shots in our dimly lit kitchen right before we sat down to dinner. Now I am setting up photo shoots during the day when I can get lots of natural light.
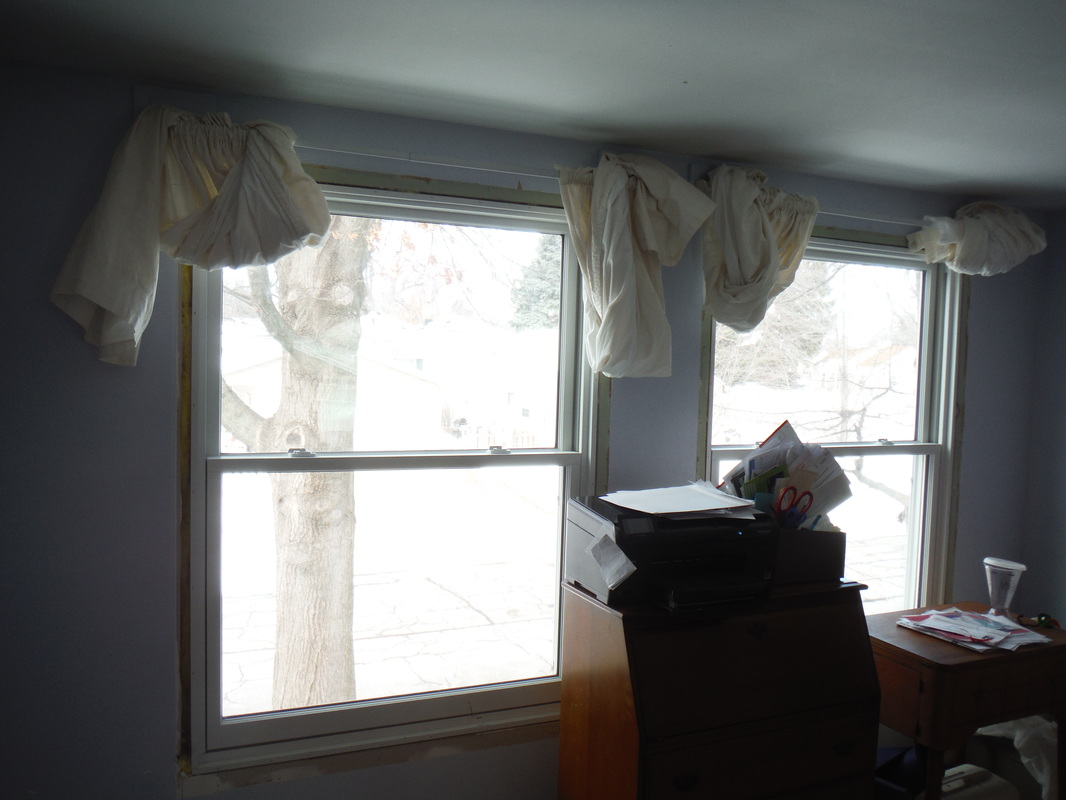
I pull the curtains up as much as I can to let in the natural light.
I set up a basic backdrop with a reflector board facing the window to bring as much light to my subject as possible. I have been taking photos in my bedroom because it gets so much great light during the day. I have actually figured out that by leaning over the back of the reflector board I can get great overhead shots with lots of great natural light. I haven't used this side light much since I have been photographing in the daylight.
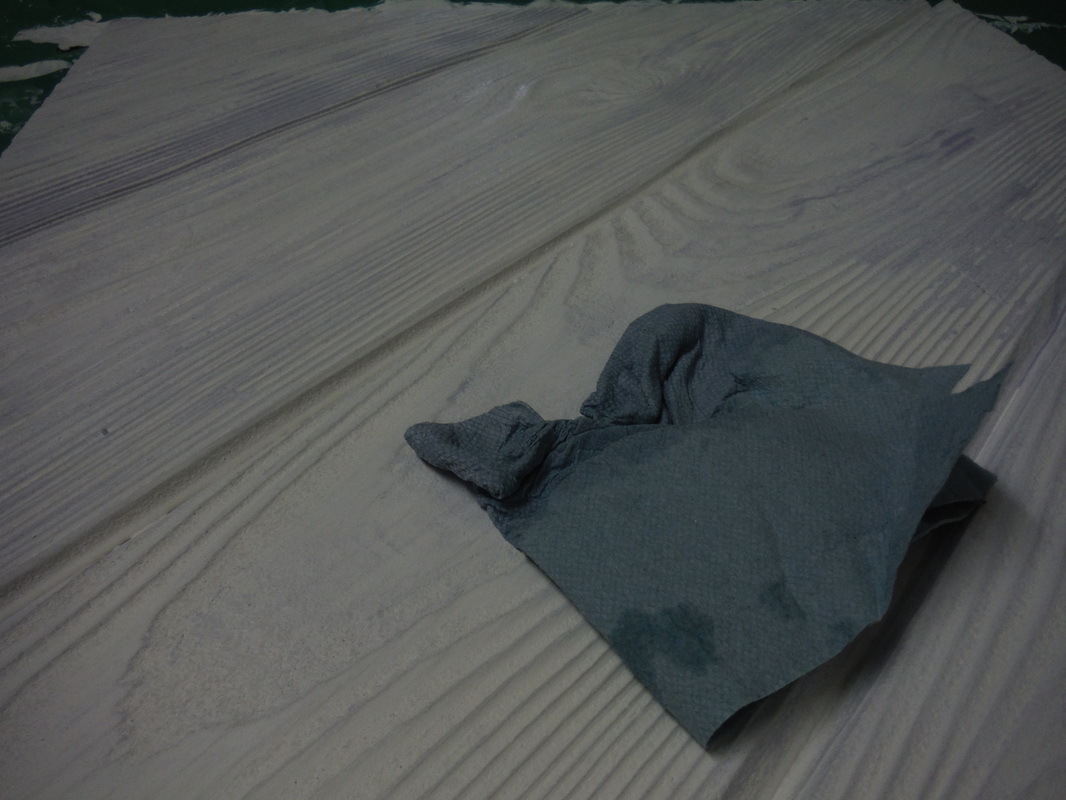
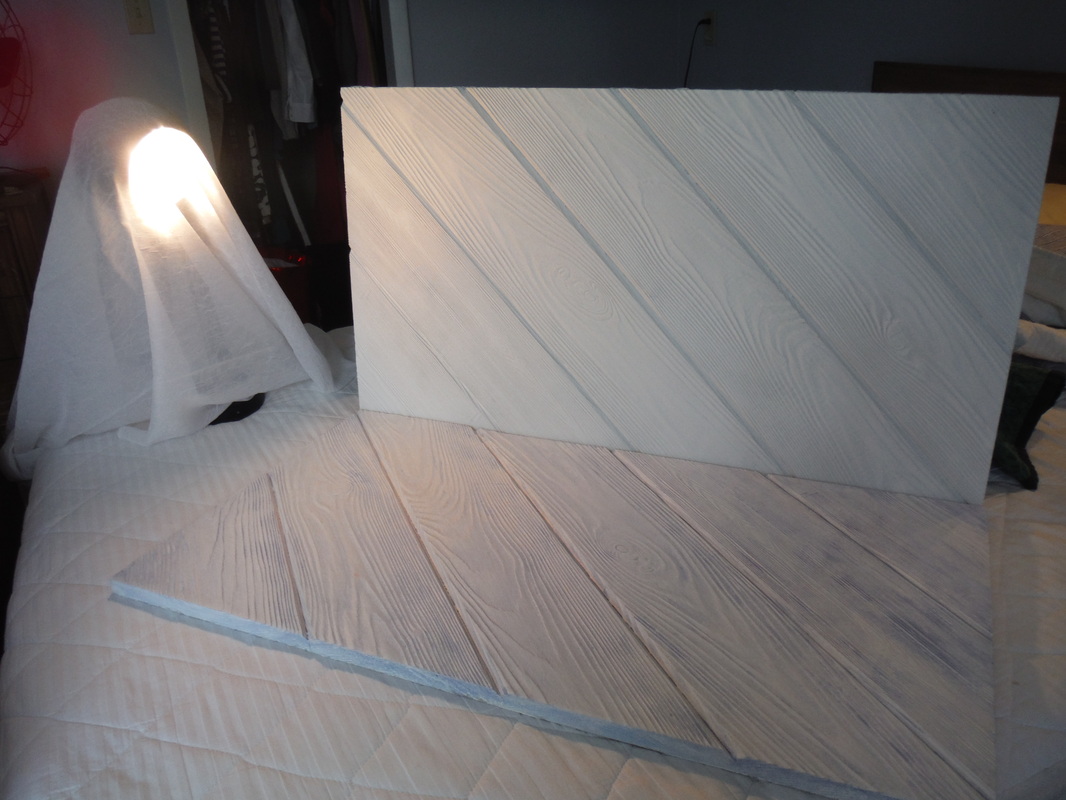
I bought two boards for $5 each at PACA, a salvage resale store that saves old buildings and anything that can be salvaged from old buildings. These are actually not real wood which makes them easy to move and store. They were a really ugly peachy beige color so I painted them both white. Then I used some watered down blue paint and a shop towel to whitewash one of the boards to give it some dimension. I plan to procure a variety of boards to add more textures and colors to my photos.
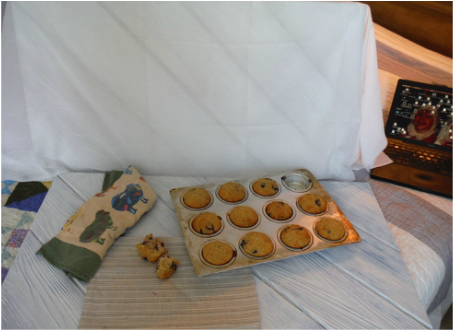
You can also add texture and dimension to photos with textiles and props. I have been studying photos on foodgawker and Taste Spotting before photo shoots to get ideas. Another tip I learned is too take lots of photos. Take your time and try various angles and set ups. I took at least 75 pictures of muffins during this photo shoot. I probably would have taken 5 to 10 photos before.
I only very recently started doing any photo editing. I am still very new to it and haven't made any major adjustments to my photos, but I have made some minor adjustments. Lindsay explains how to use several photo editing tools in Tasty Food Photography. I need to reread this section of her book and reference it often until I feel more comfortable with editing tools. She also talks a lot about camera settings which is helpful if you are using a DSLR camera. I have been mostly using a point and shoot camera which goes to show you that you can take good photos with simple equipment too. Lindsay gives a lot of good advice about taking pictures with an iphone too. Here is a comparison of an old photo to a new photo. 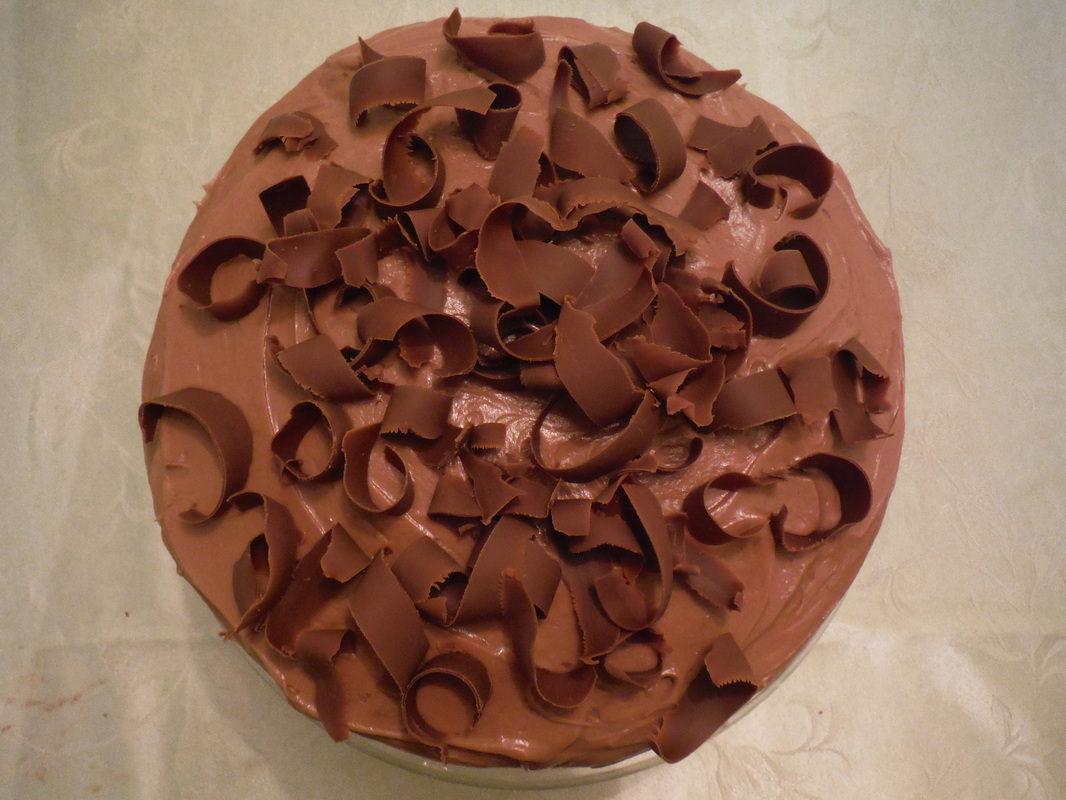
I don't think this one would make it onto foodgawker or Taste Spotting.
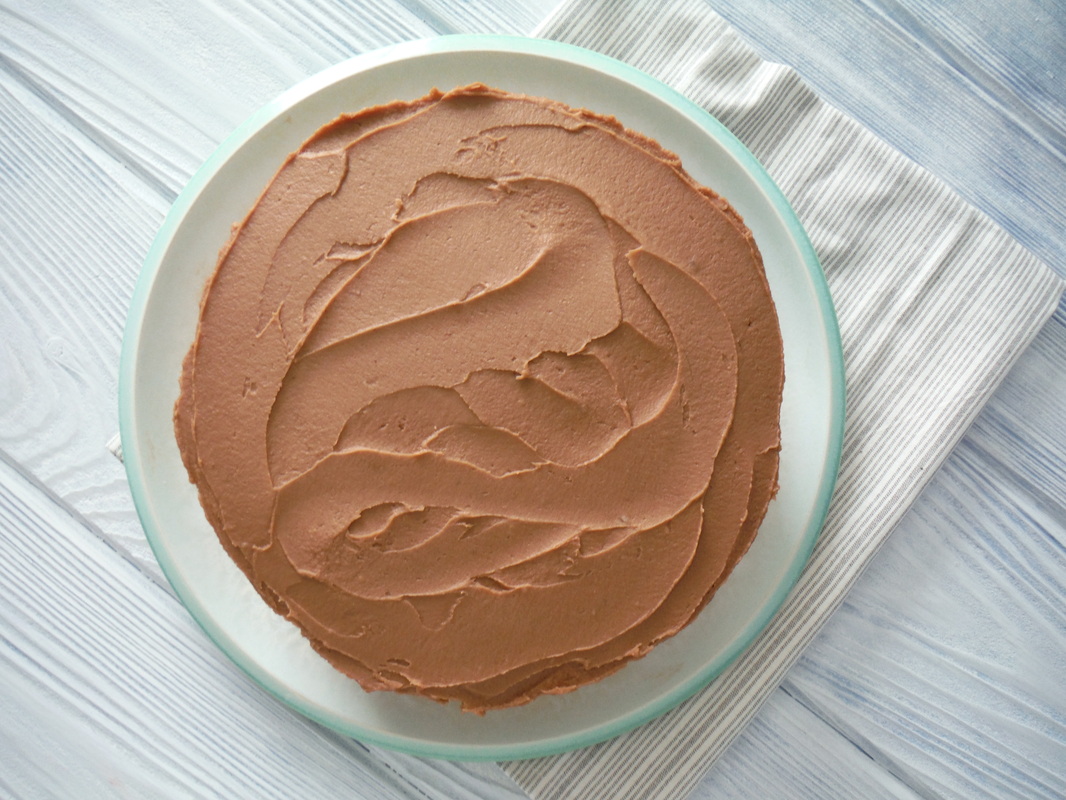
Much better. This photo did get accepted on both foodgawker and Taste Spotting. You can see this delicious recipe here.
Don't get discouraged if you have submitted photos and been rejected. I have been rejected a lot, but I keep learning and improving and submitting new photos. I have had some luck submitting recipes on Healthy Aperture too. I don't think they are as picky on the quality of the photo, but the recipe needs to be a healthy one. Are you into food photography? If so, what are your best tips?
Disclosure: The photo link for Tasty Food Photography is an affiliate link.
Linking up at Lou Lou Girls, Do Tell Tuesday, Create with Joy 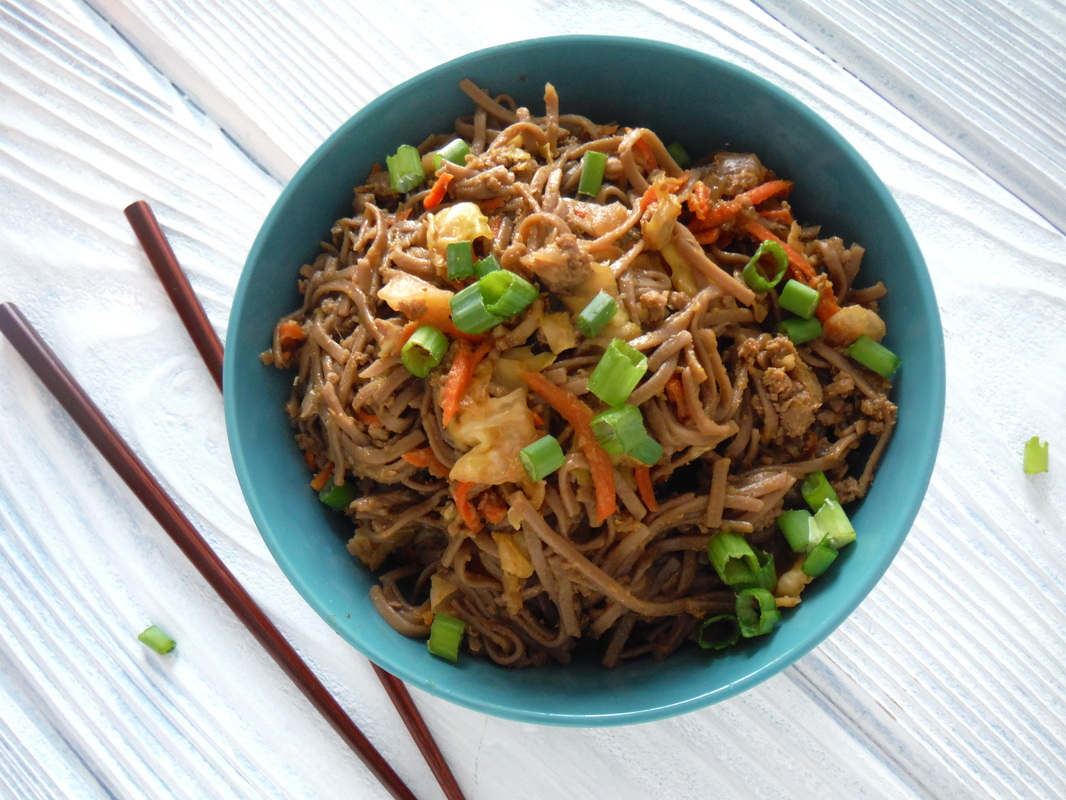
I have always loved soba noodles which are Japanese buckwheat noodles. They contain all the essential amino acids, antioxidants, and essential nutrients including thiamin and riboflavin. Combine with lean meat and fresh vegetables for a hearty and healthy meal.
Ginger, garlic, soy sauce, sesame oil and rice vinegar with a hint of coconut sugar come together to create a delicious flavor combination in these fresh noodle bowls. 
Hearty Asian noodle stir fry
Serves 6-8 Ingredients: 1 pkg. soba noodles or other Asian noodles 2 large carrots shredded* 1 lb. lean ground beef or venison 1 onion, diced 1 Tbsp. (or more to taste) sesame oil 4 cloves garlic, minced 1 tsp. ground ginger or about an inch fresh ginger, minced fine 1/2 cup soy sauce 2 Tbsp. rice vinegar 2 tsp. coconut sugar or brown sugar 1/4 head cabbage, finely sliced handful of shiitake or other mushrooms, optional salt and freshly ground pepper sliced green onions (garnish) Instructions: 1. Cook the soba noodles according to package directions. Toss noodles with a little oil to keep them from sticking and set aside. 2. In a large pot or wok brown ground meat, onion, and sesame oil. 3. Mix the garlic, ginger, rice vinegar, soy sauce, and sugar together then add to the skillet. 4. Next, add the cabbage and mushrooms and cook until the cabbage is tender, stirring occasionally. 5. Then add the carrots and cook for 2-3 more minutes. Add the noodles and toss to warm them. 6. Salt and pepper to taste. Garnish with green onions. Add any additional flavors or ingredients you like. For a little kick you can add 1/4 tsp. red pepper flakes . *If you have a food processor, it will make shredding the carrots super easy.
Linking up at Create with Joy
|

Welcome to Home Ec @ HomeHi, I'm Faith, a former Family and Consumer Science teacher turned food blogger. I love God, my family, and food. You can usually find me in the kitchen preparing family friendly, homemade recipes and taking lots of pictures. 
Still Goldens, Southern, IL
 Fan Favorites

The Best Dry Brined Turkey with Citris and Fresh Herbs

 Dehydrating Pears and Apples in the Instant Pot Duo Crisp Dehydrating Pears and Apples in the Instant Pot Duo Crisp
 
 |
 RSS Feed