|
Cucumber pickles scream SUMMER! Crisp and deliciously sweet, they are irresistible and don't last more than a day or two in our house.
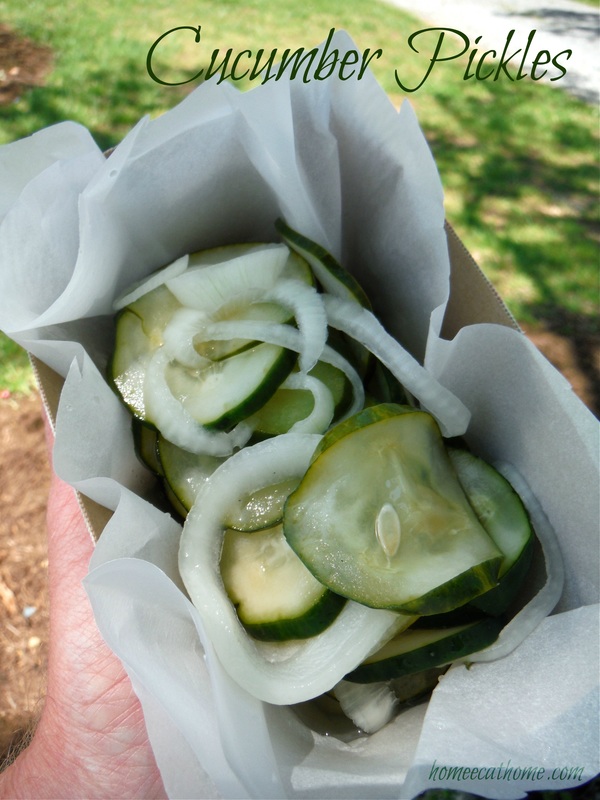
Since I made this old favorite the other day and my old photo was a terribly washed out pic from 2011, I decided it was time to give some much needed love to this post. 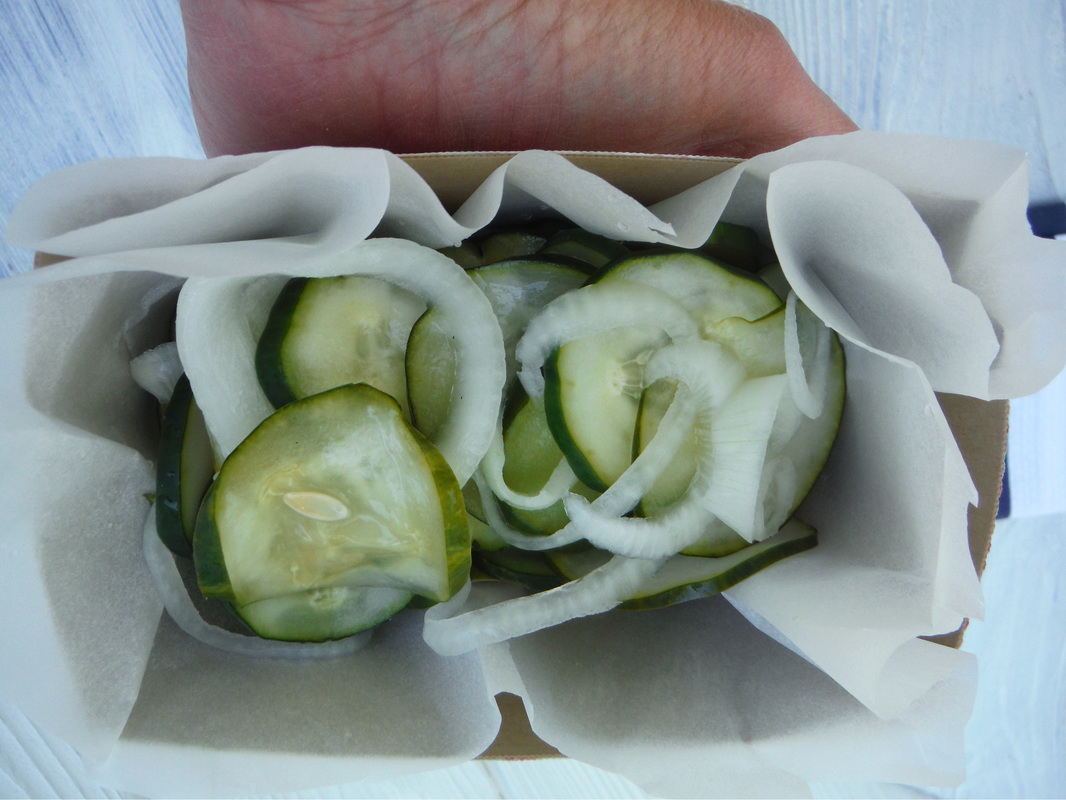
So next time you get invited to a summer potluck, think cucumber pickles. Such an easy and delicious side and you probably won't bring any home with you.
Ingredients
Directions 1. Put cucumbers and onion in a large bowl. 2. In a saucepan heat sugar, vinegar, and salt until dissolved. Pour over vegetables and cool. Cover and refrigerate until serving. (Don't worry if the liquid doesn't cover all of the pickles. It will after it sits a while.) This will still be delicious for a few days if stored in the refrigerator, but they never last that long in our house.
2 Comments
Thank you for supporting Home Ec @ Home. The links in this post are my affiliate links.

Mornings can be busy, rushed, or even CRAZY at times and while I am far from perfect, I have found that if I take care of a few simple tasks at night, our mornings run so much smoother. 1. Evaluate which tasks eat up your morning time and could be done the night before to help your morning run more smoothly. I like to take a relaxing bath every other day, but this really cut into my morning time and I found myself rushing out the door. I started giving myself half an hour at night to relax in the tub and I love it. No rushing in the morning, kids are in bed and I have much needed alone time. Maybe you spend lots of time in the morning picking out an outfit. Do this the night before and you won't even have to think about it in the morning. My husband picks out his work clothes and lays them out the night before and it is one less thing he has to do in the morning. 2. Clean the kitchen every night. I have been doing this for years so it is a habit for me. I love coming in to a clean kitchen every morning. It is easy to start breakfast and the kids can sit right down at the table. 3. Rotate the laundry and fold a load each night. This may not pertain to you, but I have to do about 2 loads a day to keep up with our laundry so I make sure to fold a load each night and then I put it away the next day. It is easy to watch a favorite show after the kids have gone to bed and fold a load of laundry. Actually, it's kind of relaxing and I get to catch up on my favorite shows. My current favorite is Call the Midwife. Fair warning, keep a box of tissues handy. I watched season 5 episode 2 the other day and the tears gushed. I suppose clean laundry is always good for wiping away tears too. 4. Get ideas for lunches and breakfast the night before. My boys have been eating school lunches lately, but when I pack lunches, it can take some time out of my morning so any preparation I can do at night, I do ahead. Every night during the school year I make sure icepacks go in the freezer then I pack non-perishable foods in the boys' lunch boxes. Anything that I can make ahead and pre-package I put in the fridge the night before. Then all I have to do in the morning is add an ice pack and fresh food (sandwich, fruit, etc.) Our breakfast are pretty simple, usually cereal, fruit, cheese, toast, etc., but I try to get an idea the night before and if we are low on our usual supplies I'll make a loaf of bread, some muffins or boil some eggs so that I am prepared for the morning. Last summer, I took Crystal Paine's (Money Saving Mom) Make Over Your Mornings online course and I loved it. Read my testimonial on the Make Over Your Mornings site. I am so excited to announce that Crystal has created a new course Make Over Your Evenings which is available starting today, April 21st at midnight Eastern time. So, the 14 day course which only takes 15 minutes a day and includes all the videos, the workbook, and the projects — will regularly retail for just $17. Here are The Crazy-Can’t-Miss-Low-Low-Low Launch Sale Prices: 12 a.m. to 7 a.m. ET on April 21, 2016 – just $5!!! 7 a.m. to 12 p.m. ET – just $7! 12 p.m. to 5 p.m. ET – only $10! 5 p.m. – 12 a.m. ET – only $13! 

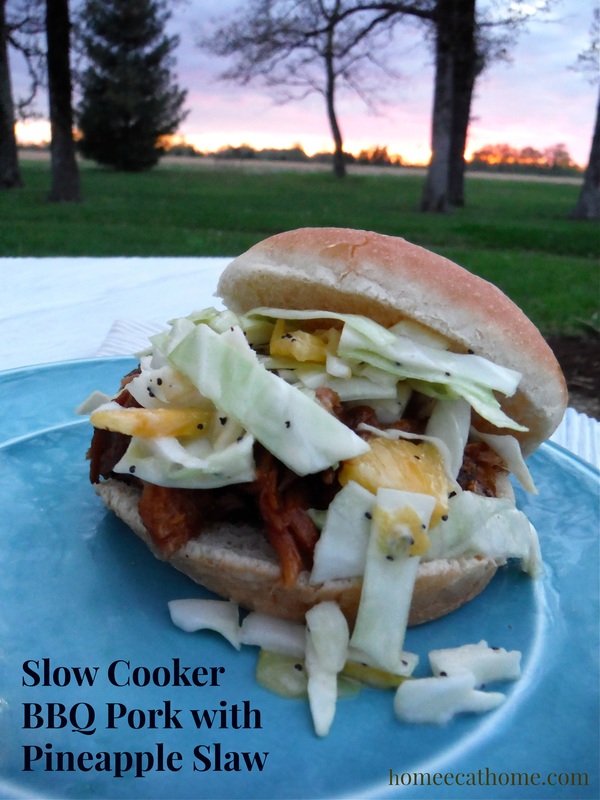
Spring has definitely sprung in Southern Kentucky and we have the sunburns to prove it. Time for BBQ and picnics and a little sunscreen. Time to sit back, relax and enjoy this simple, delicious slow cooker BBQ pulled pork with a big glass of iced tea.
I often take pictures of food outdoors to try to capture good natural light in my photos. One day my oldest son asked me why I never shot food photos with the beautiful natural landscape in the background. I didn't have a good answer. I was always so focused on the food that I never thought about the gorgeous landscape that was right in front of me. The other day I was shooting these photos in my usual style with my photo boards and I couldn't help but notice the beautiful colors and glow of the sunset. I remembered my son's comment about using the natural landscape as a background and I decided to try it. I loved the results and will use more landscapes as backgrounds in the future.
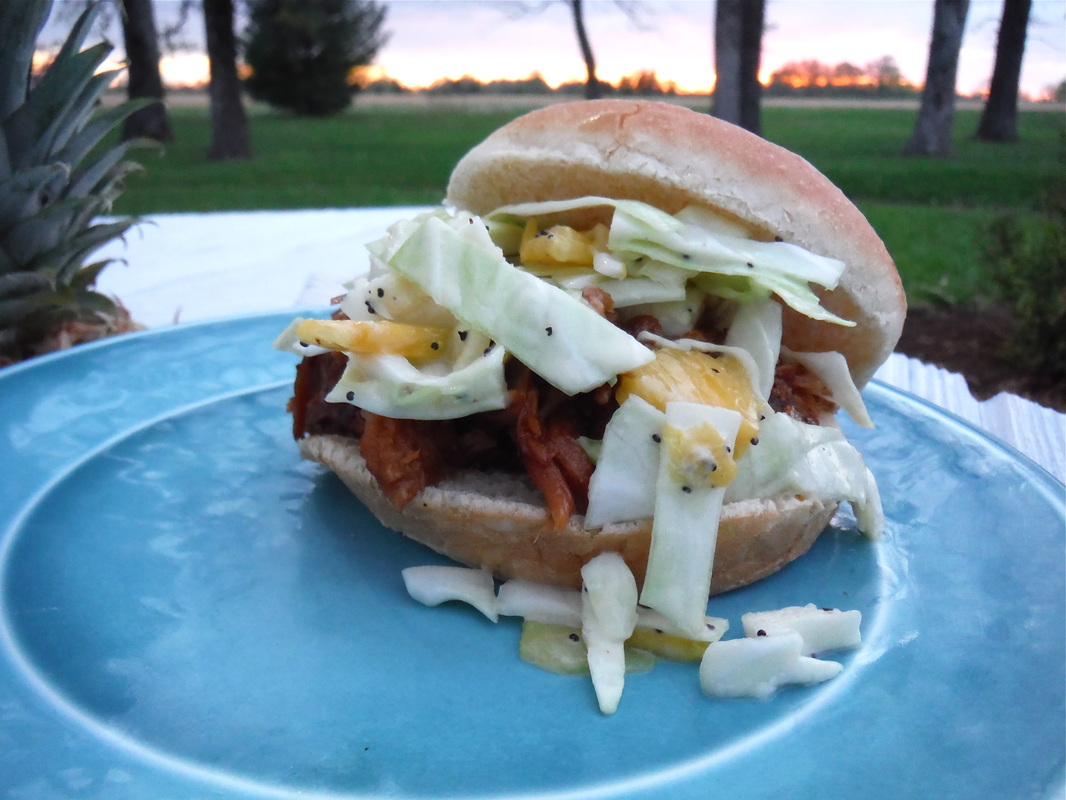
This BBQ pork is super easy in your slow cooker. A little honey, water, onion, and BBQ sauce is all you need. Use your favorite store bought sauce or a delicious homemade BBQ sauce.
We all know that slaw and pulled pork go together and pineapple and pork go together so I decided to try pineapple and slaw...together. It was a lovely combination, The pineapple gives the slaw a natural sweetness so use more or less pineapple depending on how sweet you want your slaw. Salt and pepper to taste. I like a little extra salt and pepper when I make slaw. 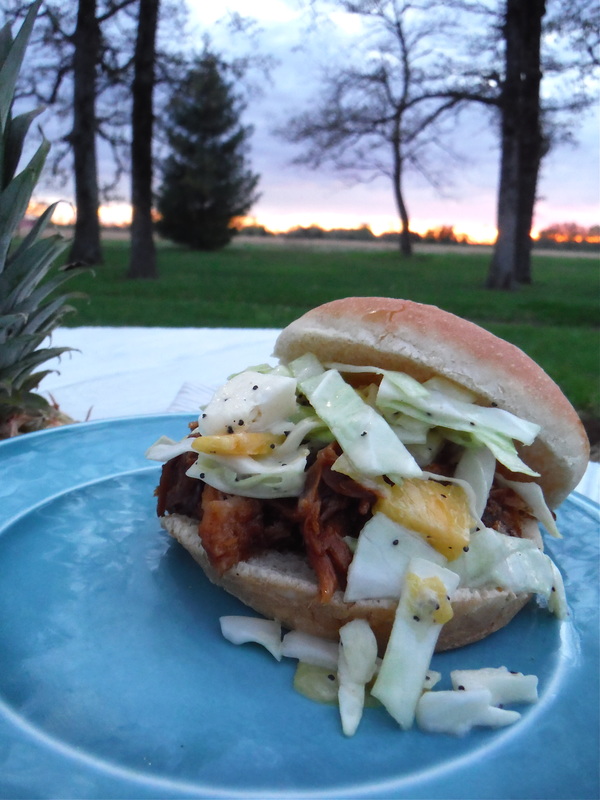
Hoping your spring has sprung and you are enjoying quiet sunsets and delicious BBQ too.
Slow Cooker BBQ Pork with Pineapple Slaw
2 1/2 to 3 lb. pork shoulder roast 1/2 onion, diced 1/2 cup water 1 Tbsp. honey BBQ sauce 1. Place pork fat side down in slow cooker. Add onion, water and honey. Cook on low for 7 to 9 hours. 2. Remove pork from slow cooker and pull apart with two forks discarding any bone and fat. 3. Leave about 1/4 to 1/2 cup broth in the slow cooker, draining off the rest. You may not need to drain off any broth. Return the shredded pork to the crock-pot and add desired amount of your favorite BBQ sauce stirring to combine. 4. Cook on low until warmed through. Pineapple Slaw 1 small head cabbage, shredded 1/2 to 3/4 pineapple diced small or cut into thin chunks. (Add more or less depending on how sweet you want your slaw) Dressing ingredients: 1/2 cup miracle whip or mayo 2-3 Tbsp. honey, adjust to taste 2-3 Tbsp. apple cider vinegar (adjust to taste, adding more as needed) 1 tsp. poppy seeds 3/4 tsp. salt 1/4 tsp. freshly ground black pepper (adding more salt and pepper as needed) Mix the dressing ingredients together and toss with the cabbage and pineapple. This makes a lot of slaw, but you can easily cut this recipe in half. 
No need for a mix. Enjoy this easy and delicious homemade beer bread anytime with just 4 simple ingredients.
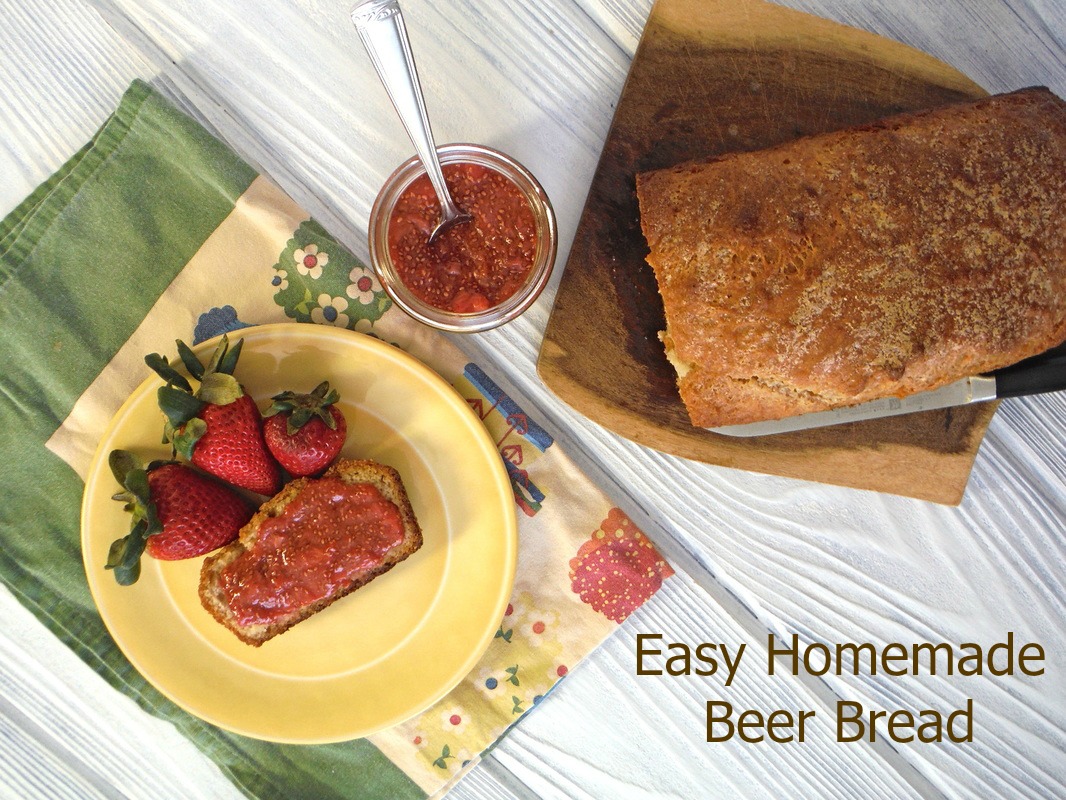
My sister shared this recipe with me years and years ago. You may have seen it on the blog with a terrible little photo circa 2012. I have been meaning to update this post for sometime and realized recently that I already have great beer bread photos in other posts... as in this strawberry chia seed jam post and this beer bread made with soda post. So I went the lazy route or let's call it the more efficient, best use of time route and repurposed these photos to show off this delicious beer bread. 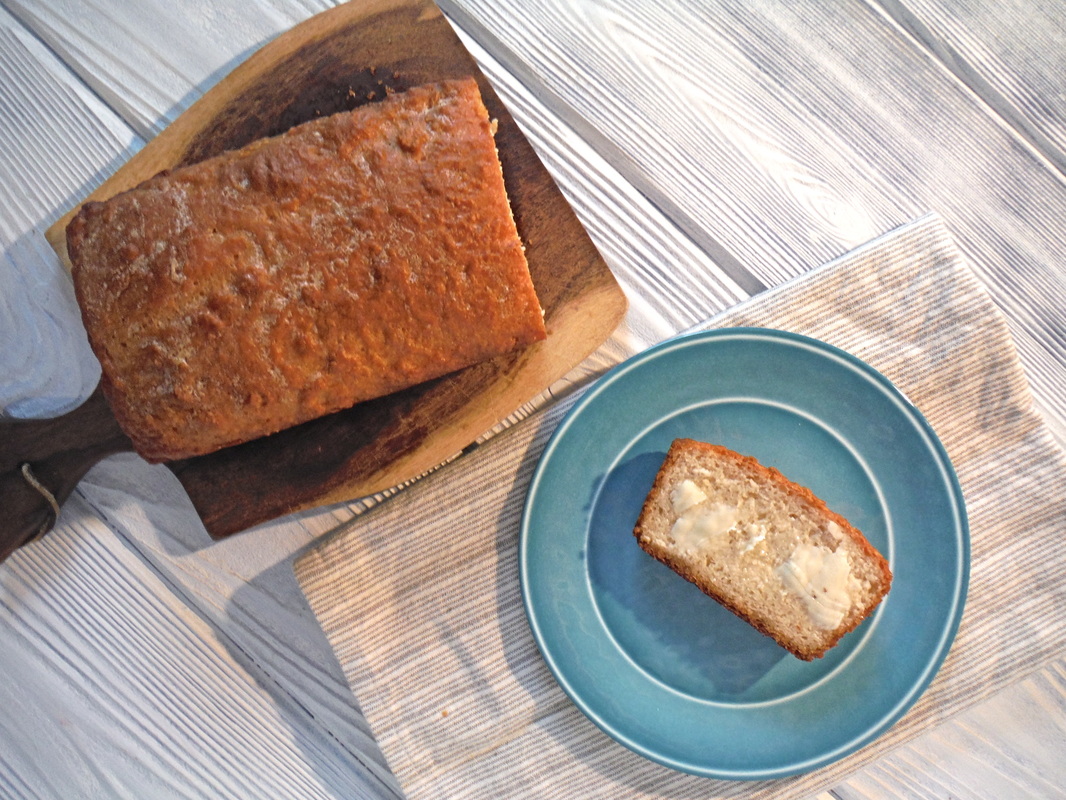
This is the easiest bread you'll ever make. It is one of my go-to recipes when I want something to go with soup or a casserole or almost any entree. Our family loves it. We enjoy it sliced fresh or toasted with butter. For a special treat, cube it and serve it with dill or spinach dip. I love to take it to pot-lucks cubed with dip. It is always a hit. And if you're not a fan of beer, simply substitute a can of soda for the beer. But don't worry, it doesn't taste like beer or soda. It is buttery, slightly sweet and simply delicious.
Ingredients:
1 12 oz. can of beer or soda 3 Cups self-rising flour (or use my sister-in-law's recipe for self-rising flour below) 6 Tbsp. sugar or coconut sugar 3/4 stick butter, melted 1. Mix together flour, sugar, and beer. 2. Bake in greased loaf pan for 45 minutes at 350 degrees. 3. Remove from heat, pour melted butter over the top. 4. Return to oven and bake for 15 minutes more. Recipe for Self-Rising Flour substitute: 3 cups all-purpose flour 4 teaspoons baking powder 1 teaspoon salt Directions: Combine all ingredients and use in place of self rising flour. 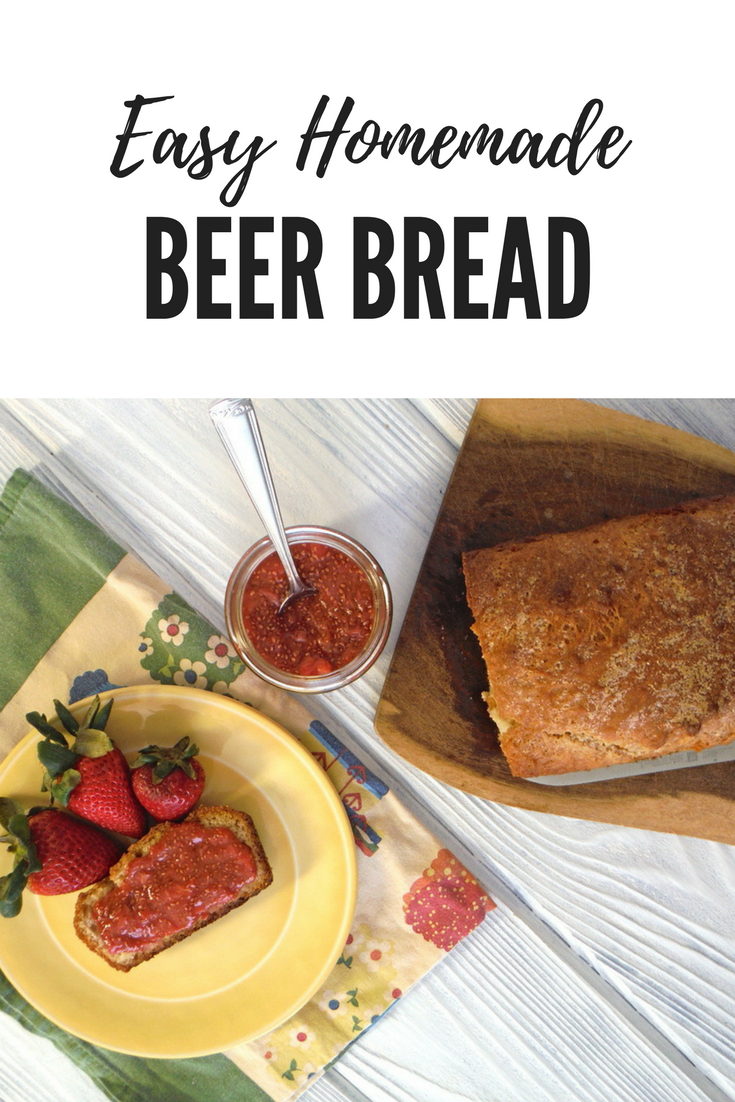
Linking up at Best Mom Advice

We are a participant in the Amazon Services LLC Associates Program, an affiliate advertising program designed to provide a means for us to earn fees by linking to Amazon and affiliated sites.
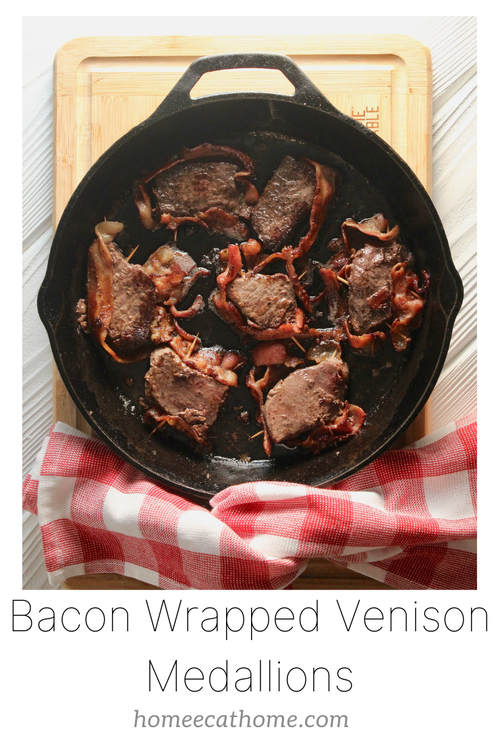
If you are lucky enough to have some venison in your freezer like we are (thanks Dad!) you will love these bacon wrapped venison medallions. And even if you don't have access to venison, these would be delicious made with beef too.

The font I chose for this image is called TALL DARK AND HANDSOME and I thought it was only fitting for such a manly recipe. Because when we start wrapping meat with bacon we're hitting manly recipe territory.

I don't usually venture into this manly food territory, but in a house full of boys, my efforts were certainly appreciated. There wasn't a bite left. Our four year old even went back for seconds.
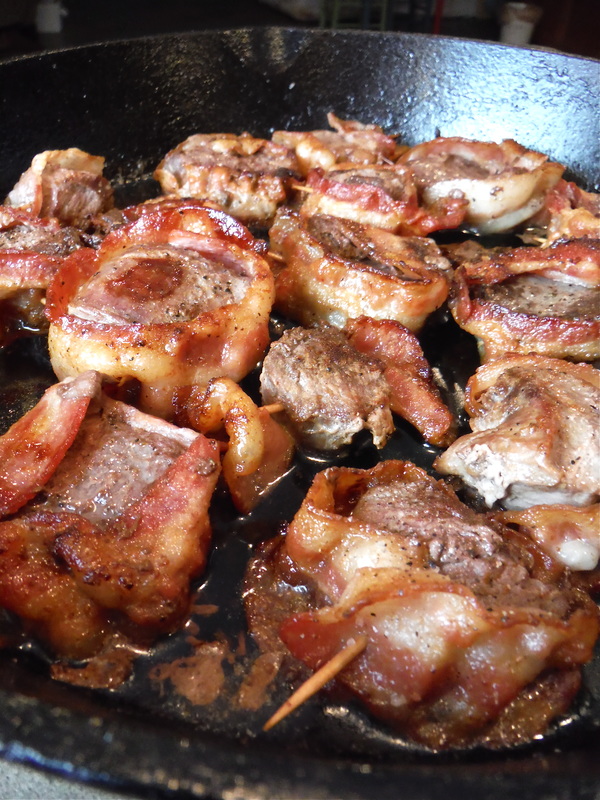
Are you feeling adventurous? If so, wrap some meat in bacon and enter this lessor traveled food world with me. Believe me, you will enjoy this culinary adventure.
Ingredients:
1 package (12-16 oz.) bacon 1 pound venison steak medallions toothpicks salt pepper Instructions: 1. In an iron skillet (amazon link) fry bacon turning it to cook both sides until it is about 1/2 cooked. You want it a little crispy, but still soft enough that you can wrap it around the meat. You will have to do this in batches. 2. Let the partially cooked bacon cool until you can handle it without burning your hands. Then wrap a piece of bacon around each medallion pinning it in place with a toothpick. 3. Cook the bacon wrapped medallions in the bacon grease turning to cook evenly until desired doneness. Salt and pepper while cooking. These would also be great on the grill and would be a little leaner since you wouldn't be cooking them in bacon grease.
Pin on Pinterest
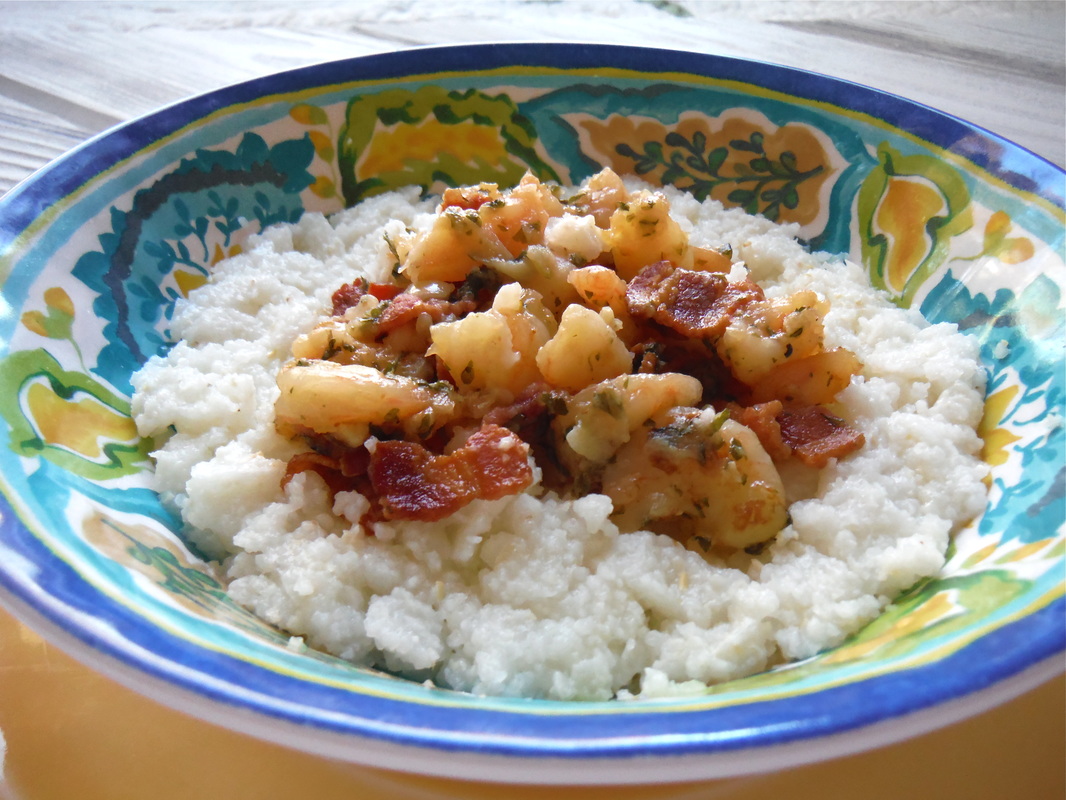
Shriiiiiimp and Griiiiiits! We're talking seriously amazing food today. Shrimp and Grits can each hold their own, but when you put them together with bacon, butter, cheese and garlic you are on a whole new playing field. We're talking soulful, comforting culinary heaven.
Putting shrimp and grits aside for a moment...I have missed you and sharing my love of food with you so much. It's been a busy couple of weeks and schoolwork for my graduate program had to take precedence over my love of sharing food. Priorities...I know, but here we meet again over some delicious shrimp and grits. 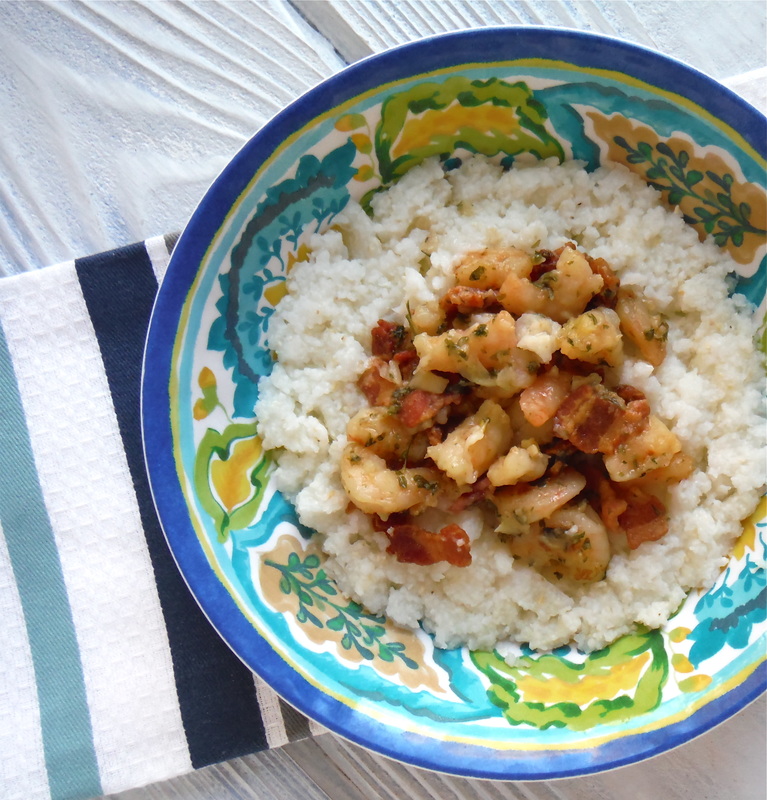
And my second favorite thing about shrimp and grits (my first favorite thing is how amazingly delicious it it) is how quick and easy it is to make. You could have no dinner plan in sight, read this post at the end of your work day, stop at the store on the way home, then come home and prepare a delicious homemade dinner in minutes. Seriously easy. Simply buy peeled, deveined shrimp (I buy raw shrimp to avoid overcooking them.) and thaw them in a colander under running water when you get home. Don't want to cut them in half? Just buy smaller shrimp. I usually buy medium or large, and cut the large shrimp in half. Another short cut is to buy minced garlic in a jar. 1/2 tsp. = 1 clove garlic minced. 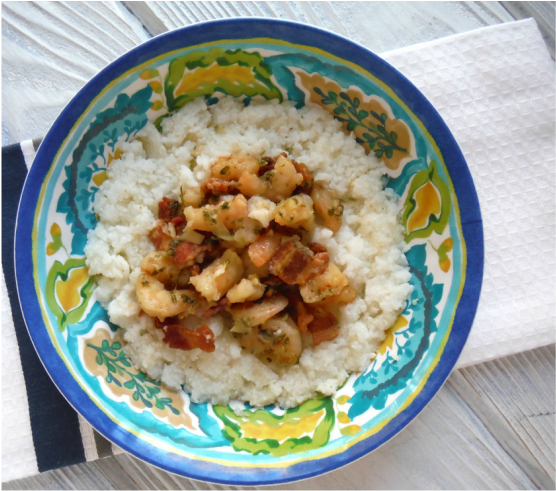
Shrimp and Grits For the Grits Grits Water Salt Butter Shredded sharp cheddar cheese Follow package directions to make number of servings of grits you desire. I make 6-8 servings for our family of 5 and 12 servings for company. (We love leftovers.) After the grits are done, stir in butter and cheese to your liking. For the Shrimp 6 slices bacon 1 lb. raw shrimp, peeled and deveined 1 medium sweet onion, diced 1 T. freshly squeezed lemon juice 2 cloves garlic, minced 2-3 Tbsp. fresh parsley, chopped or 1 Tbsp. dried parsley Salt and fresh ground pepper
Serve grits in a large serving bowl or individual bowls with shrimp topping in center of grits. Recipe adapted from Shrimp and Grits by Bobby Flay. Linking up at Share the Wealth, Create with Joy |

Welcome to Home Ec @ HomeHi, I'm Faith, a former Family and Consumer Science teacher turned food blogger. I love God, my family, and food. You can usually find me in the kitchen preparing family friendly, homemade recipes and taking lots of pictures. 
Still Goldens, Southern, IL
 Fan Favorites

The Best Dry Brined Turkey with Citris and Fresh Herbs

 Dehydrating Pears and Apples in the Instant Pot Duo Crisp Dehydrating Pears and Apples in the Instant Pot Duo Crisp
 
 |


 RSS Feed