|
I received this product for free from Moms Meet (momsmeet.com) to use and post my honest opinions. Compensation for this post was provided and this page may contain affiliate links.
We are a participant in the Amazon Services LLC Associates Program, an affiliate advertising program designed to provide a means for us to earn fees by linking to Amazon and affiliated sites.
Have you ever baked with 100% Italian Extra Virgin Olive Oil? I love to sauté and roast with it, but haven't used it a lot in baking, except to bake bread. For the Flavor Your Life Campaign, I made this delicious olive oil apple cake which is a new family favorite.
To learn more about the rich history and delicious properties of 100% Italian Extra Virgin Olive Oil and the culinary culture that’s been harvested in Europe for generations, visit Flavor Your Life.
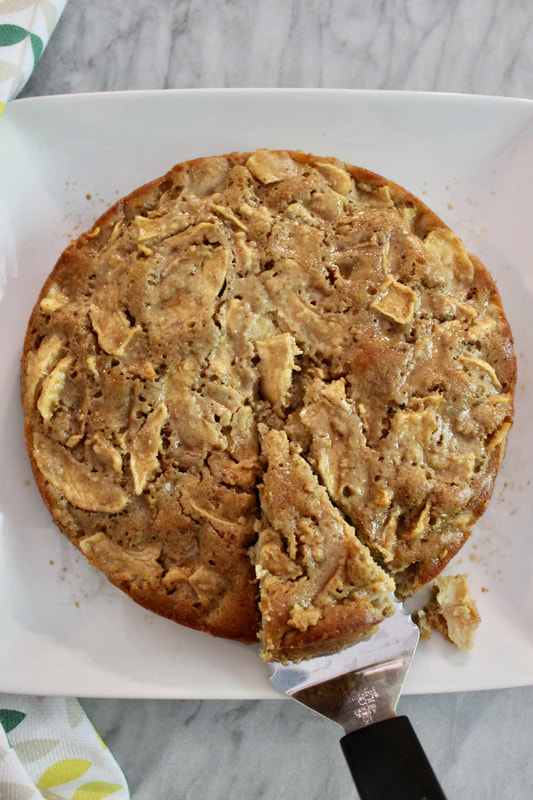
This olive oil apple cake is an Italian classic. A light cake batter infused with apple slices and made with extra virgin olive oil.
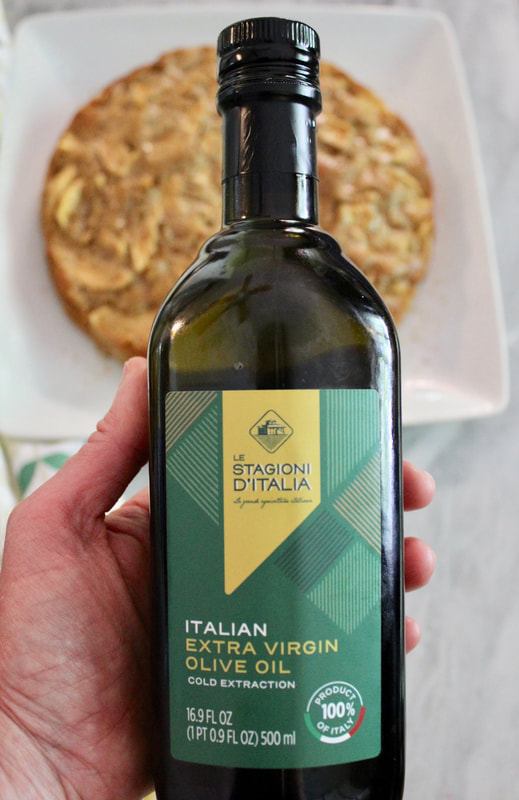
Le Stagioni d’ Italia means “the seasons of Italy” in Italian.
About Le Stagioni d’ Italia
• Le Stagioni d’ Italia’s short, fully traceable supply chain is guaranteed sustainable and the great care they take with processing creates exceptional taste.
• 100% Italian Extra Virgin Olive Oil is the first cold pressed olive oil from the first round of extraction of fresh, intact olives. It has not been heated during processing, so it retains its full nutritional value. • Harvested in Italy, it is vegan, gluten free, and contains no additives or preservatives. • It has a robust flavor of artichoke and almond, with a medium bitter and spicy aftertaste, as well as a green, ripe, fruity aroma with a leafy feel. • 100% Italian Extra Virgin Olive Oil typically retails for $19.99 for a 500 mL bottle. 
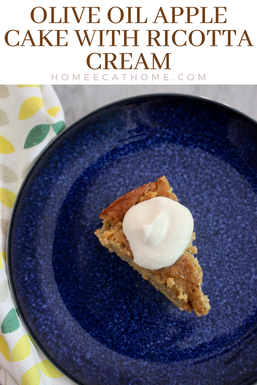
With hints of citrus and cinnamon this olive oil apple cake is moist, delicious and perfect served warm or room temperature with a dollop of ricotta cream.
About Extra Virgin Olive Oil
• Extra virgin olive oil is made by pressing olive oil, without heat or chemicals; it’s known as the first cold pressed olive oil.
• Olive oils are tested for peroxide values. Lower values indicate fresher oil and more rapid processing. • Extra virgin olive oil is virtually free of acidity, below 0.8%. If the percentage of oleic acid (fatty acid) is too high, it indicates improper production and rancidity. • A panel of trained, expert tasters tests for taste defects and the presence of positive attributes of fruitiness, bitterness, and spiciness. If the oil doesn’t have the signature fruity taste and harmonious balance, it won’t receive an Extra Virgin rating. • Extra virgin olive oil has a high smoking point of 400°F, so it is suitable for cooking and baking. • Between use, store your oil somewhere dark and cool (around 57°F, if possible), not on the counter or near a stove, and never in the refrigerator. Keep the lid screwed on tight, and use your oil within six months of opening. How should you cook with Extra Virgin Olive Oil?
• Experiment with different oils for different occasions.
• Use delicate oils for salad dressings or as a condiment over mild foods, like vegetables, fish, eggs, or potatoes. • Pair robust oils with hearty foods that can stand up to the intense flavor, like steak or spicy soup. • With a high smoking point of 400°F, extra virgin olive oil is suitable for cooking and can enhance any dish by drizzling on as a finisher.
Olive Oil Apple Cake with Ricotta Cream
Recipe Notes: This recipe is adapted from a recipe provided by Flavor your Life. Since it has European origins, the measurements and instructions are different than what I normally publish. I noticed a few discrepancies in the original instructions and reconverted the measurements to the U.S. system. I weighed dry ingredients as needed and then measured them to get accurate U.S. equivalents. The original recipe listed 80 ml as = to 4 Tbsp., however when converted it is actually 5.41 Tbsp. or 16.23 tsp. For this reason, I would measure Extra Virgin Olive Oil using the metric system if possible or measure just under 5 1/2 Tbsp. The original recipe also calls for 1/2 cup ground hazelnuts for which I substituted 1/2 cup almond flour (affiliate link). Cake Ingredients: 5-6 medium apples (any variety) 1 orange 1 cup, 1 Tbsp., and 2 tsp./150 grams all purpose flour 1/2 cup/50 grams almond flour (affiliate link) 1/2 cup/100 grams brown sugar + more for sprinkling on the cake Pinch of salt 1/4 tsp. ground cloves 1 tsp. cinnamon 2 tsp./10 grams baking powder 2 large eggs 80 ml/5.41 Tbsp. Extra Virgin Olive Oil 1/2 tsp. vanilla extract 3 Tbsp.milk Ricotta Cream Ingredients: 8 oz. ricotta cheese 1 Tbsp. clear honey 1/2 tsp. vanilla extract 1-3 Tbsp. milk 1. Preheat oven to 350 degrees F. /180 degrees C. 2. Butter a 10 inch springform cake pan. 3. Peel apples and slice thinly, about 16 slices per apple. 4. Zest and juice the orange. 5. Set the zest aside and toss the apples in the orange juice. 6. In a large mixing bowl, combine all purpose flour, almond flour, brown sugar, salt, cloves, cinnamon, and baking powder. Mix well with a whisk. 7. In another bowl, mix the eggs, Extra Virgin Olive Oil, vanilla extract, orange zest, and milk. Beat until thoroughly mixed. 8. Add the egg mixture to the dry ingredients and stir briefly to combine. 9. Fold in the sliced apples. 10. Spoon the cake batter into the prepared pan. Smooth it out with a spatula. 11. Bake for 35-45 minutes until the cake is golden and a toothpick inserted in the center comes out clean. 12. Let cool in the pan on a wire rack. 13. If desired, sprinkle the top with extra brown sugar. 14. Remove from the pan and place on a serving platter. To make the ricotta cream combine the ricotta cheese, honey, vanilla extract and 1 Tbsp. milk. Check the consistency and if desired add 1-2 Tbsp. more milk. We prefer it thicker with only 1 Tbsp. milk. Serve the cake with a dollop of ricotta cream.
You might also like these easy and delicious bread machine breadsticks which I make with 100% Italian Extra Virgin Olive Oil.
Pin on Pinterest

Yum on Yummly
4 Comments
We are a participant in the Amazon Services LLC Associates Program, an affiliate advertising program designed to provide a means for us to earn fees by linking to Amazon and affiliated sites.
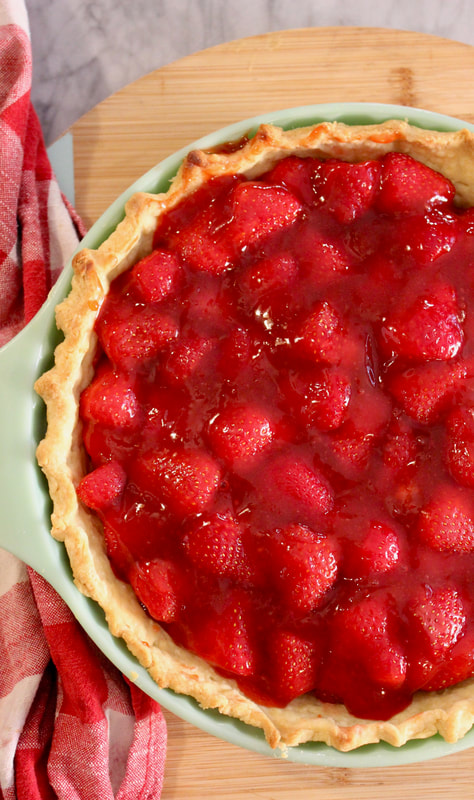
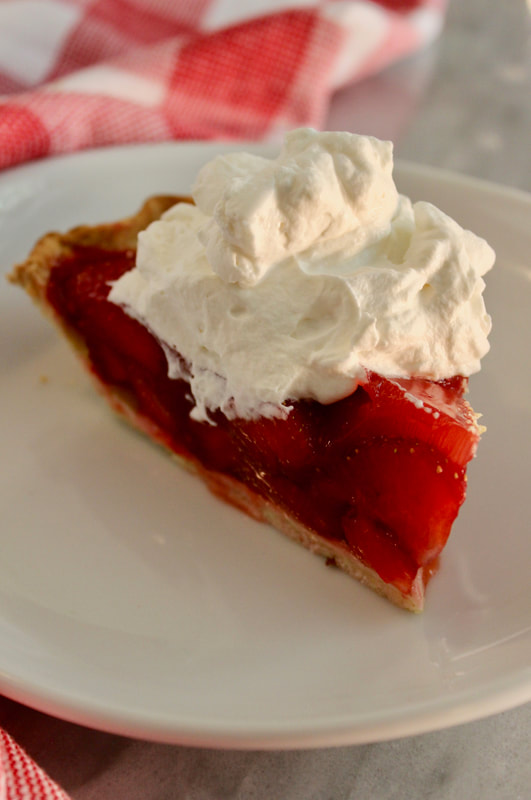
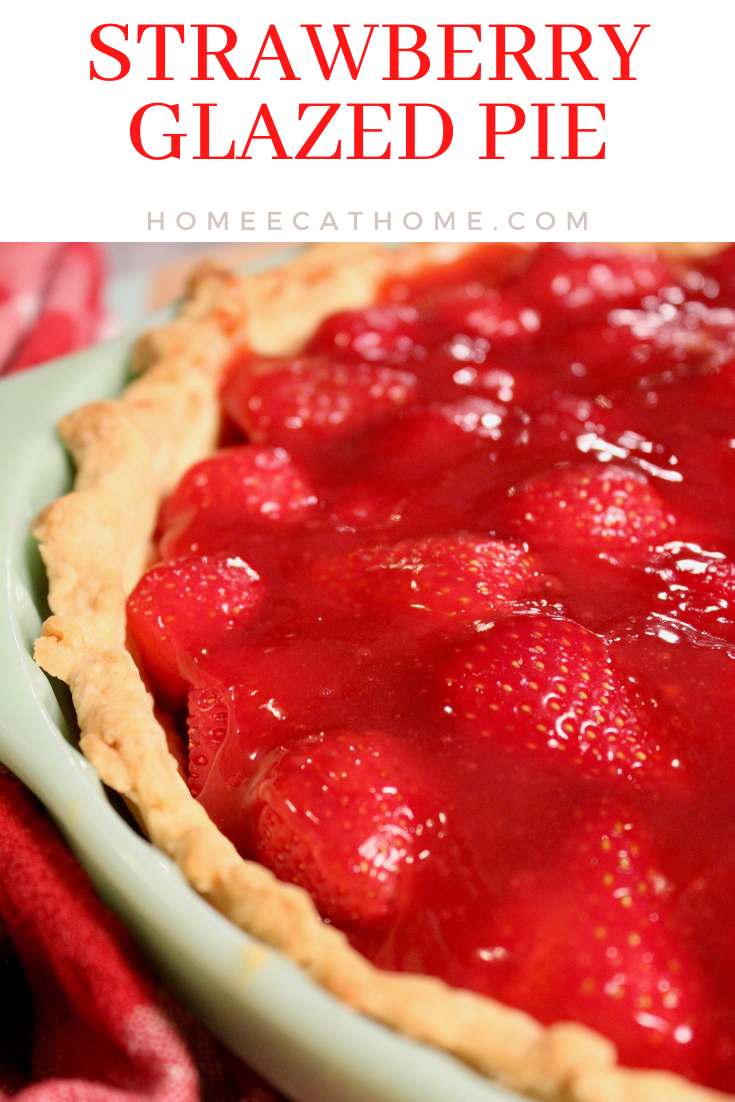
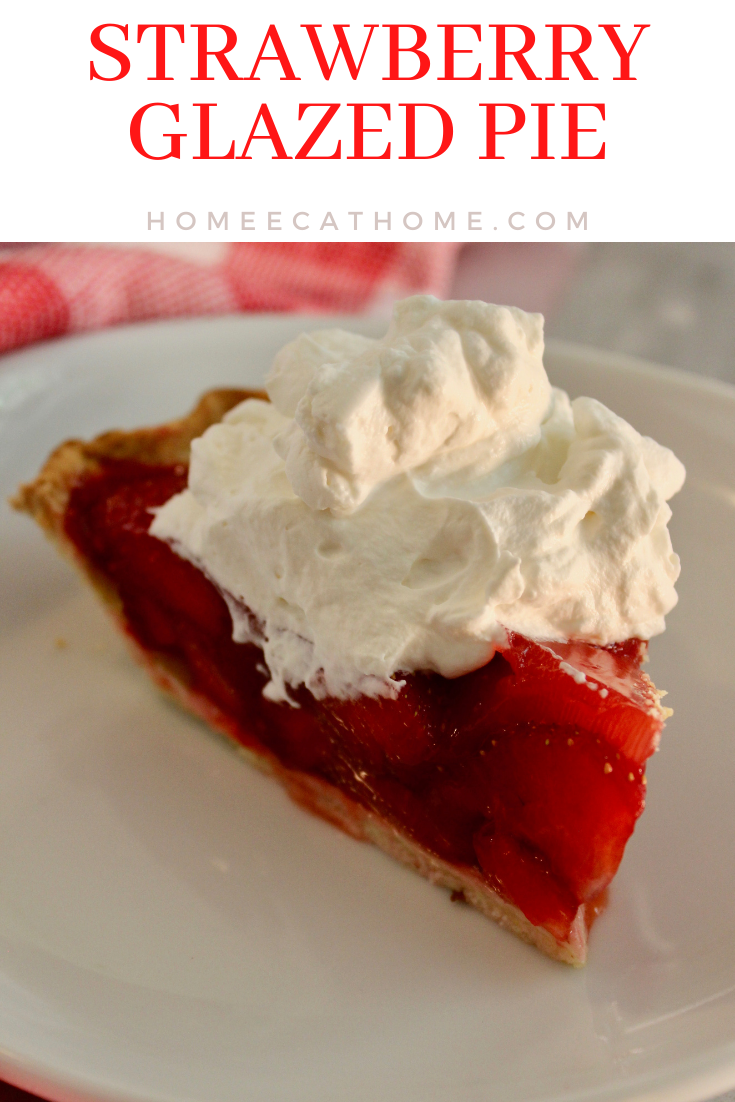
Strawberry pie, with layers of juicy strawberries surrounded by sweet glaze on a crispy crust must be the quintessential summer dessert. I remember bringing home a strawberry pie from Shoney's restaurant when I was a kid and thinking it was the best thing ever.
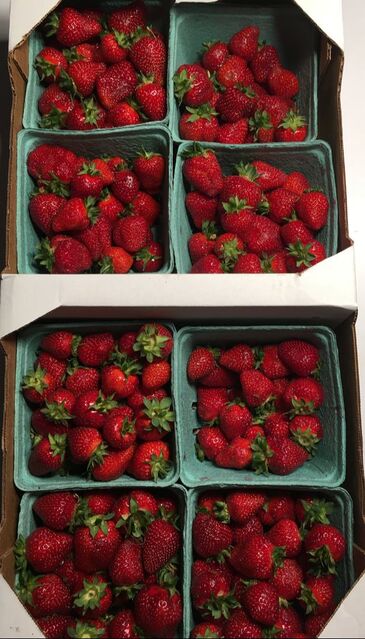
When your husband goes to a farm auction and brings home a gorgeous tray of strawberries, you make strawberry pie or easy strawberry chia seed jam. These strawberries were so sweet on their own, the boys literally ate half of them before I could make anything.
*Fresh picked strawberries are sweeter and juicier than strawberries that are picked before they ripen to go to grocery stores. If using fresh picked strawberries that are naturally sweet, use less sugar to make this pie. If using store ripened less sweet strawberries, you may want to use more sugar. The recipe below has a range in the amount of sugar so that you can adjust depending on the sweetness of your strawberries.
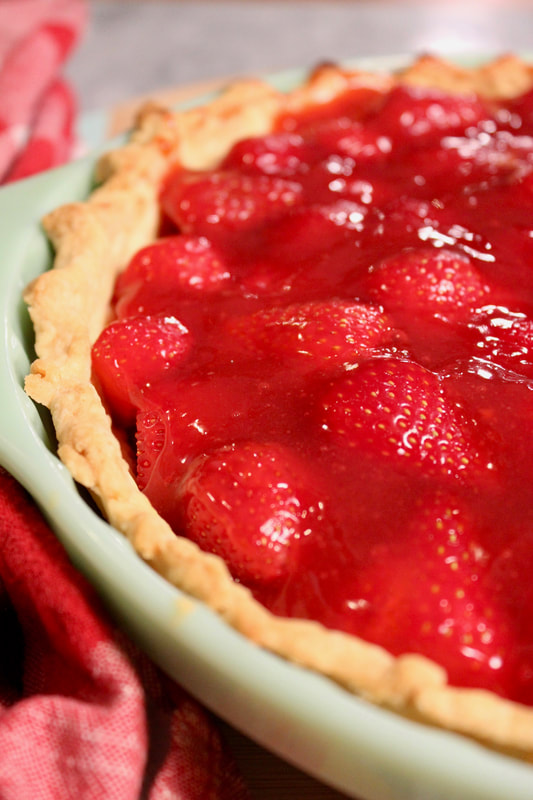
This pie is both delicious and simple. I love using homemade glaze made with common ingredients. No artificial dyes or flavorings that you would find in packaged store bought glaze. The best part is that making homemade glaze is really pretty easy.
1. Crush about 1/2 lb. strawberries with a meat chopper (pictured below) (affiliate link) or a potato masher.
2. Cook the mashed berries and 1 cup water at medium high heat for about two minutes to help break down the strawberries. 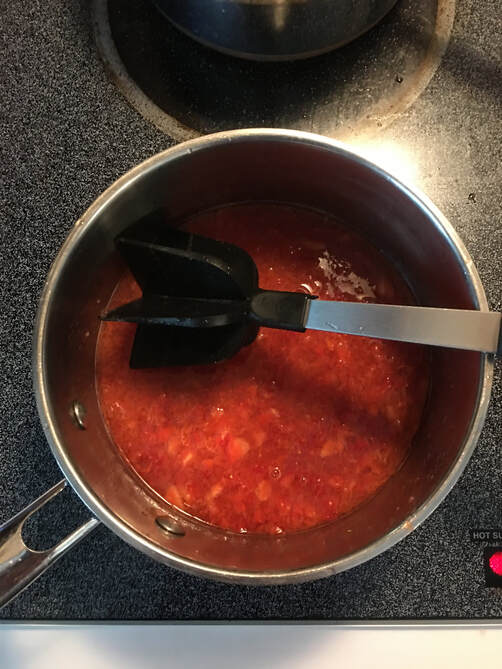
3. Sieve the cooked berries to get the juice. Discard the berry pulp. 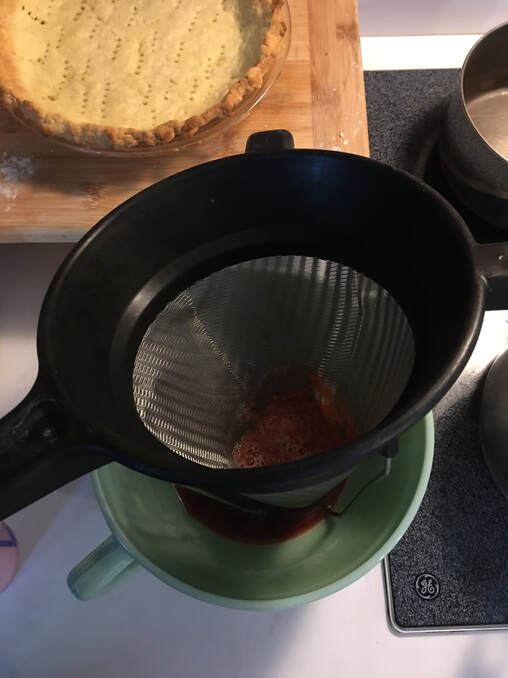
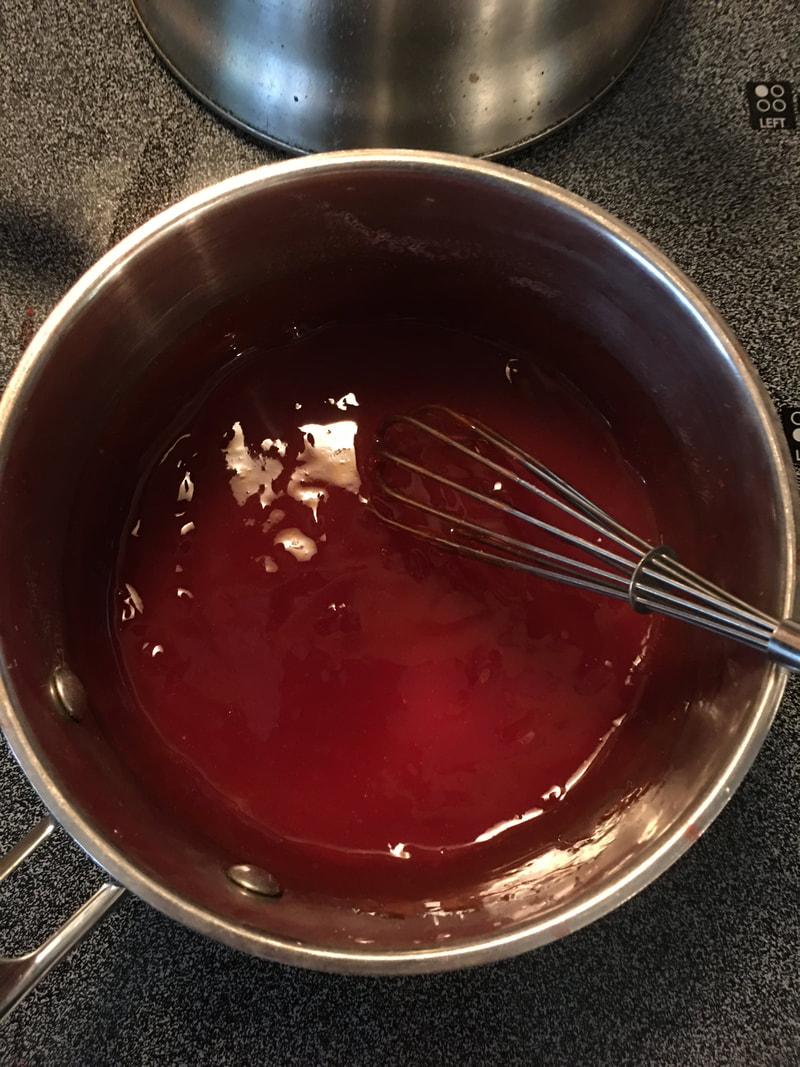
4. Combine the sugar and cornstarch in a saucepan. Gradually stir in berry juice. Cook stirring constantly till thick and clear.
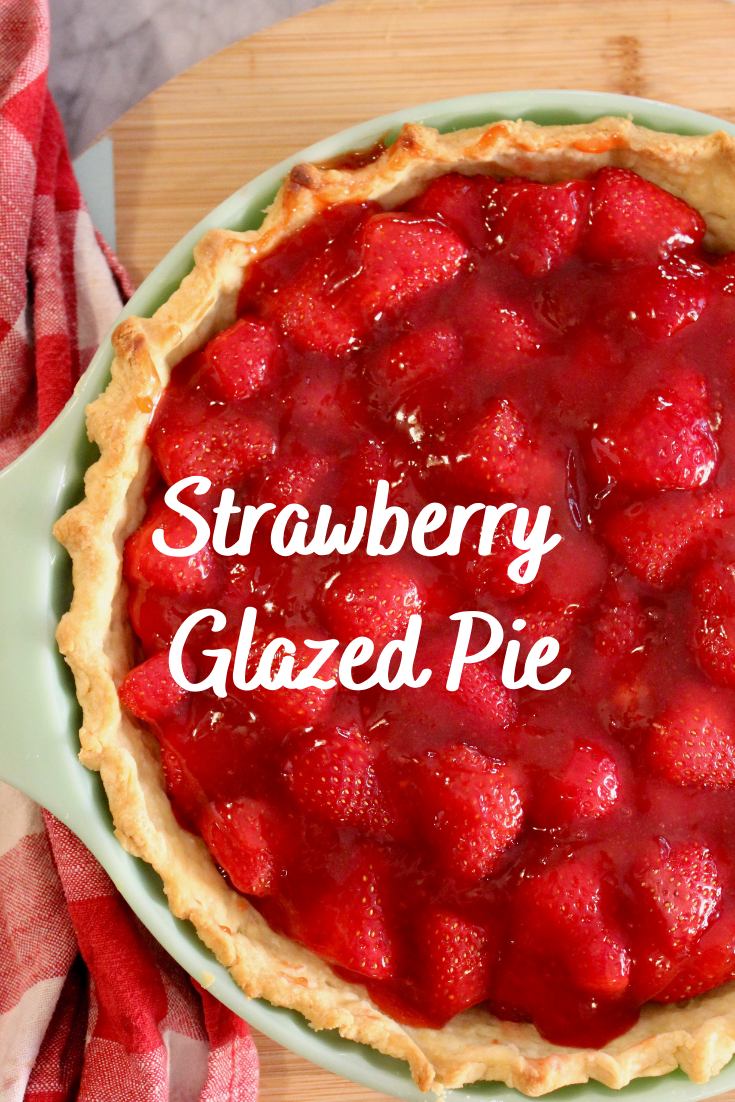
5. Line pie crust with a layer of sliced strawberries. Drizzle slightly cooled strawberry glaze over berries. Layer on more sliced strawberries and pour remaining glaze over berries.
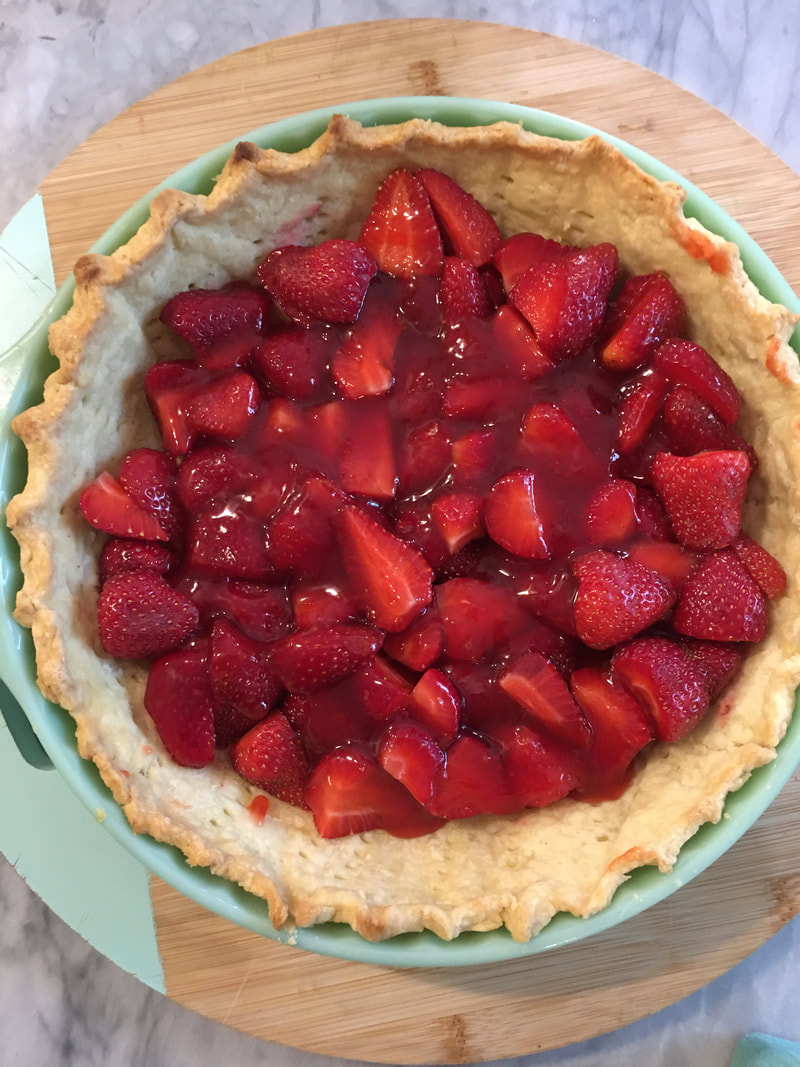 Pie crust with half of the berries and half of the strawberry glaze. Pie crust with half of the berries and half of the strawberry glaze.
Strawberry Glazed Pie
Ingredients: 2 lb. fresh strawberries 1/3 to 1/2 cup sugar* 1 Tbsp. and 2 tsp. cornstarch (I think this amount works nicely to thicken it, if you want it extra thick like jello when chilled, use 2 Tbsp. cornstarch.) Cooled, baked pie shell 1. Crush about 1/2 lb. strawberries with a meat chopper or a potato masher. 2. Cook the mashed berries and 1 cup water at medium high heat for about two minutes to help break down the strawberries. 3. Sieve the cooked berries to get the juice. Discard the berry pulp. 4. Combine the sugar and cornstarch in a saucepan. Gradually stir in berry juice. Cook stirring constantly till thick and clear. 5. Line pie crust with a layer of sliced strawberries. Drizzle slightly cooled strawberry glaze over berries. Layer on more sliced strawberries and pour remaining glaze over berries. 6. Refrigerate until serving time. Serve with whipped cream.
Pin on Pinterest
Yum on Yummly
|

Welcome to Home Ec @ HomeHi, I'm Faith, a former Family and Consumer Science teacher turned food blogger. I love God, my family, and food. You can usually find me in the kitchen preparing family friendly, homemade recipes and taking lots of pictures. 
Still Goldens, Southern, IL
 Fan Favorites

The Best Dry Brined Turkey with Citris and Fresh Herbs

 Dehydrating Pears and Apples in the Instant Pot Duo Crisp Dehydrating Pears and Apples in the Instant Pot Duo Crisp
 
 |
 RSS Feed