|
Disclosure: I received free samples of California Walnuts mentioned in this post. By posting this recipe I am entering a recipe contest sponsored by California Walnuts and am eligible to win prizes associated with the contest. I was not compensated for my time.
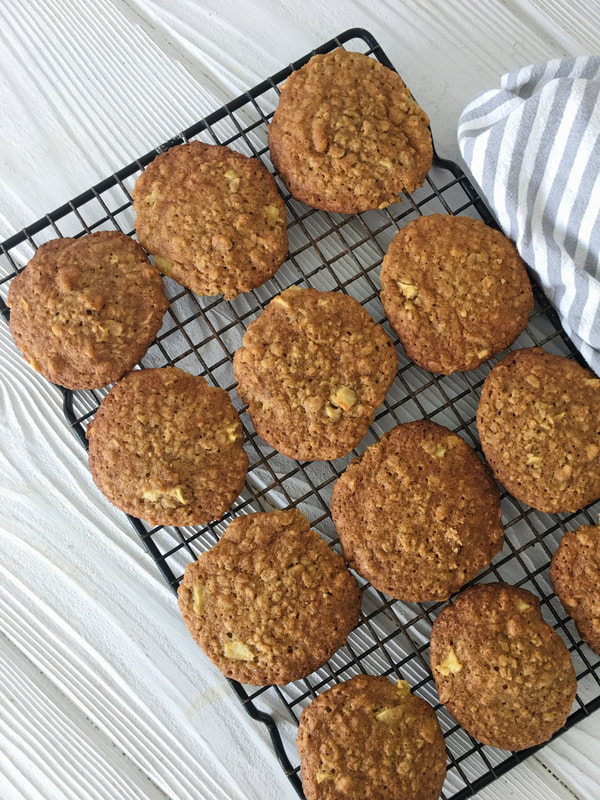
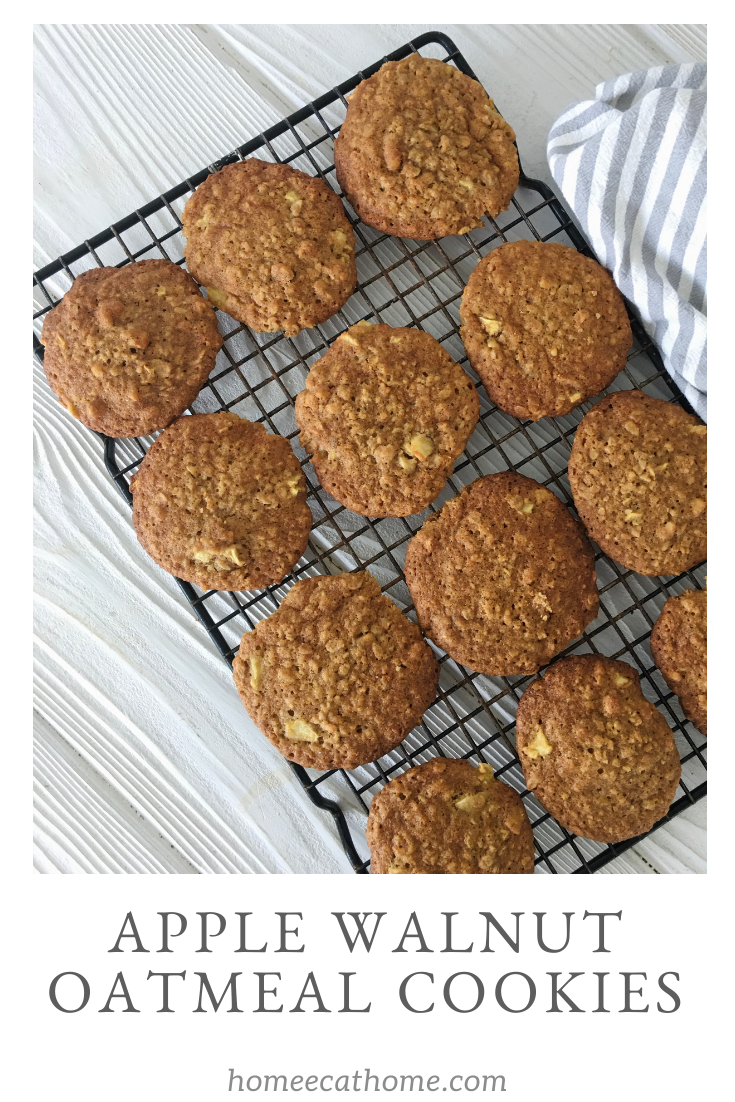
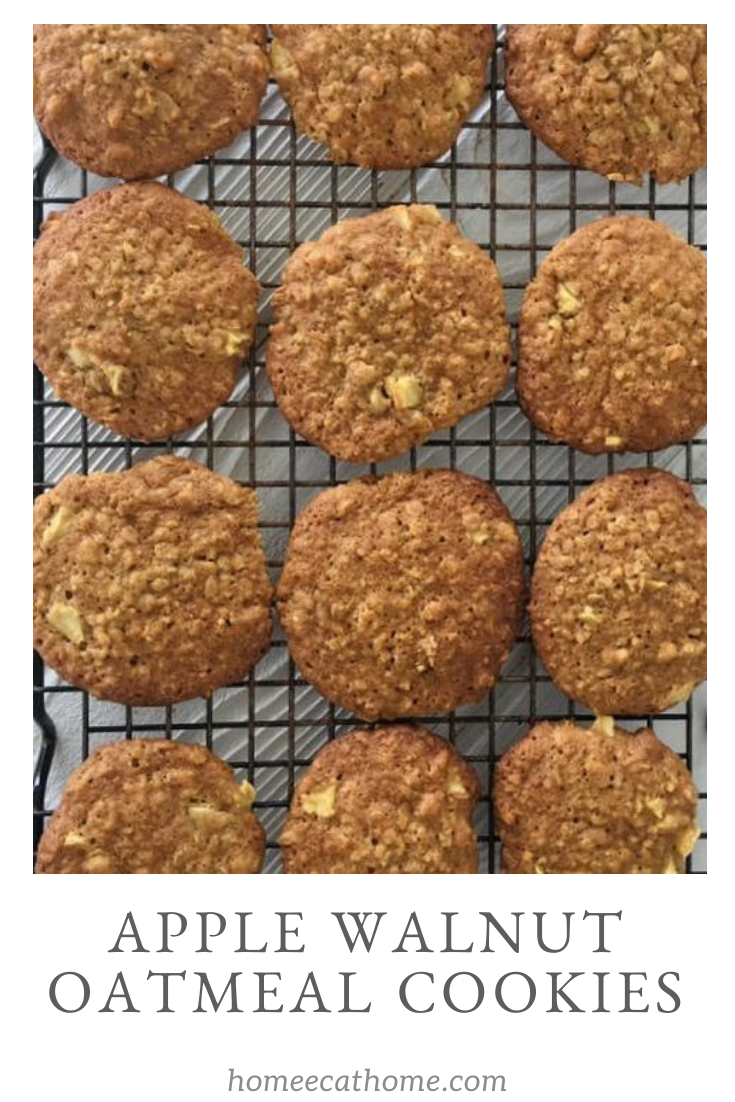
Do you prefer savory or sweet? Apparently it is wired in our DNA if we will prefer savory or sweet? I tend to lean toward the sweet side so I created these Apple Walnut Oatmeal Cookies for this California Walnuts challenge. They are the perfect mid-morning snack, and afternoon snack, and midnight snack...I could pretty much eat them all day long.
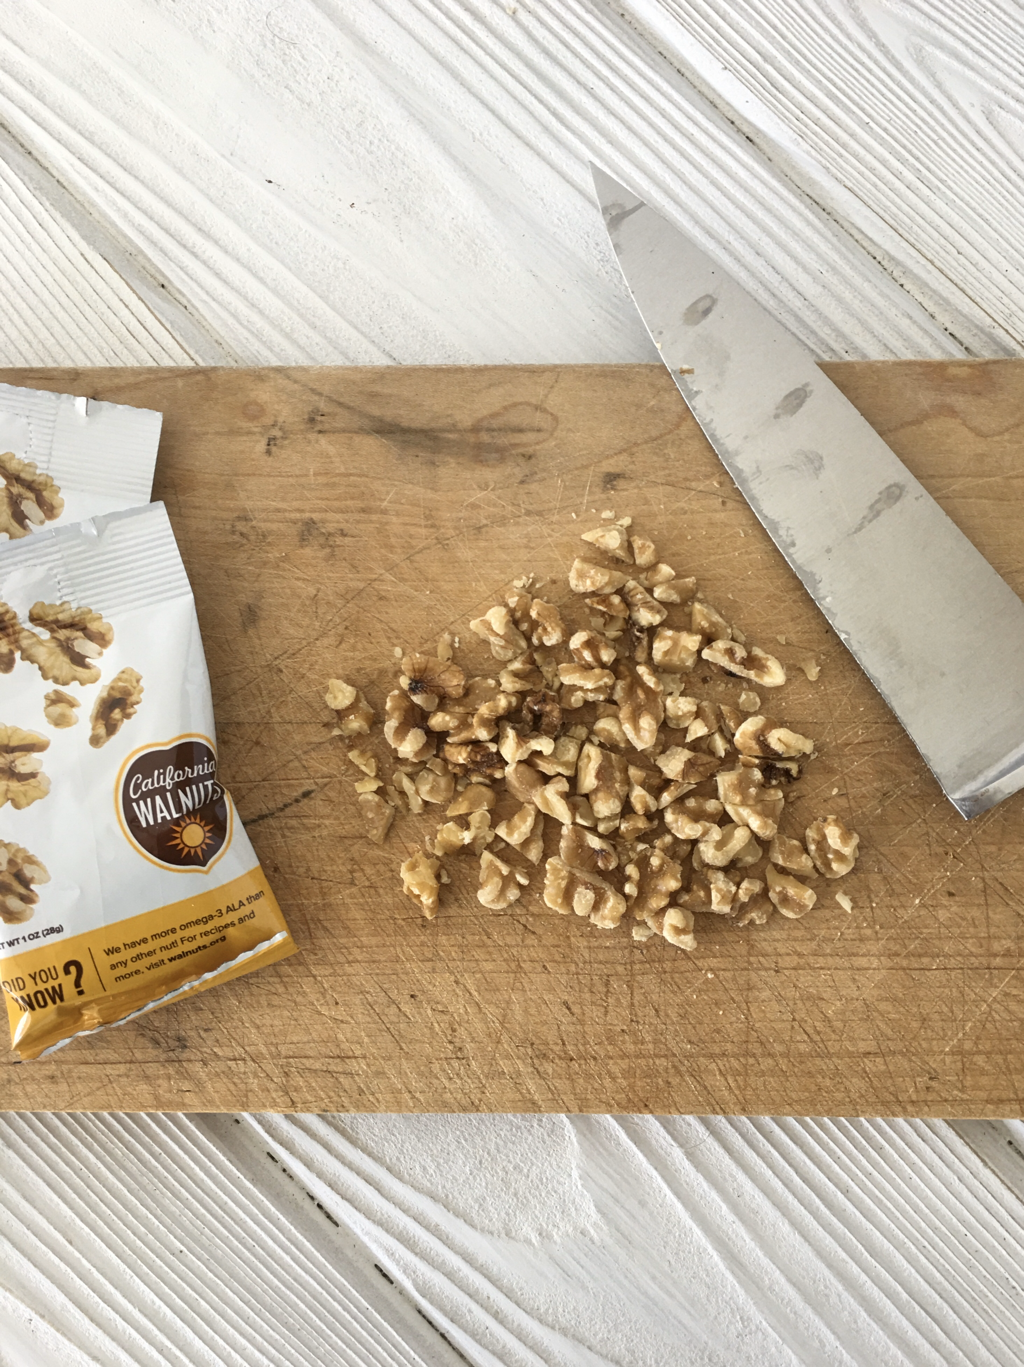
A handful of California walnuts is a versatile snack and can satisfy any taste preference, from savory to sweet. Regardless of your flavor preference, walnuts are the only nut to provide an excellent source of the plant-based omega-3, ALA (2.5g/oz).
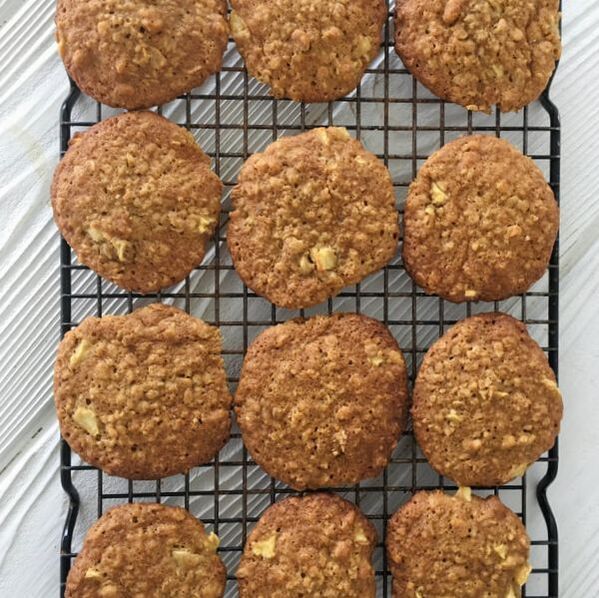
These apple walnut oatmeal cookies are easy to make and so yummy. Apples and California Walnuts just go together...add oats and you have perfectly delicious crispy and chewy cookies.
You have a couple of sweetener options when making these cookies. I use coconut sugar instead of granulated white sugar because it is lower on the glycemic index, but granulated sugar works well for making these cookies too.
If you are running short on butter, you can use less by reducing the butter down to 1/2 cup (1 stick). They will still be delicious, but they will be more like muffin tops or muffin cookies and won't be as crispy. (pictured below) If you want to make them more cookie like and less muffin like, use the full amount of butter (original recipe) and they will spread more and be crispier on the edges. We prefer the crispier edges of the cookies over the "muffin cookies". 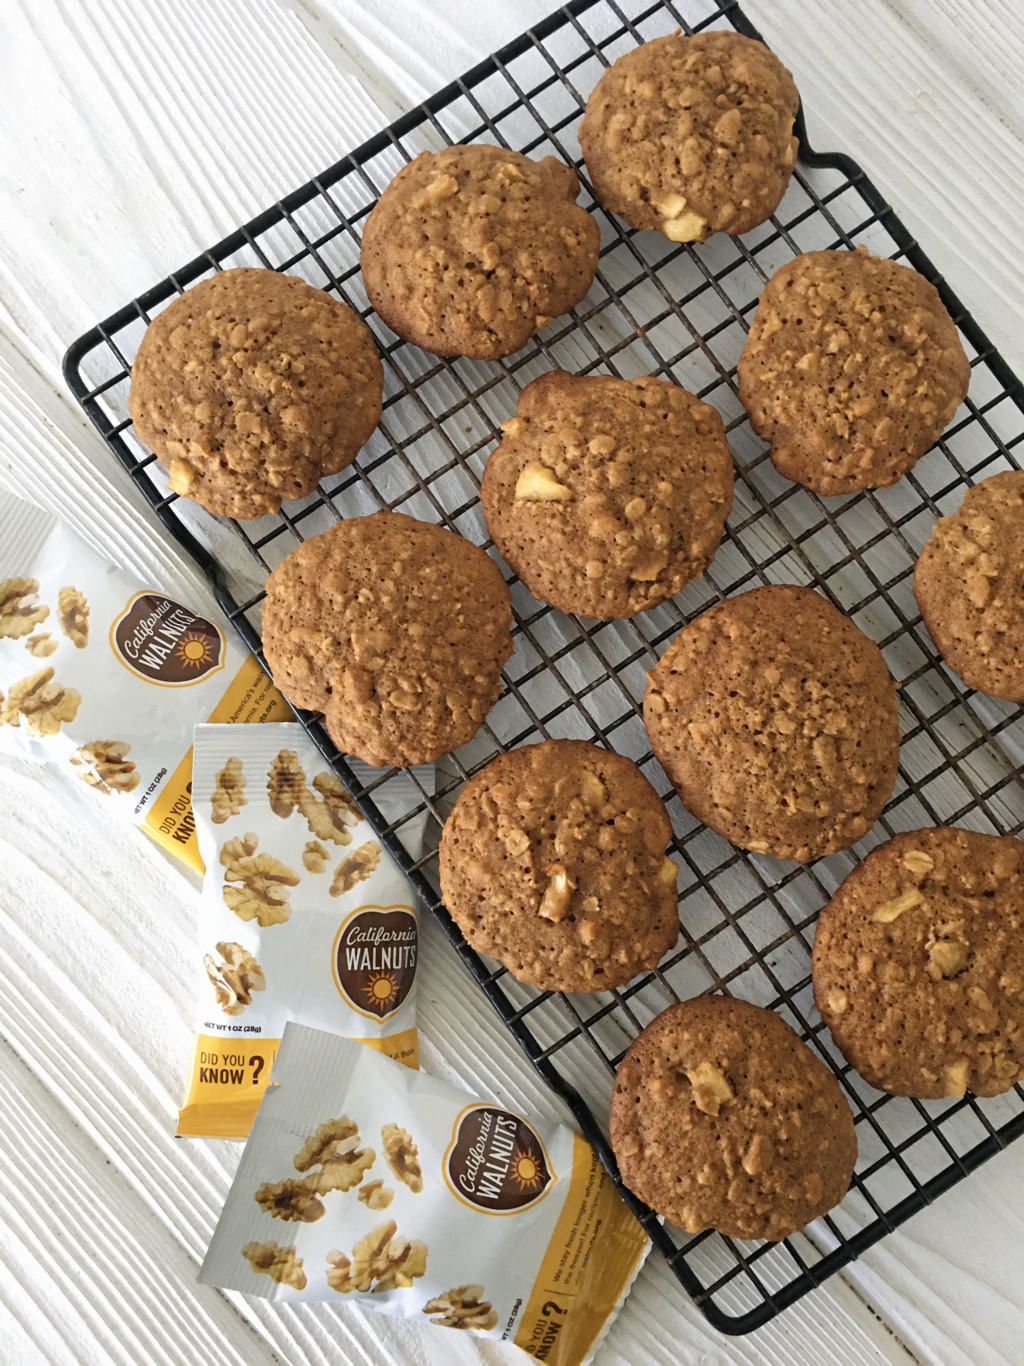
Another tip, you can store butter in the freezer. I always keep extra butter in the freezer so I never run out. You can also store nuts in the freezer to keep them fresh longer. If your butter was stored in the freezer though, it will need to sit out for a while before making cookies.
Ingredients:
1 ¼ cups flour ½ tsp. baking powder ½ tsp. baking soda ¼ tsp. salt 1 tsp. cinnamon 3/4 cup (1 1/2 sticks) butter softened (I always use real butter) 3/4 cup coconut sugar or granulated white sugar 1/3 cup packed brown sugar 1 ½ tsp. vanilla extract 1 egg 2 Tbsp. milk 1 cup apple, peeled and diced (about 1 medium apple) 1 cup quick or old fashioned oats 1 cup California Walnuts, chopped Directions: 1. Preheat oven to 375 degrees F. 2. Combine flour, baking powder, baking soda, salt and cinnamon. Set aside. 3. Beat butter, sugars, and vanilla extract in large mixer bowl until creamy. Beat in egg. Gradually beat in flour mixture and milk. Stir in apple, oats, and California Walnuts. 4. Refrigerate dough for at least one hour. 5. Drop by rounded tablespoon onto un-greased baking sheets. (I always line my cookie sheets with parchment paper.) I also use a cookie scoop which makes perfectly rounded tablespoons. 6. Bake for 12-13 minutes or until edges are crisp but centers are still soft. Cool on the baking sheet for 2 minutes then move to a cooling rack to cool completely. Makes about 2 1/2 dozen cookies.
Pin on Pinterest

Yum on Yummly
0 Comments
Disclosure: This post contains affiliate links. If you make a purchase through one of my links, I will receive compensation.
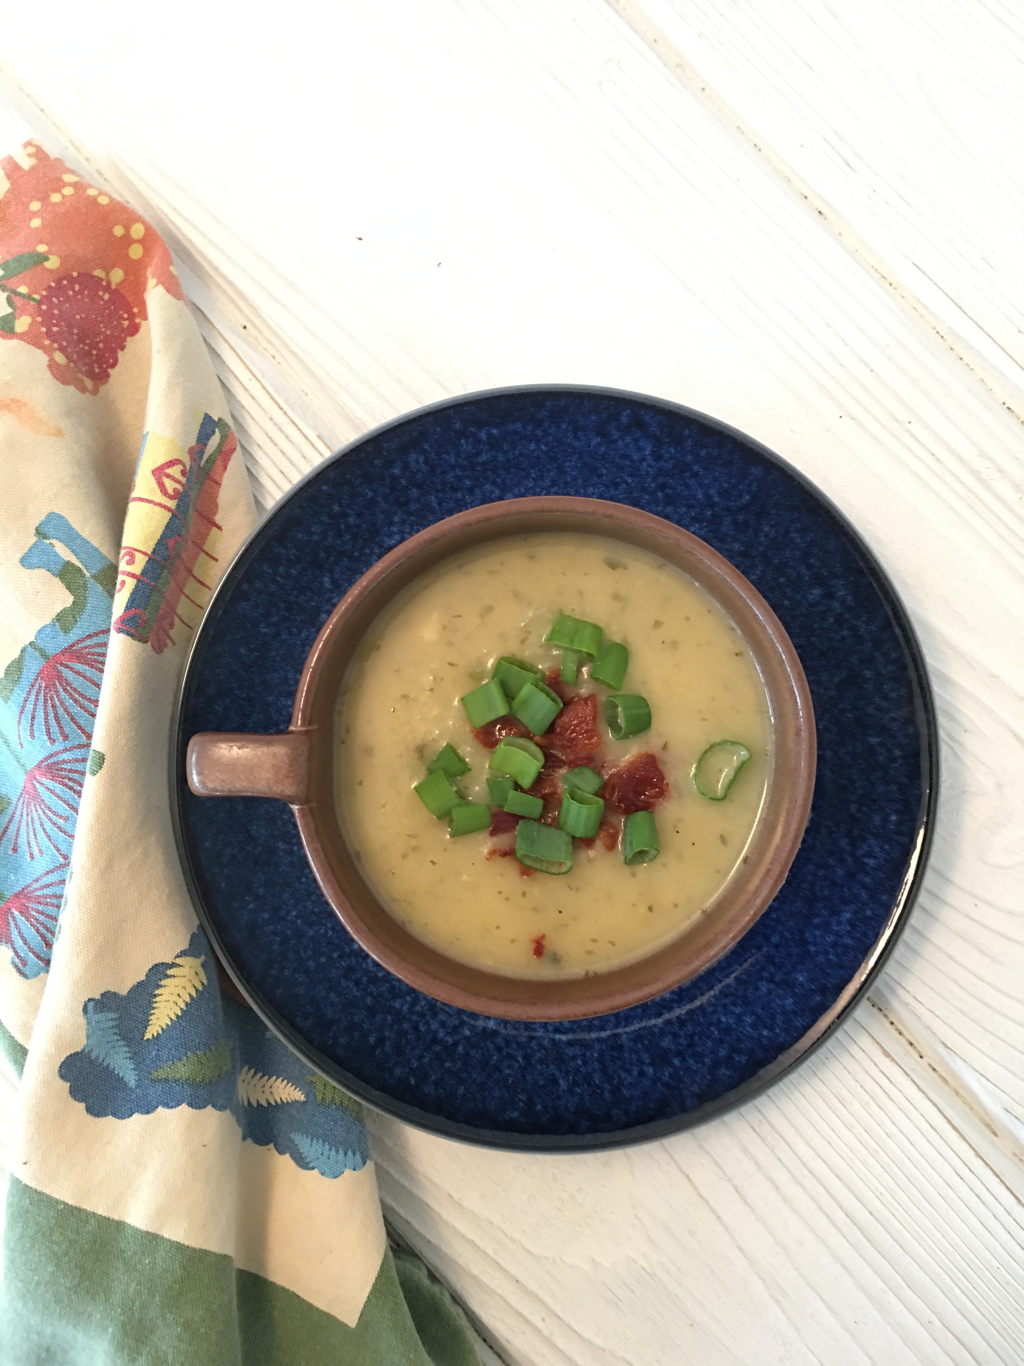
I was inspired to make this potato and onion soup because a neighbor gave us a big bunch of beautiful green onions from her garden. They aren't like the green onions you get in the store, they are so fresh and so much bigger. We are putting in a huge garden this year and will plant lots of onions. Even if all you have is grocery store green onions or even just regular onions, make this soup! It is both delicious and healthy.
I recently saw this story on The Healthy Home Economist of a 90 year old corona virus survivor who credited her homemade potato soup as having helped her survive. It was a really simple recipe with vitamin C rich onion and potatoes.
My recipe feeds a whole family since there are 6 of us, but you could easily halve it. You can also buy bone broth at the store or you may have some in your freezer if you want the added health benefits of bone broth. 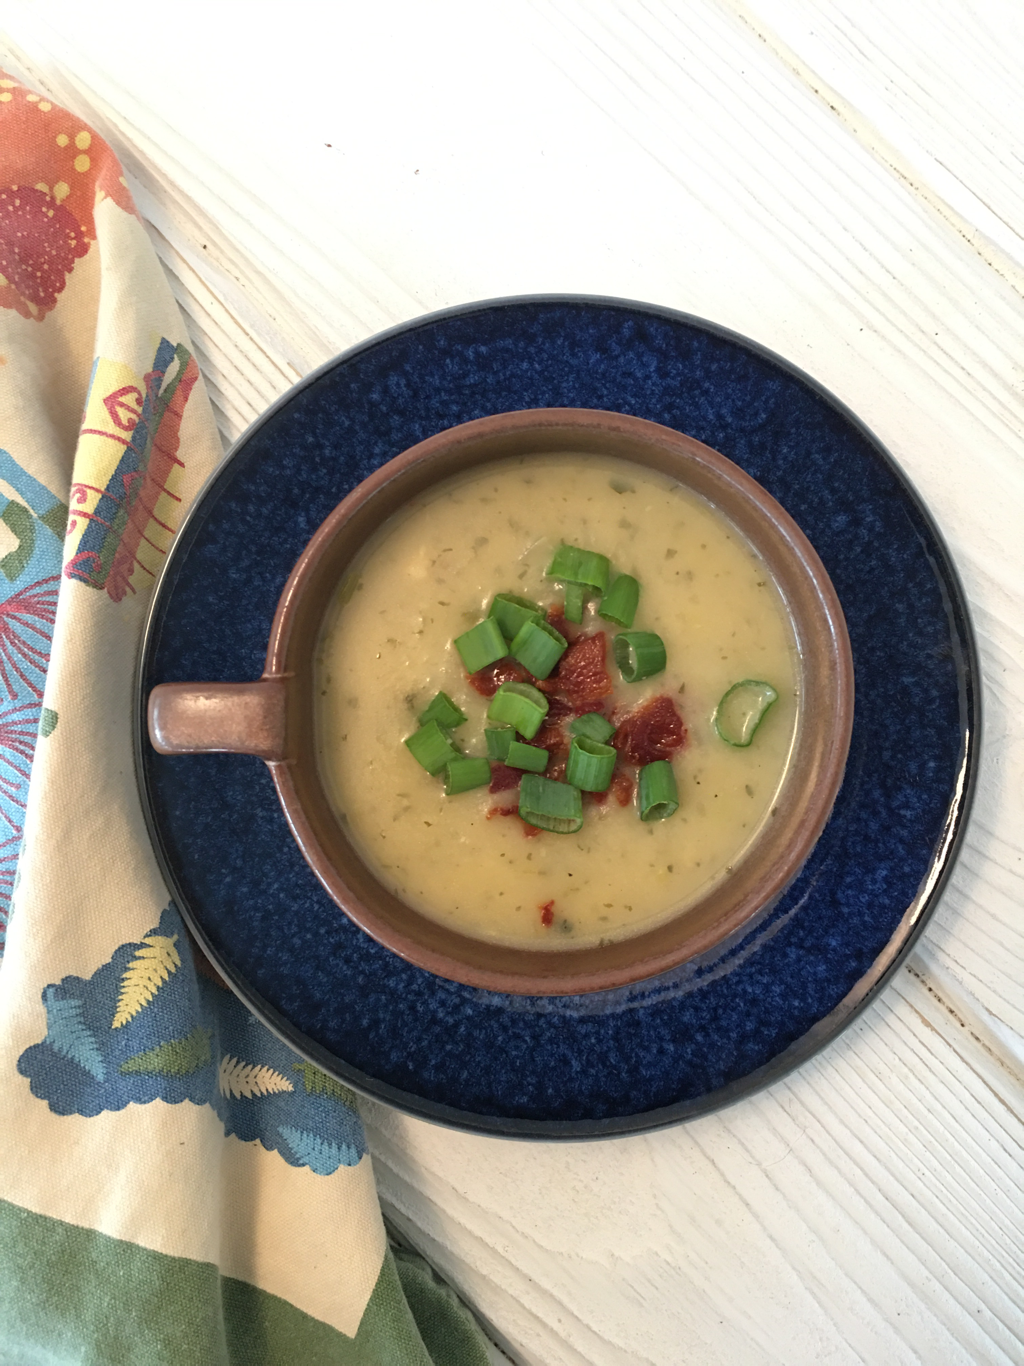
I made a big pot of this soup the other night for our family and we finished it off that night. It was delicious! It was such a hit, the boys asked for more the next day.
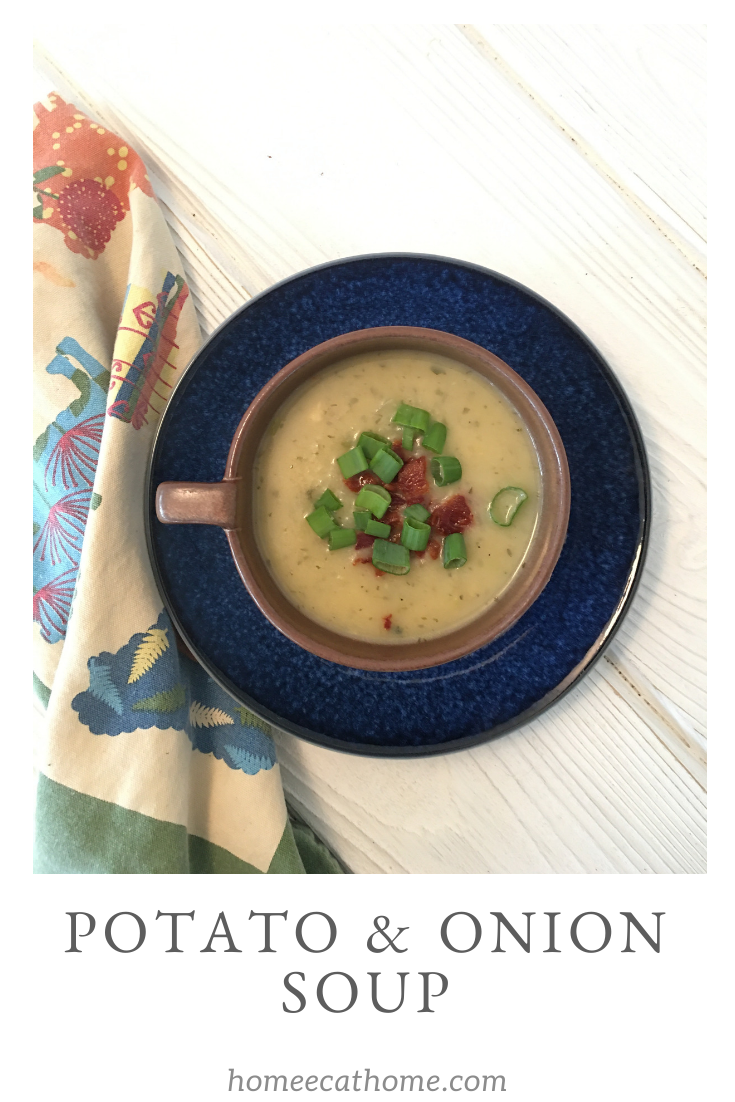
Potato and Onion Soup
Serves 6 (halve if needed) Ingredients: 3 T. butter 1-2 medium onions, diced (I used sweet) Big bunch green onions, sliced (tops reserved for garnish) 4 cloves garlic, minced 2 T. flour 8 cups vegetable or chicken broth (or mix them) 1 T. dried parsley 6-8 russet potatoes, peeled 1 cup whole milk or half and half Salt and pepper to taste 12-16 oz. bacon, cooked and crumbled (optional) Instructions: 1. Melt butter in a large Dutch oven or stock pot. Saute diced onions, the sliced white part of the green onions, and garlic for several minutes over medium heat until tender. 2. Add flour to onions and stir for a minute or two. I add some salt and pepper here to add another layer to the flavor. 3. Next add broth, parsley, and potatoes. I peel the potatoes and add them whole. You could chunk them to cook faster. 4. Simmer over medium heat until potatoes are tender enough to break up with a potato masher (amazon link). 5. While soup is cooking, you can prepare the bacon. I cut it up with kitchen shears (amazon link) and then fry it in an iron skillet. (amazon link) Set aside the bacon crumbles to use as a garnish. 6. When potatoes are nice and tender (you can poke them with a fork to test them) mash them into the soup with a potato masher. 7. Stir in milk or half and half. Salt and pepper to taste. 8. Garnish with sliced green onion tops and crumbled bacon.
Pin on Pinterest
Disclosure: This post contains amazon affiliate links. If you make a purchase after clicking on one of my links I will receive affiliate income.
Family meal time has always been important to us, but it came in many different forms in our normal busy lives before social distancing. I cooked often, but we weren't always home for dinner. Sometimes dinner was sandwiches or whatever we could find, quickly scarfed down at the breakfast bar after returning from swim practice. I know that sports, band, school clubs, etc. are good for our kids, but I don't miss the busyness, at least not yet. I'm sure I will at some point and when we do get to enjoy community again it will be exciting for all of us. Maybe we will appreciate each other so much more.
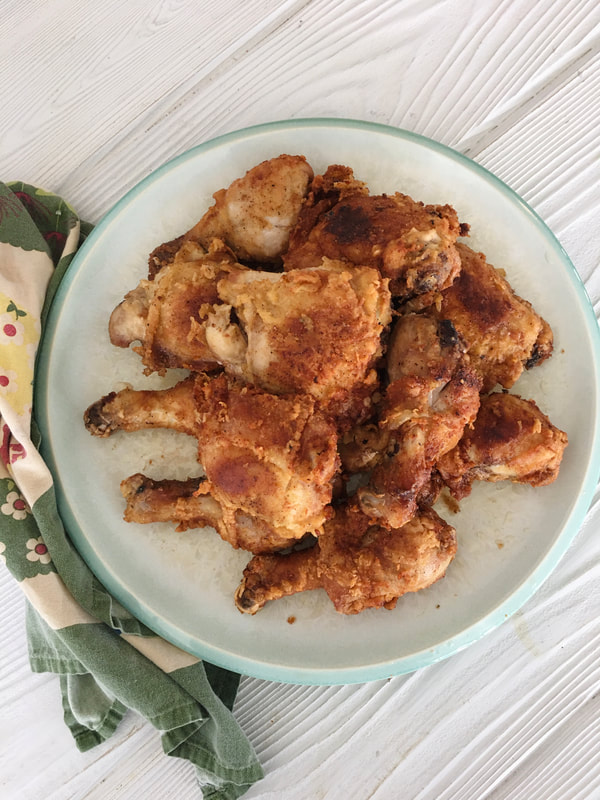
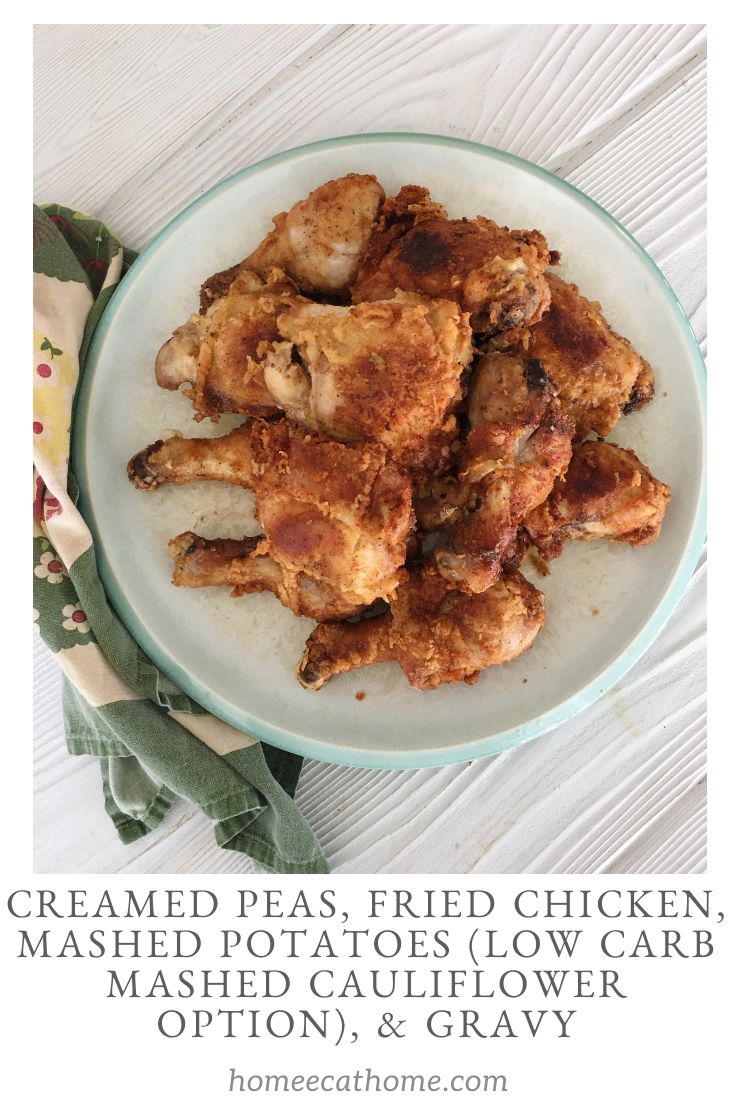
Since we are home all the time now including my husband who always had work trips, meetings, dinners, etc. we have been really enjoying family dinner time. I have been cooking every day. I think most of us are cooking more now that we are all home. I recently made fried chicken which I hadn't made in years. I originally posted this recipes way back in 2012 and it is still one of my favorite home cooked meals.

This is the best cream sauce for making creamed peas or spinach. This is also a great way to get kids to eat their vegetables. My boys love creamed peas or spinach.
White Sauce for creamed vegetables 2 Tablespoons butter 2 Tablespoons flour ½ teaspoon salt Dash of pepper 1 Cup milk Frozen peas or spinach 1. Melt butter in saucepan over low to medium heat. 2. Stir in flour, salt, and pepper. Cook 1 minute. 3. Stir in milk. Cook until a thick sauce, stirring frequently. 4. While making sauce, cook frozen vegetables according to package instructions in microwave or saucepan on stovetop. 5. Add cooked peas, spinach, or other vegetable to cream sauce and stir to combine. Sprinkle with extra freshly ground pepper for flavor. You can also use canned vegetables in a pinch, but frozen are better. Drain before adding to white sauce. As you can see in the picture the peas are two different shades of green. I only had ½ bag of frozen peas on hand so I added a can of drained peas.
There is something wonderfully comforting about our favorite home-cooked meals. This flavorful crispy fried chicken is one of my family's favorites. I hope you enjoy it too.
Fried Chicken Peanut or Vegetable oil Whole chicken cut-up or your favorite assortment of cut chicken pieces Milk Flour Cajun seasoning (I useTony Chachere's Original Creole Seasoning) (Amazon link) Salt and pepper to taste 1. Heat about ½ inch oil in a heavy skillet (I use an iron skillet) at medium high heat. 2. Pour some milk into a shallow dish and put flour in another shallow dish. Season flour with the Cajun seasoning-I have never measured the seasoning, but you can be liberal I would guess at least a teaspoon or more. 3. Dip chicken pieces into milk then into seasoned flour. Lower chicken pieces gently into hot oil. Sprinkle with more Cajun seasoning. Loosely cover skillet with a sheet of foil or use a splatter shield and cook until the bottom side is browned. Using tongs gently lift chicken pieces to turn them over. Sprinkle again with Cajun seasoning. Recover and cook until evenly browned and cooked through. Salt and pepper for more flavor while frying. Remove to platter to serve. Mashed Potatoes Several potatoes depending on how many people you are serving (I use 6 to 8 potatoes.) Russet potatoes or Yukon Gold are my favorites to mash. Half and Half or part cream & part milk (If all you have is milk, use straight milk) Butter Salt 1. Peel and chop potatoes into large chunks. 2. Put in a large pot, cover with water and bring to a boil. Reduce heat to medium and cook until potatoes are tender. 3. When potatoes are tender, drain and mash them with a potato masher (amazon link). If you don’t have a potato masher, you can use a mixer. 4. Add half and half or cream and milk or just milk to thin the potatoes. Stir in butter for flavor 4 to 6 Tablespoons should be good. Stir in salt for flavor. Continue to stir and mash until you get the consistency that you want. You can always thin with more half and half. Taste to make sure you get the flavor you want. Mashed Cauliflower (low carb) We have been eating lower carb mashed cauliflower which we love. I first steam the cauliflower til soft enough to mash. I use my emersion blender (amazon link) to mash cauliflower because it takes more than a potato masher to get the consistency of mashed potatoes. I then make it the same way I make mashed potatoes. Gravy 2 Tablespoons meat drippings from fried chicken 2 Tablespoons flour or 1 Tablespoon cornstarch 1 cup chicken broth salt and pepper If you would like to make more gravy, simply double the recipe. If you like your gravy thinner, add more water. Flour will give you a cloudy gravy and cornstarch will give you a clear gravy. 1. Heat meat drippings in skillet. 2. Add flour or cornstarch. Cook and stir to make a paste called a roux. 3. Add broth and continue to cook and stir until gravy thickens and bubbles. Salt and pepper to taste.
Pin on Pinterest
Disclosure: There are affiliate links in this post. If you make a purchase through my links, I will receive compensation.
So this isn't even really a recipe, but I realized that with more people cooking at home during the quarantine, people want ideas for things they can stock in their freezers and pantries and prepare quickly and easily. We have been making these semi-homemade pizzas for a several months and love them. Honestly, we like them better than any takeout pizza available locally and they're less expensive to make.

Bonus: Your kids can make dinner and they will probably really like getting to help. Now is the time to take advantage of all of this family time at home and let the kids learn some life skills.
The boys keep begging to make more cooking videos since we did a facebook live making banana bread. We had trouble with our internet connection during our facebook live so I put this video on YouTube. This video was a last minute decision so it's real...no makeup and I wore the same lounge pants and t-shirt for two days. #quarantinestyle You'll see the ingredients in the video, but our favorite pizza crust is Stonefire (purchased from Kroger). I keep a few extras in the freezer. We also like this pizza crust (amazon link) although it's less expensive at our local grocery. I also keep shredded mozzarella and pepperoni in the freezer. Some pepperoni is shelf stable so you can keep it in the pantry. If you purchase it from a non-refrigerated shelf in the store, it's shelf stable. Onions can store for a couple of months in a pantry. You may like to keep some canned olives and canned pineapple in your pantry too. Pizza is so versatile you can use your favorite toppings based on what you have available.
Ingredients:
Pizza Crust Pizza Sauce Mozzarella cheese Topping ideas: Pepperoni Sausage Bacon Spinach Tomatoes Olives Onion Mushrooms Artichoke hearts Peppers Pineapple Preheat oven before assembling pizza. Use oven temperature and recommended time from pizza crust package. Assemble pizza then bake. We bake right on the oven rack (no pan) for a crispier crust.
Pin on Pinterest

|

Welcome to Home Ec @ HomeHi, I'm Faith, a former Family and Consumer Science teacher turned food blogger. I love God, my family, and food. You can usually find me in the kitchen preparing family friendly, homemade recipes and taking lots of pictures. 
Still Goldens, Southern, IL
 Fan Favorites

The Best Dry Brined Turkey with Citris and Fresh Herbs

 Dehydrating Pears and Apples in the Instant Pot Duo Crisp Dehydrating Pears and Apples in the Instant Pot Duo Crisp
 
 |
 RSS Feed