|
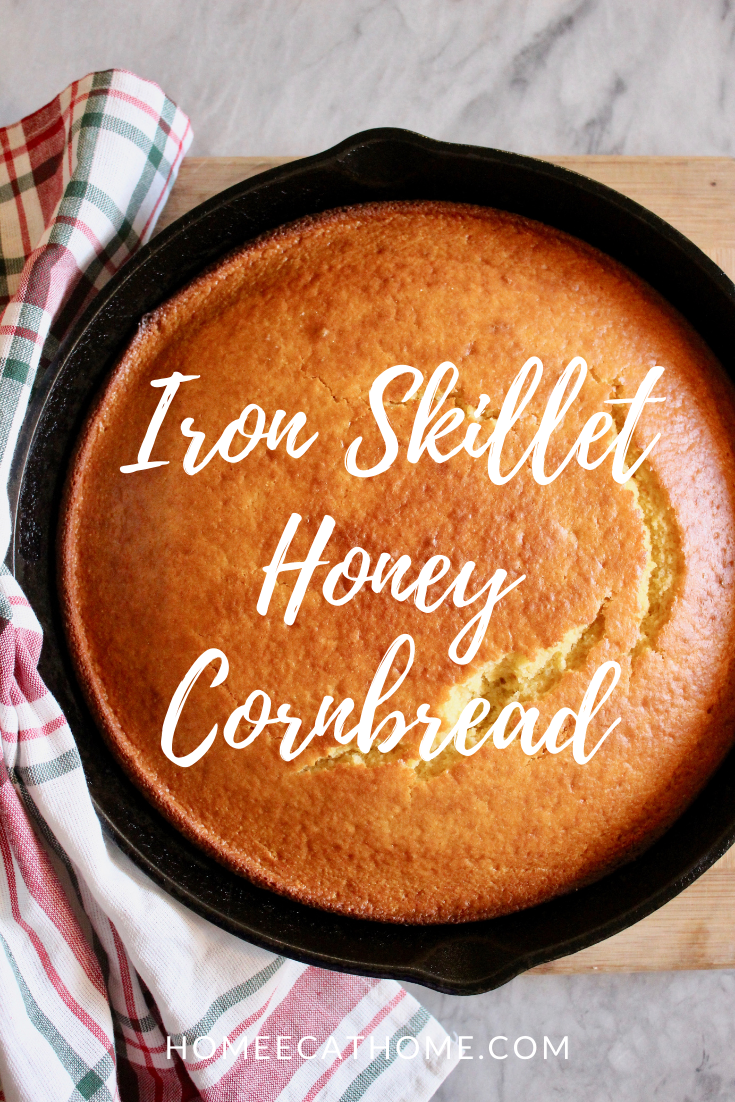
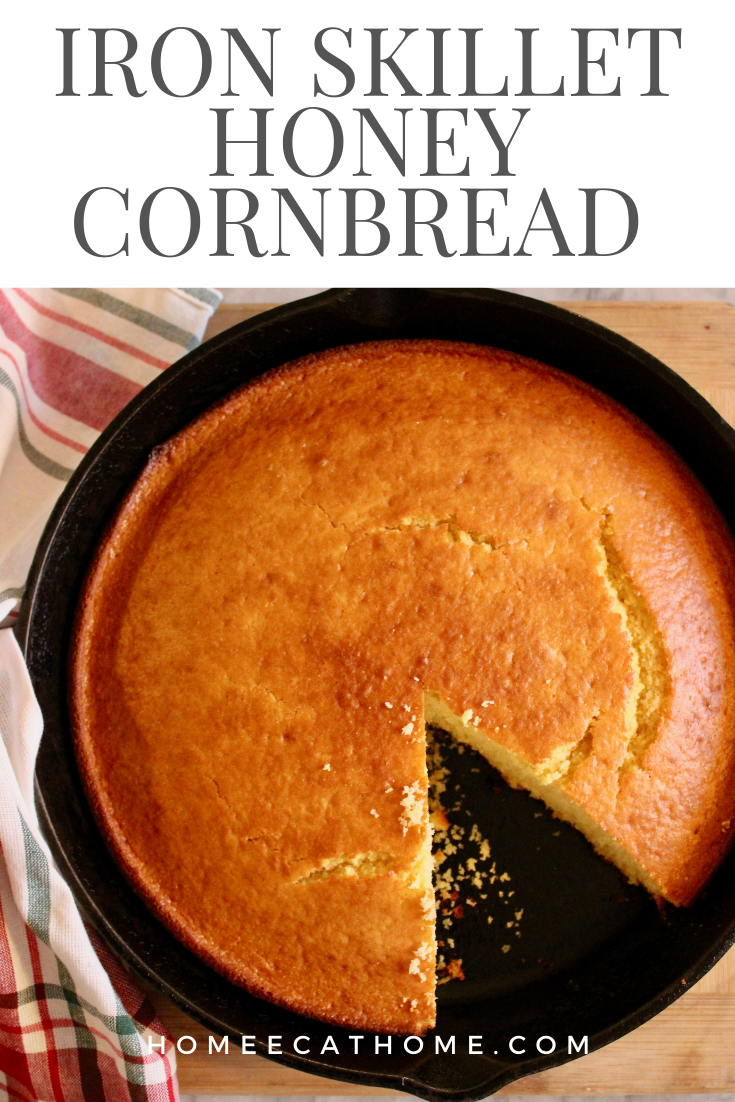
Sweet honey cornbread baked in an iron skillet is the perfect addition to a summer BBQ or a warm bean soup on a cool fall day. You will love its golden crispy edges with buttery moist bread inside.
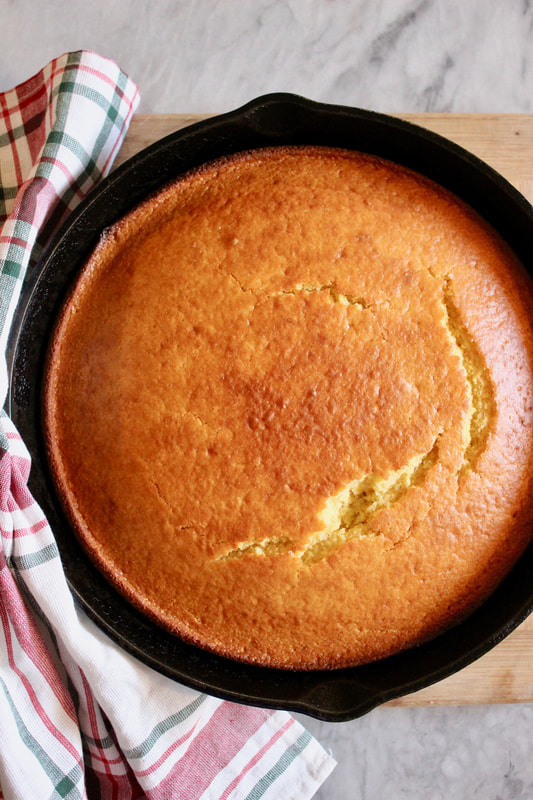
I have been making honey cornbread in an iron skillet for several years and I prefer the shape and size over using a rectangle pan. Isn't it beautiful. Plus there is the added benefit of iron being absorbed into the bread from the pan while it is baking.
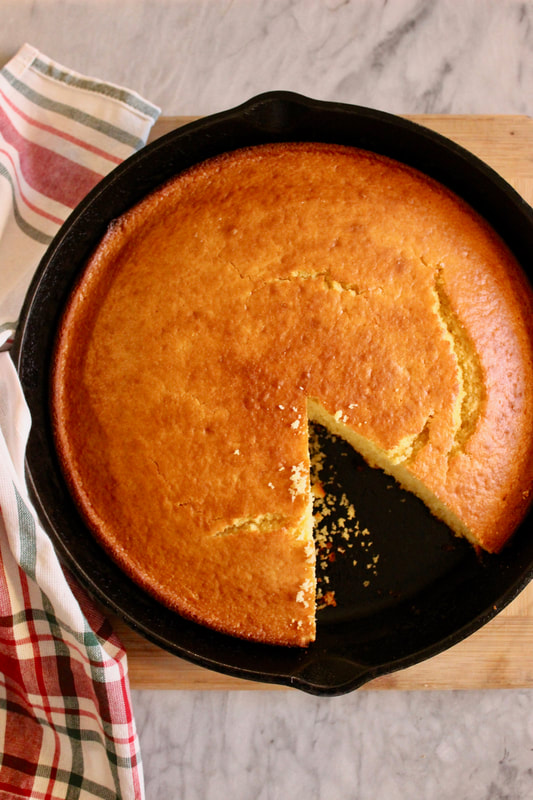
This really is the best corn bread I have ever made. The boys love it and ask for any leftovers for a snack.
What size skillet should I use to make this cornbread recipe?
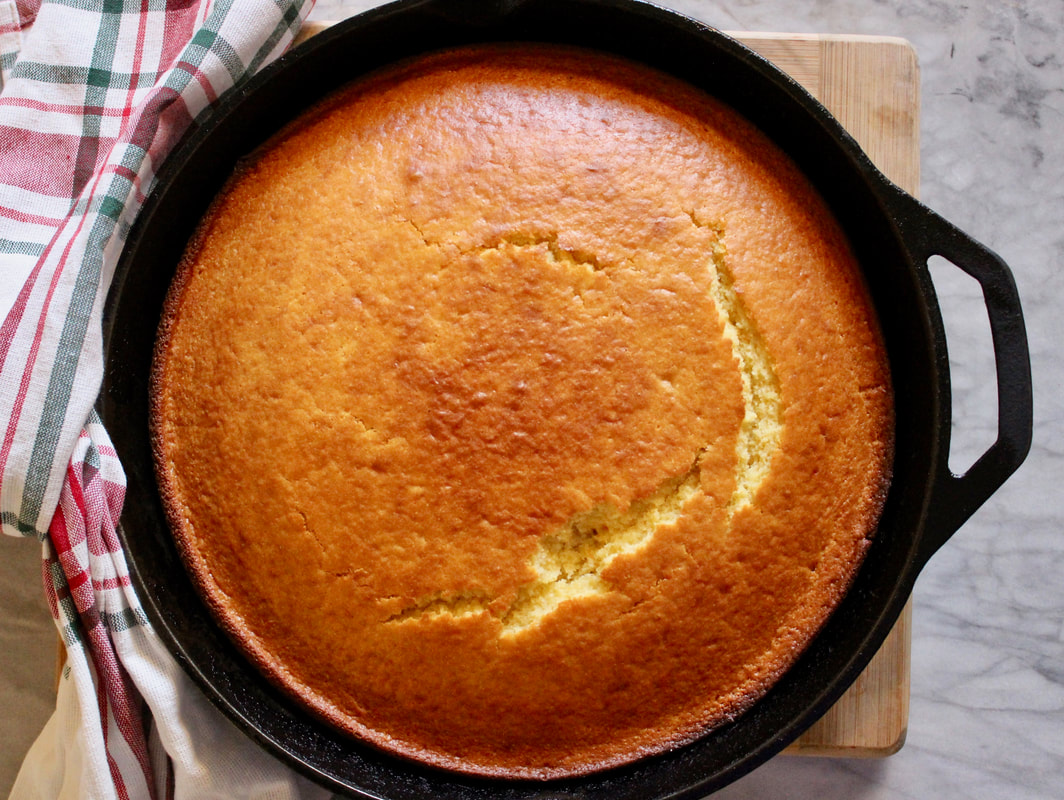
I use a large 12 inch iron skillet which is the perfect size for this recipe.
This cornbread is on the sweet side and is great with a bowl of chili or as a sweet treat smothered in butter and honey or apple butter.
Iron Skillet Honey Cornbread
2/3 cup sugar 1/4 cup butter, softened 4 eggs 1/2 cup honey 1 1/3 cups milk 2 1/3 cups flour 1 1/2 Tablespoon baking powder 1/2 cup corn meal 1 teaspoon salt 1. Preheat oven to 400 degrees. 2. Cream sugar and butter. Add in eggs, honey and milk and mix well. 3. Mix together flour, baking powder, corn meal and salt. 4. Mix dry ingredients with wet ingredients carefully. Do not over-mix. Batter will be lumpy. 5.Pour batter into greased iron skillet. I use my large 12 inch iron skillet. I butter the skillet really well or rub coconut oil all over it before pouring in the batter. I have found that coconut oil works really well for greasing cake and bread pans. 6. Bake for about 25 minutes. Do not over-bake. You want nice moist cornbread, not dry cornbread.

11 Comments
We are a participant in the Amazon Services LLC Associates Program, an affiliate advertising program designed to provide a means for us to earn fees by linking to Amazon and affiliated sites
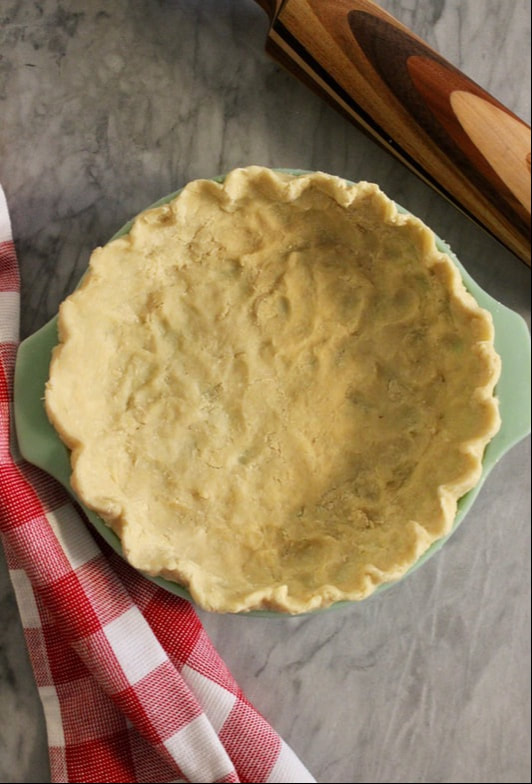
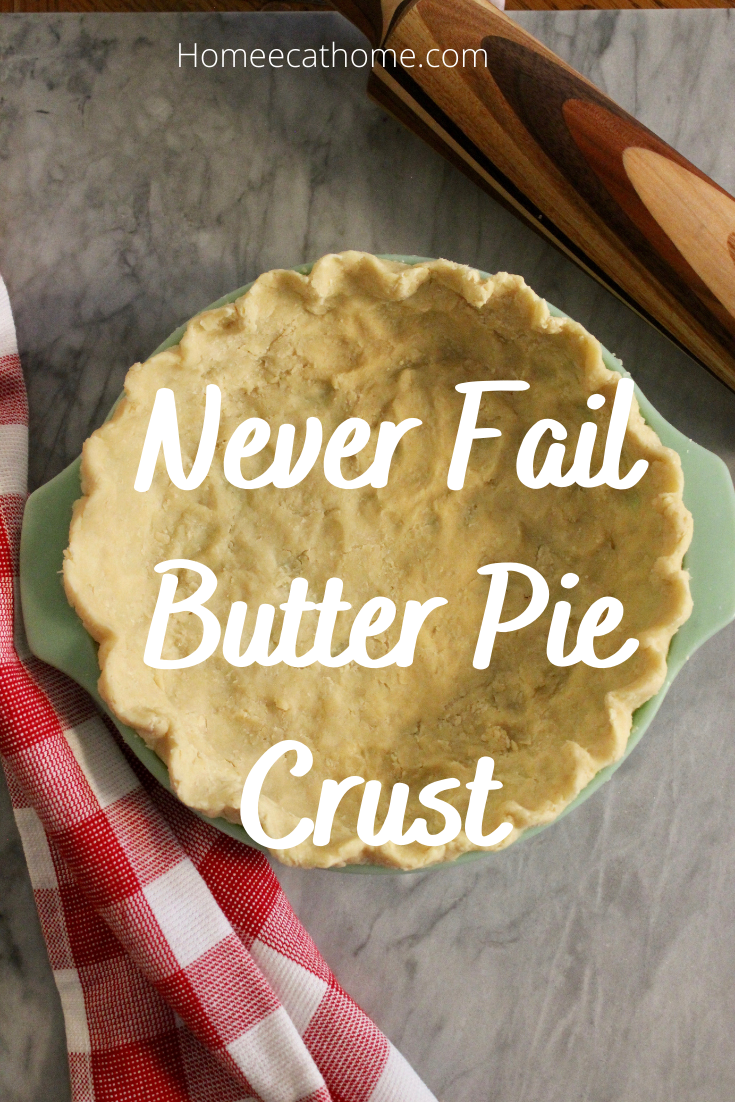
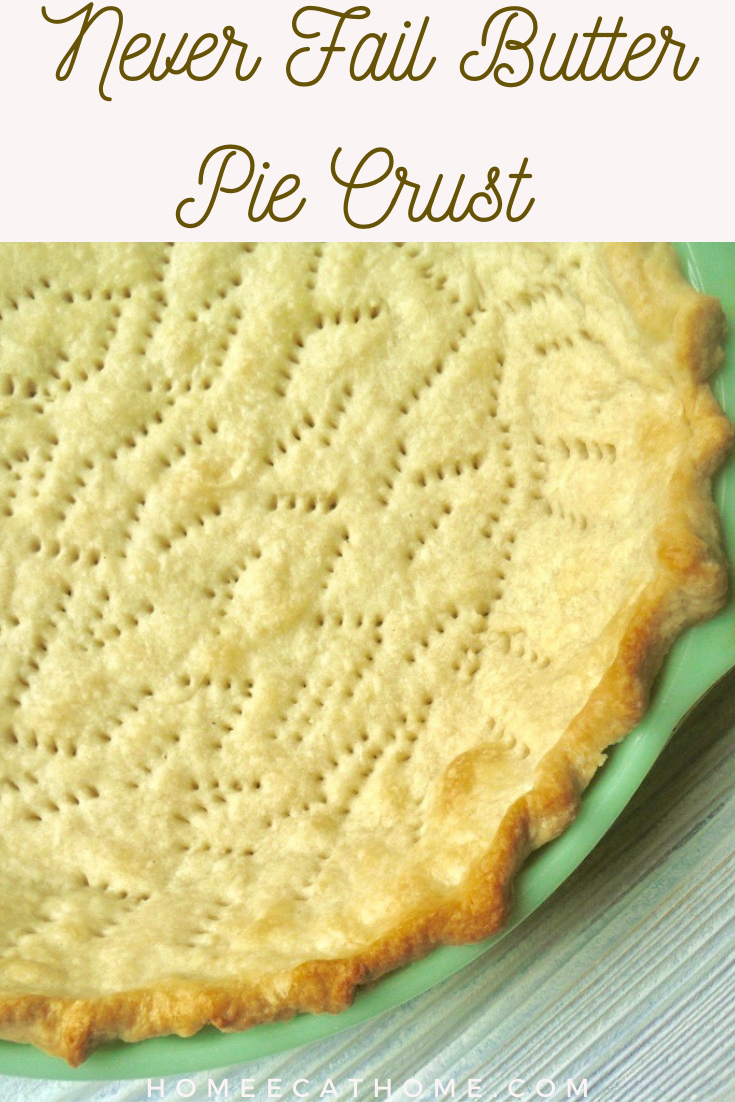
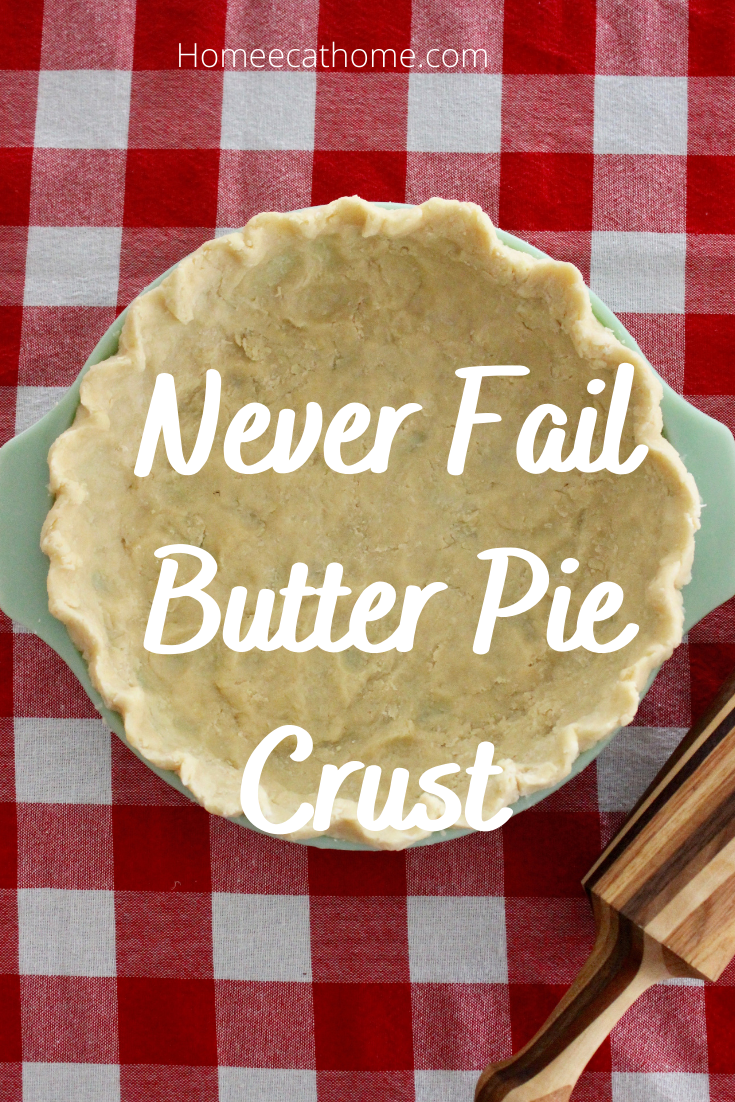
Nothing says fall like pumpkin pie. But before you make the most delicious, mouthwatering creation of creamy pumpkin filling with aromas of fall spices wafting through the house, you have to make a good pie crust. This never fail butter pie crust is my favorite all around pie crust. It's flaky, buttery and full of delicious flavor.
This has been my go-to pie crust for several years now, but the one I had been making wasn't as good as it could have been and if I am going to go to the trouble to make a pie crust it should be really good. My husband who really should be a food critic, determined that the crust recipe I had been making was industrial and lacked flakiness. He was right. This pie crust is so much better!
So I decided to try my hand at my Aunt Carol's Never Fail Pie Crust again with a few tweaks. I had abandoned this recipe because it called for shortening which I avoid buying since it is such an unhealthy fat. I use real butter in place of shortening. To make the dough easier to handle, I freeze the butter ahead of time and use ice water. The result: A delicious, flaky pie crust made with butter instead of shortening.

Can you freeze leftover pie dough?
Yes. If you have extra dough leftover, simply press it into a ball and store in a zipper seal bag or container in the freezer. Make sure to label with the date and contents. When ready to use thaw in the fridge for several hours or even overnight.
Can you make pie crust ahead and refrigerate it?
Yes, you can make your pie crust ahead of time and refrigerate or freeze it. I often make pie crust the day before I need it and either press it in a ball shape to roll out later or form it in a pie pan, cover with plastic wrap to keep it from drying out and refrigerate overnight. This is really helpful when entertaining or planning a big holiday meal.
Special Supplies:
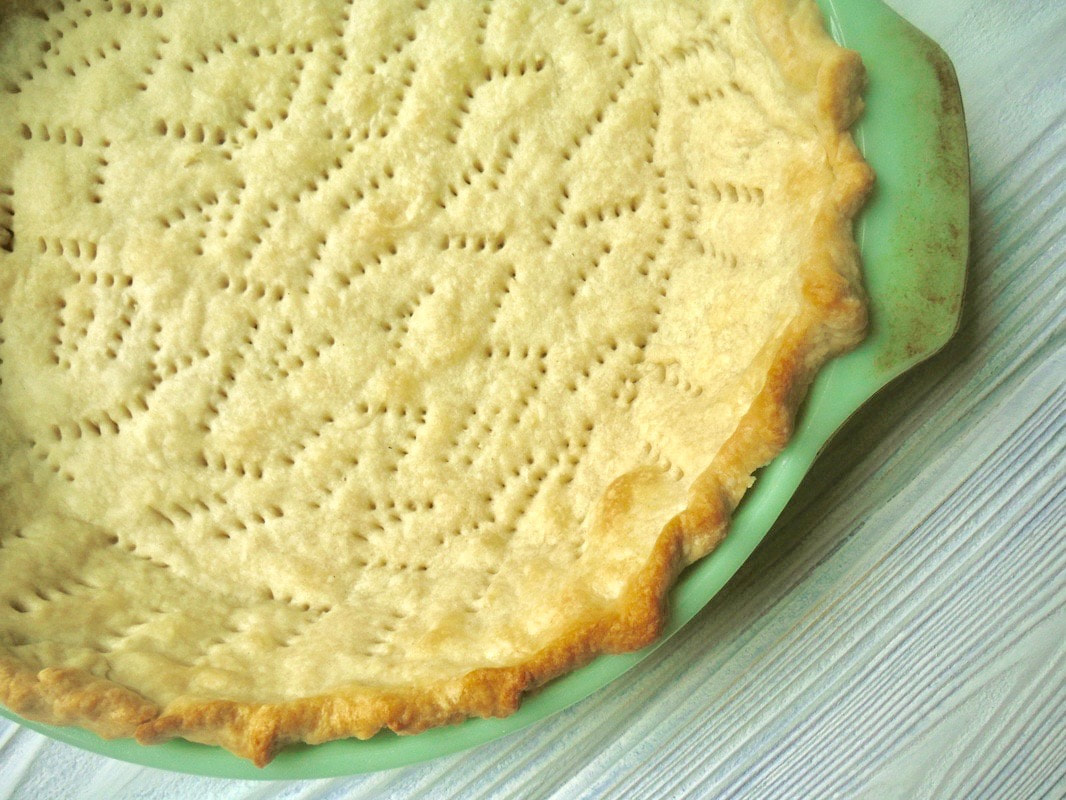
Rolling pin (affiliate link) Pastry blender (affiliate link) If you are really into making pastries, you might consider a marble board (affiliate link) to help keep pastry cold when working with it. I received one like this for Christmas last year and love it. Mine is the larger 16 X 20 size so I can roll out large sheets of dough. Ingredients: 3 cups flour 1 1/4 cup cold butter, cubed (2 1/2 sticks) 1 tsp. salt 1 egg, well beaten 5 Tbsp. ice water 1 Tbsp. vinegar 1. Cut up butter and put it in the freezer for a while before starting. 2. Cut butter, flour, and salt into coarse crumbs with a pastry blender. This takes a little of work since the butter is frozen. You can also process this step in a food processor. 3. Combine egg, vinegar, and water. Pour liquid into flour mixture all at one time. 4. Blend with a spoon just until all the flour is moistened. If it is crumbly, just start pressing it together with your hands until it becomes a soft ball of pie dough. 5. Roll 1/2 of the dough out on a lightly floured surface. Fold flattened dough in half and then in half again so that it can be easily lifted into the pie pan. Lift the dough into the pan and unfold so that it covers the pie pan. 6. Press the dough into the pan and trim and shape the edges for a one crust pie. For a two crust pie, pour filling into the pie. Then cover with top crust, seal and shape the edges. 7. To bake without filling, generously prick sides and bottom of pie crust with a fork to prevent the crust from collapsing into the pan. Or line with foil and pour pie weights or dry beans onto the foil to weigh the crust down and prevent it from shrinking into the pan. 8. Bake for 15 to 20 minutes or until golden brown at 425 degrees. If I use pie weights, I bake for 15 minutes and then bake for another 5 to 7 minutes after removing the foil and pie weights. If making a two crust pie, follow baking instructions in the filling recipe. This recipe makes enough dough for two pie crusts.
Pin on Pinterest
We are a participant in the Amazon Services LLC Associates Program, an affiliate advertising program designed to provide a means for us to earn fees by linking to Amazon and affiliated sites.
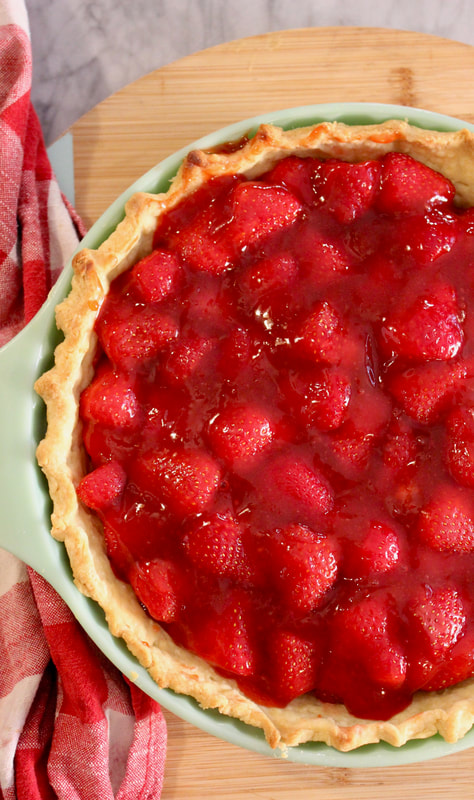
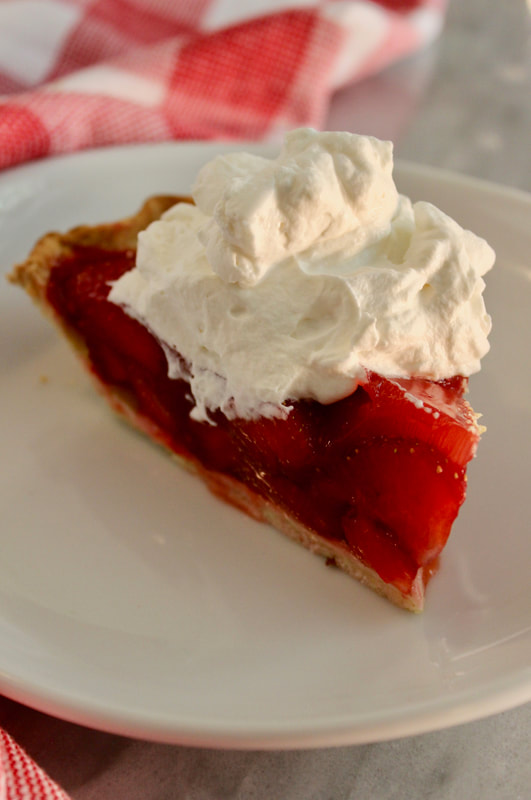
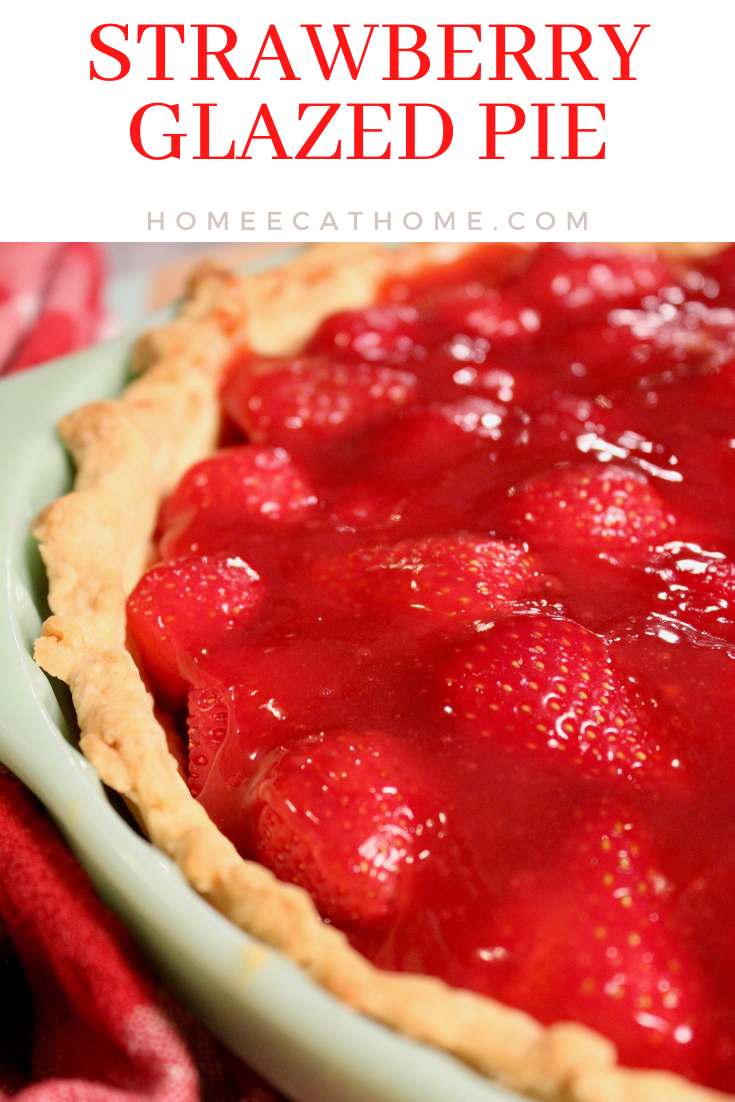
Strawberry pie, with layers of juicy strawberries surrounded by sweet glaze on a crispy crust must be the quintessential summer dessert. I remember bringing home a strawberry pie from Shoney's restaurant when I was a kid and thinking it was the best thing ever.
When your husband goes to a farm auction and brings home a gorgeous tray of strawberries, you make strawberry pie or easy strawberry chia seed jam. These strawberries were so sweet on their own, the boys literally ate half of them before I could make anything.
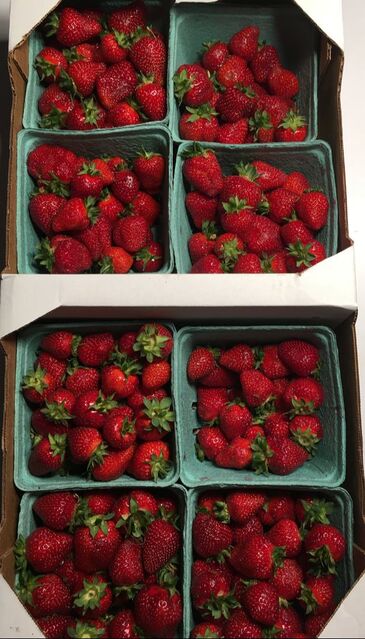
*Fresh picked strawberries are sweeter and juicier than strawberries that are picked before they ripen to go to grocery stores. If using fresh picked strawberries that are naturally sweet, use less sugar to make this pie. If using store ripened less sweet strawberries, you may want to use more sugar. The recipe below has a range in the amount of sugar so that you can adjust depending on the sweetness of your strawberries.
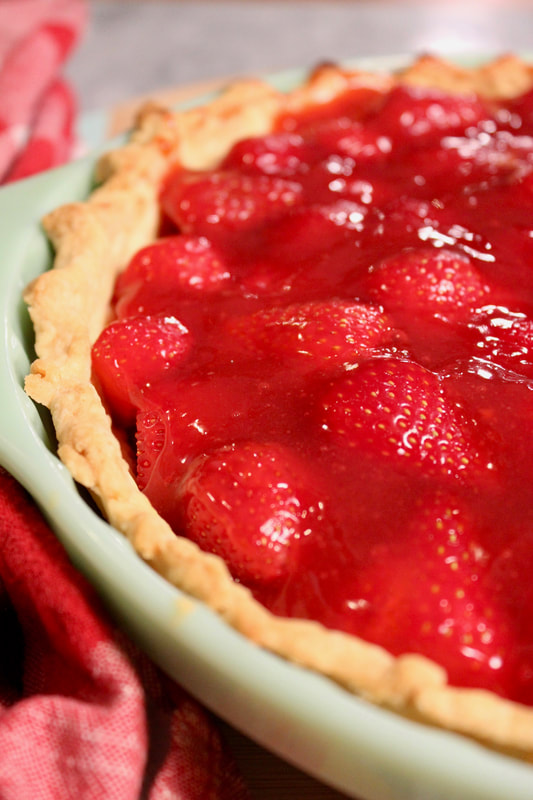
This pie is both delicious and simple. I love using homemade glaze made with common ingredients. No artificial dyes or flavorings that you would find in packaged store bought glaze. The best part is that making homemade glaze is really pretty easy.
1. Crush about 1/2 lb. strawberries with a meat chopper (pictured below) (affiliate link) or a potato masher.
2. Cook the mashed berries and 1 cup water at medium high heat for about two minutes to help break down the strawberries. 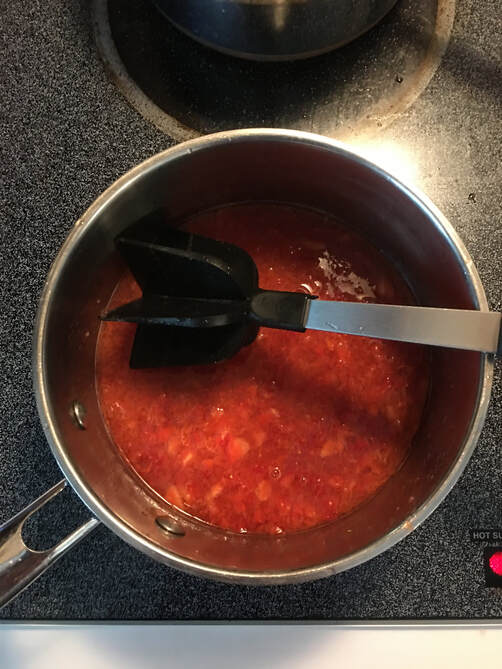
3. Sieve the cooked berries to get the juice. Discard the berry pulp. 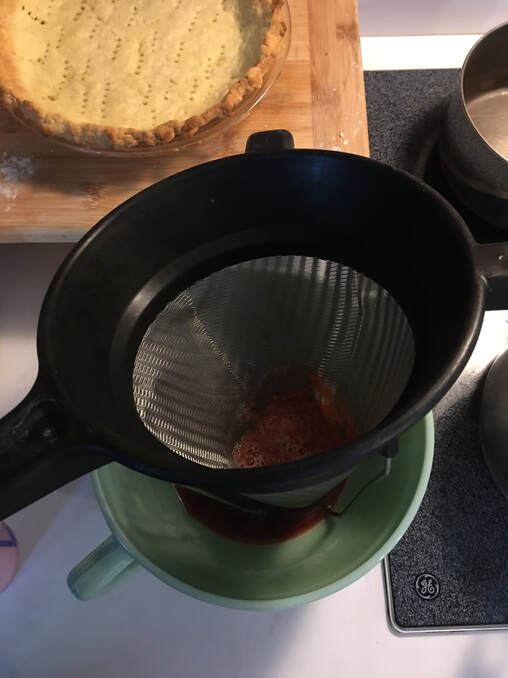
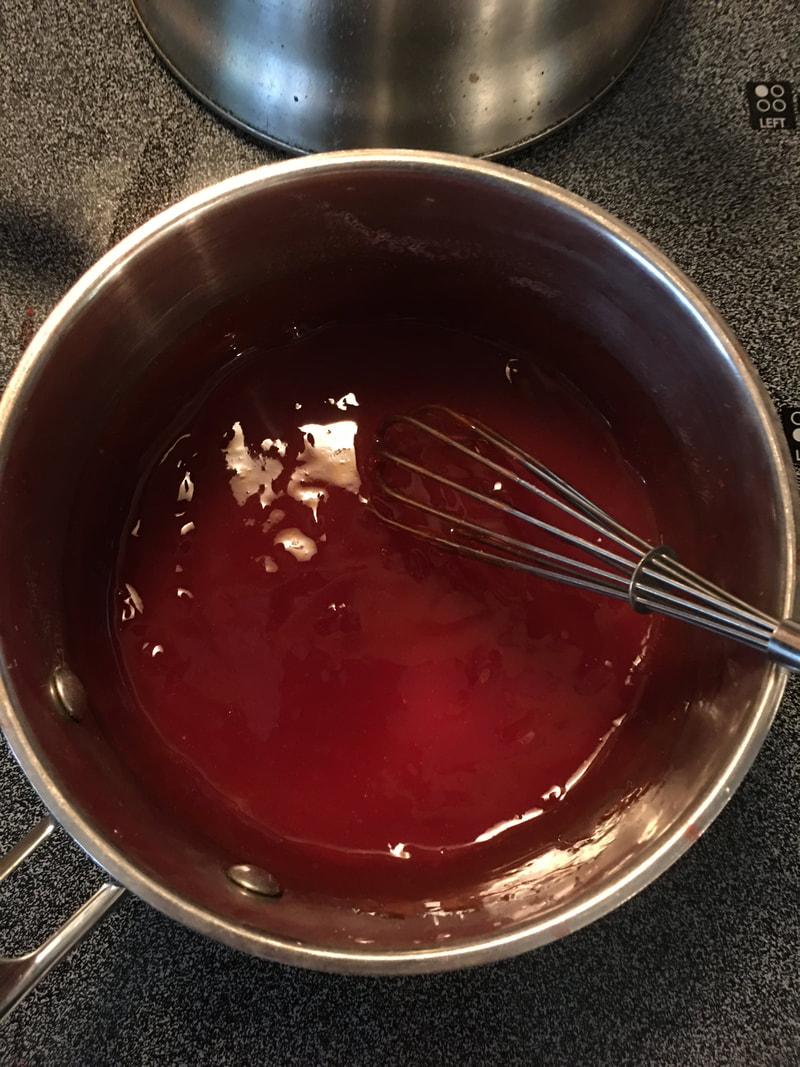
4. Combine the sugar and cornstarch in a saucepan. Gradually stir in berry juice. Cook stirring constantly till thick and clear.
5. Line pie crust with a layer of sliced strawberries. Drizzle slightly cooled strawberry glaze over berries. Layer on more sliced strawberries and pour remaining glaze over berries.
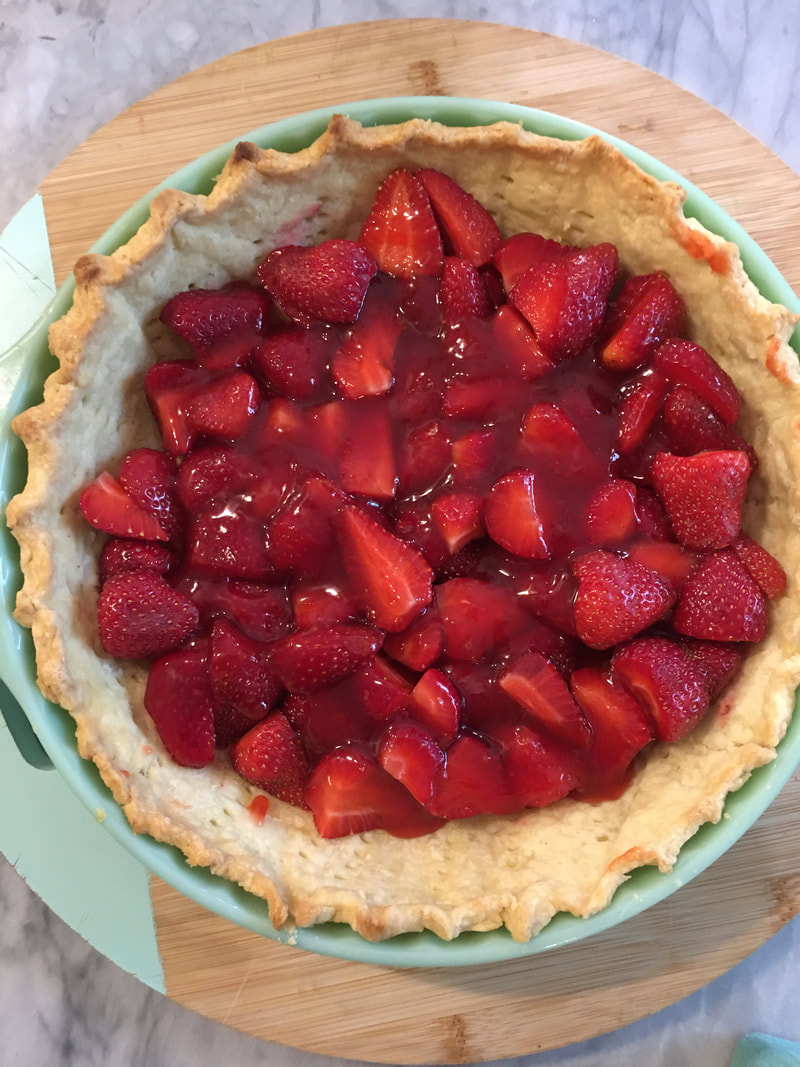 Pie crust with half of the berries and half of the strawberry glaze. Pie crust with half of the berries and half of the strawberry glaze.
Strawberry Glazed Pie
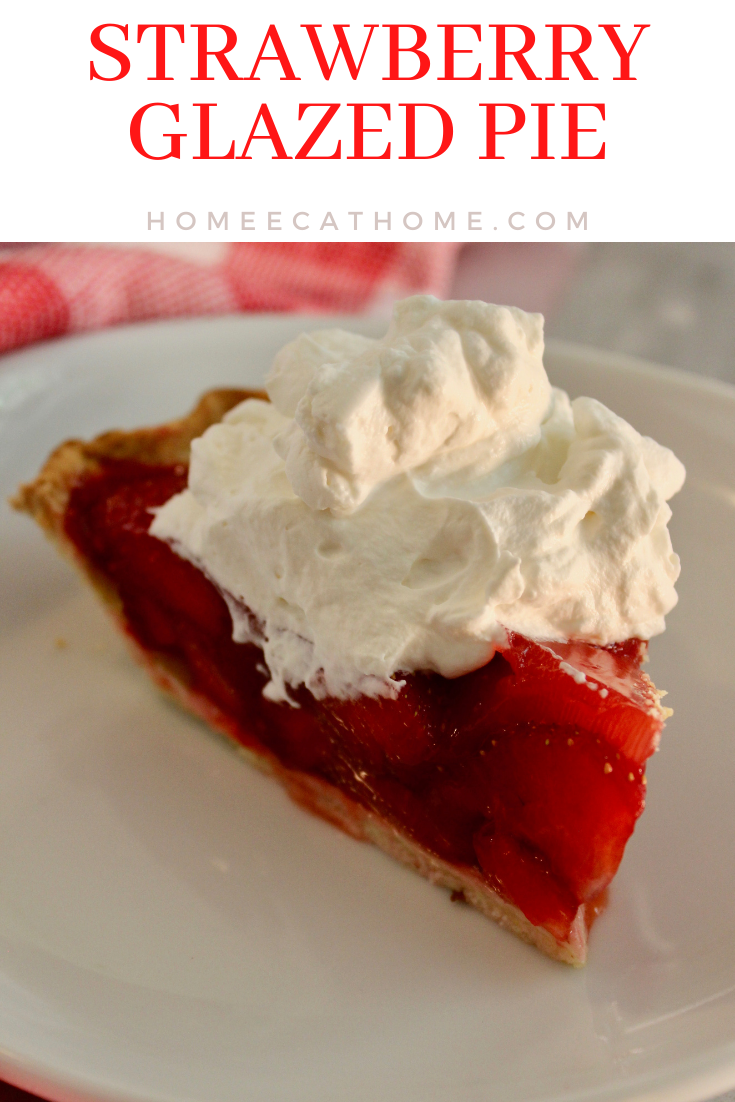
Ingredients: 2 lb. fresh strawberries 1/3 to 1/2 cup sugar* 1 Tbsp. and 2 tsp. cornstarch (I think this amount works nicely to thicken it, if you want it extra thick like jello when chilled, use 2 Tbsp. cornstarch.) Cooled, baked pie shell 1. Crush about 1/2 lb. strawberries with a meat chopper or a potato masher. 2. Cook the mashed berries and 1 cup water at medium high heat for about two minutes to help break down the strawberries. 3. Sieve the cooked berries to get the juice. Discard the berry pulp. 4. Combine the sugar and cornstarch in a saucepan. Gradually stir in berry juice. Cook stirring constantly till thick and clear. 5. Line pie crust with a layer of sliced strawberries. Drizzle slightly cooled strawberry glaze over berries. Layer on more sliced strawberries and pour remaining glaze over berries. 6. Refrigerate until serving time. Serve with whipped cream.
Pin on Pinterest
Yum on Yummly
Happy Father's Day to all the amazing Dad's out there! My husband and I have two of the best Dads you could ask for and they are amazing Grandpas to our boys. We are blessed! I also want to send a little shout-out to my wonderful husband. The boys and I love ya and we're so thankful to have you in our lives!
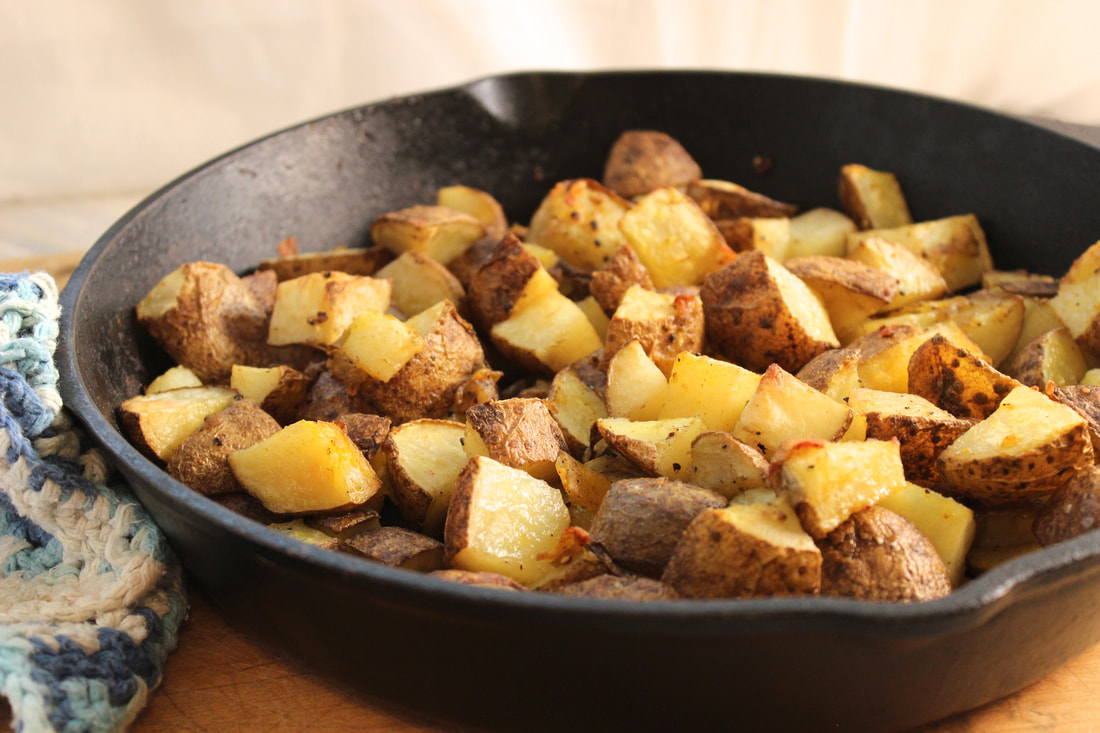
Today I am re-sharing an old post that I recently updated. We love these simple, frugal, hearty mouthwatering good potatoes! Roasted to perfection...crispy golden edges...soft tender bites of yum. 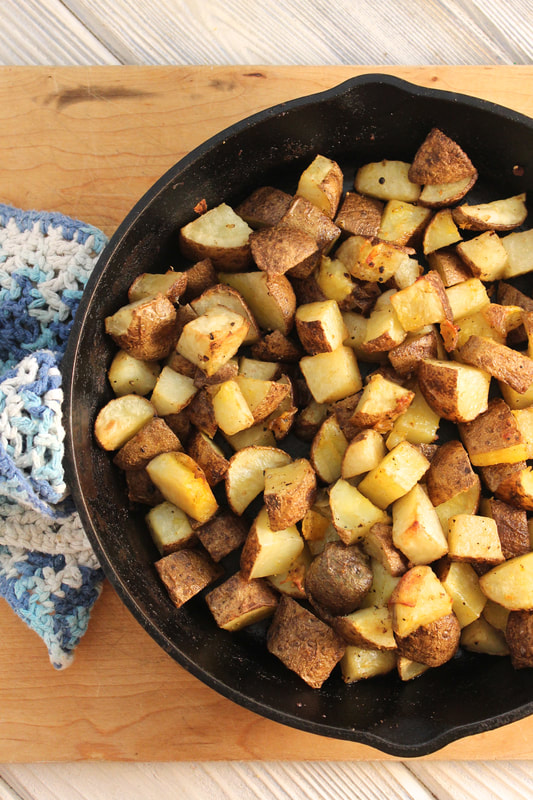
I love how easy these potatoes are to prepare and with a house full of hungry boys that's a good thing for this busy mom. I try to limit processed food and these are an easy option that taste way better than store bought frozen potatoes or fries.
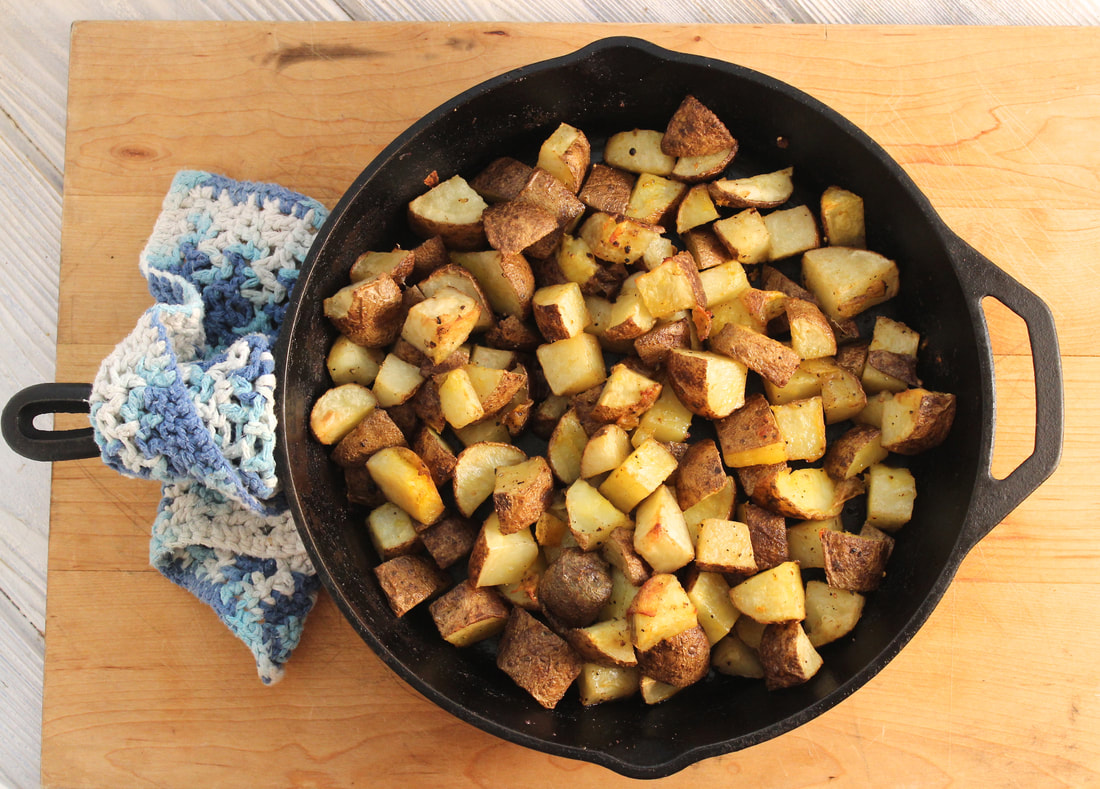
These are perfection and so simple. You can easily change the flavor by changing the seasonings and potatoes go with just about everything. Kids love them too. I have always used olive oil to make these until recently I reviewed Malaysian red palm oil. I made this batch of potatoes with a mix of olive oil and red palm oil which was delicious.
You have a lot of flexibility when making such a simple dish so you can really get creative and have fun with this or just enjoy the simplicity of crispy, tender, salted potatoes. Leftovers are really yummy reheated with shredded cheese melted on top.
Ingredients:
5-6 Russet Potatoes Olive oil or Palm oil Salt Freshly ground pepper Garlic powder 1. Cut potatoes into chunks and place in a single layer in a 12 inch iron skillet or a 9 X 13 baking pan. Toss with oil and sprinkle with salt, pepper, and garlic powder. Don't forget, you can change up your seasonings if you like. 2. Bake uncovered in a 375 degree oven for about an hour or until potatoes are fork tender and lightly browned. Stir them halfway through the cooking time to help them brown evenly. 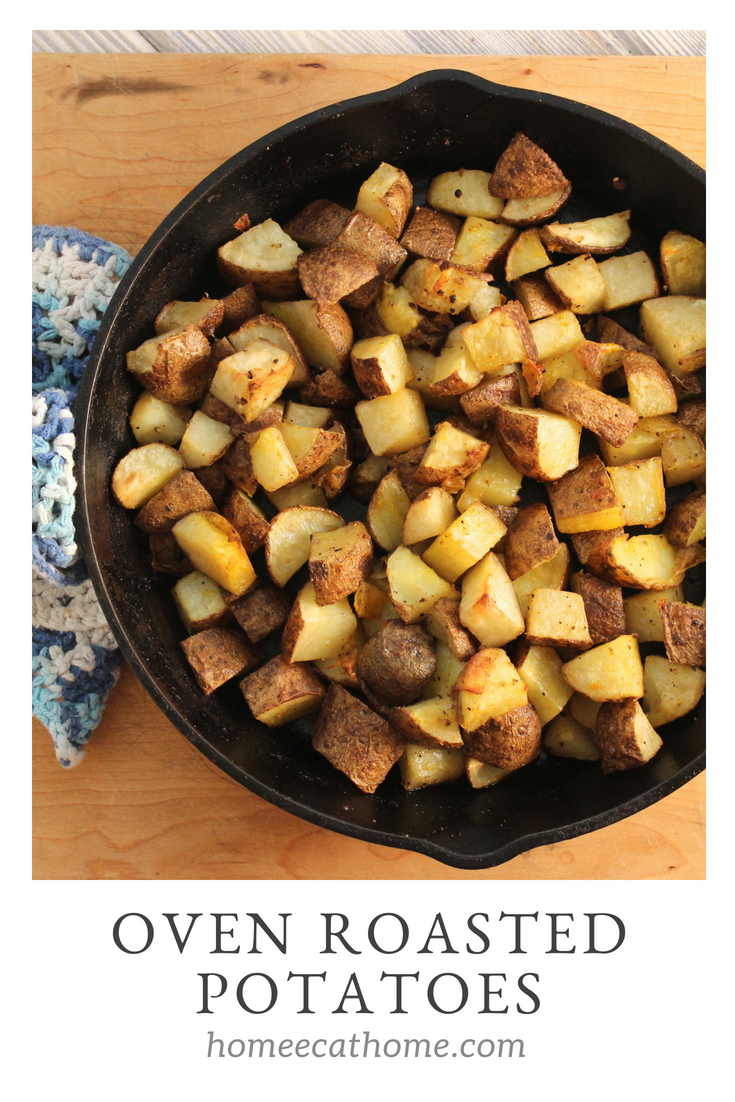
Back when I taught Family and Consumer Science, I used to have my students make this recipe to expose them to zucchini and show them that it was actually delicious. I know it's not the same as eating zucchini as a vegetable, but it was a start. Many of them had never eaten zucchini and thought it was really strange, but when they tried the finished product they always liked it.
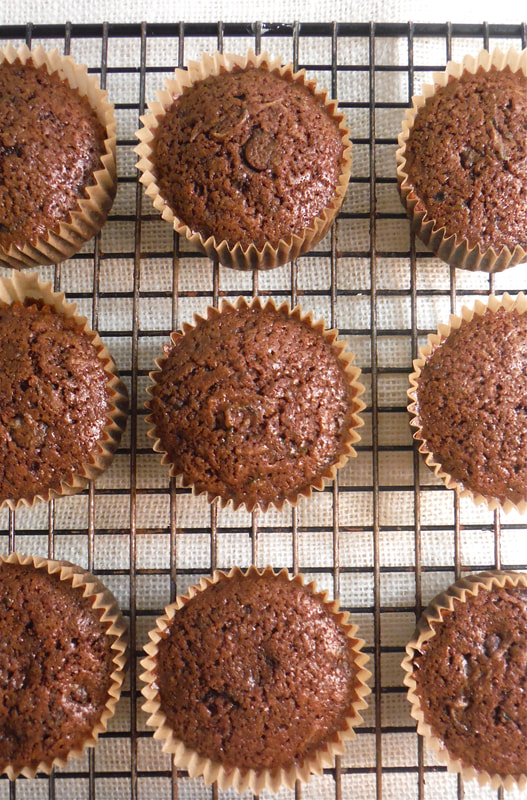
Now my boys enjoy these for a healthy snack. Well, healthy except that they do have a lot of sugar. I have been experimenting with alternative sugars and made this batch with coconut sugar instead of using granulated white sugar. Honestly, I think they taste just as good with coconut sugar as they do with granulated sugar.
These really are delicious and stand alone without any added frosting. They never last long around our house. 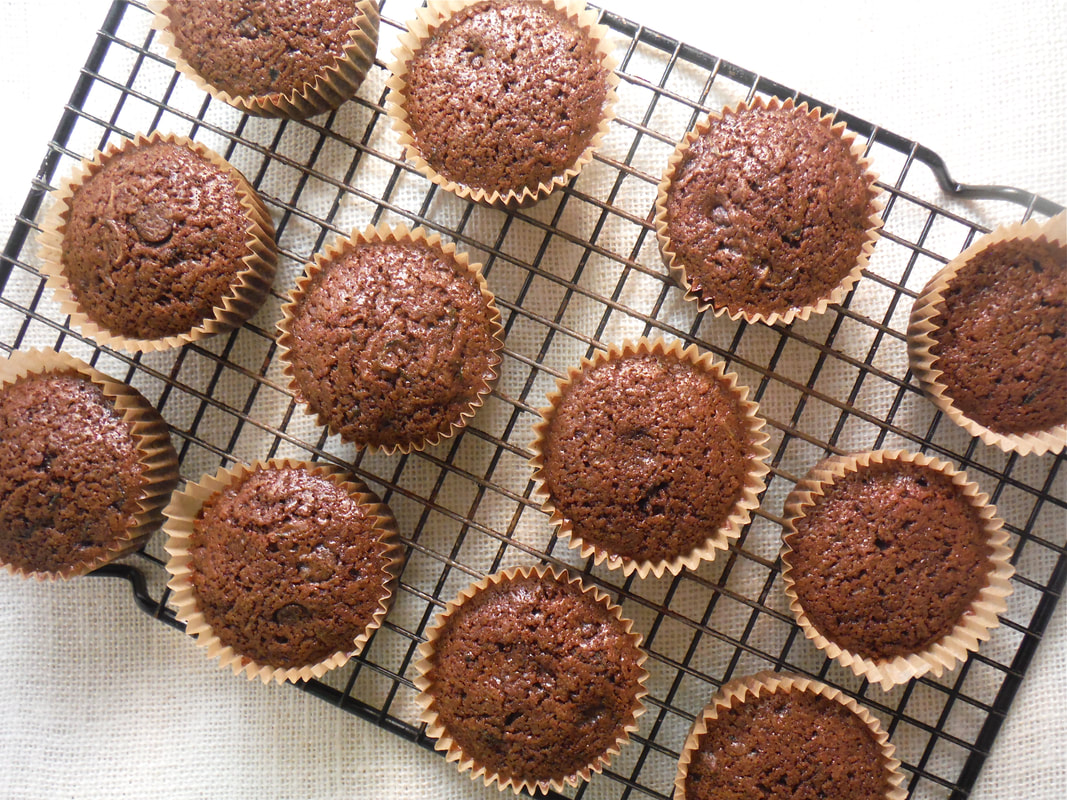
Ingredients:
1/2 cup real butter softened (1 stick) 1/2 cup oil (I use melted coconut oil) 1 3/4 cups coconut sugar, sugar, or sucanat 2 eggs 1/2 cup milk 1 tsp. vanilla 2 1/2 cups flour 1 tsp. baking soda 1/4 cup baking cocoa 1/2 tsp. salt 1/2 tsp. ground cinnamon 1/4 cup ground flax (optional) 2 cups shredded zucchini 1/4 cup mini semi-sweet chocolate chips (regular size works too) 1. In a mixing bowl cream butter, oil and sugar. 2. Add eggs, milk and vanilla, mixing well. 3. Combine flour, ground flax (optional), cocoa, baking soda, salt and cinnamon. Then add to the creamed mixture. 4. Fold in zucchini and chocolate chips. 5. Fill greased or paper lined muffin cups two-thirds full. 6. Bake at 375 degrees F for 20-25 minutes or until top springs back when lightly touched. Makes about 2 dozen cupcakes. 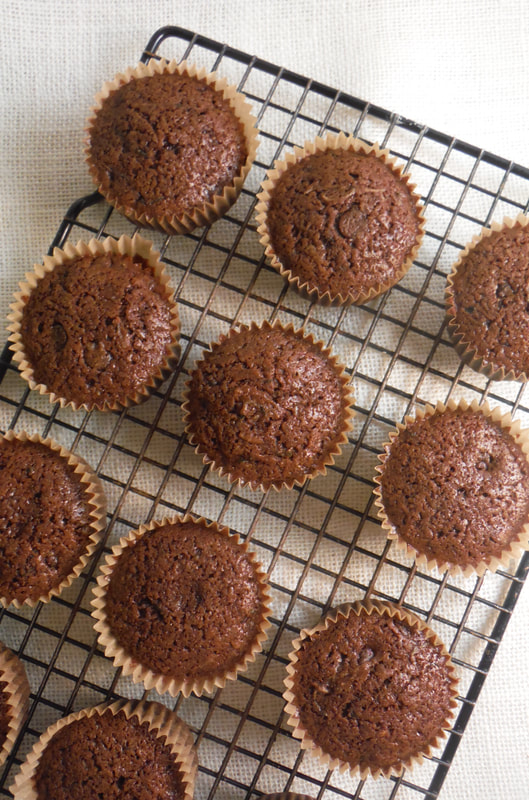
Home Economics Classroom Recipe
In a Home Economics classroom with 5 or more kitchens of students making this recipe, I used a 1/2 recipe for each kitchen. Halving recipes insured that food was never wasted and that our food budget went further. The kids gained more hands on experience because we could afford to cook more often. Here is a half recipe for use in the classroom. 1/4 cup butter softened (1/2 stick) 1/4 cup oil (I use melted coconut oil) 3/4 cup + 2 Tbsp. sugar 1 egg 1/4 cup milk 1/2 tsp. vanilla 1 1/4 cups flour 1/2 tsp. baking soda 2 Tbsp. baking cocoa 1/4 tsp. salt 1/4 tsp. ground cinnamon 1 cup shredded zucchini 2 Tbsp. mini semi-sweet chocolate chips 1. In a mixing bowl cream butter, oil and sugar. 2. Add eggs, milk and vanilla, mixing well. 3. Combine flour, cocoa, baking soda, salt and cinnamon. Then add to the creamed mixture. 4. Fold in zucchini and chocolate chips. 5. Fill greased or paper lined muffin cups two-thirds full. 6. Bake at 375 degrees F for 20-25 minutes or until top springs back when lightly touched. Makes about 1 dozen cupcakes. 
Slow cooker chicken and rice soup has been a favorite in our house for several years. The boys love it and it is so easy to prepare. When we are feeling under the weather, I can easily prepare this hearty, healthy soup with little effort. I love to use my own homemade broth which I freeze for use in recipes.
If you haven't guessed already, we (mostly me) are feeling under the weather, so I made this super easy soup for dinner tonight and it was both nourishing and comforting. There is something wonderfully healing about chicken soup when you have a cold. Maybe it's the bone broth (from homemade broth) or the nutrient dense combination of ingredients. Whatever it is, there is no substitute for homemade chicken soup to comfort and soothe. 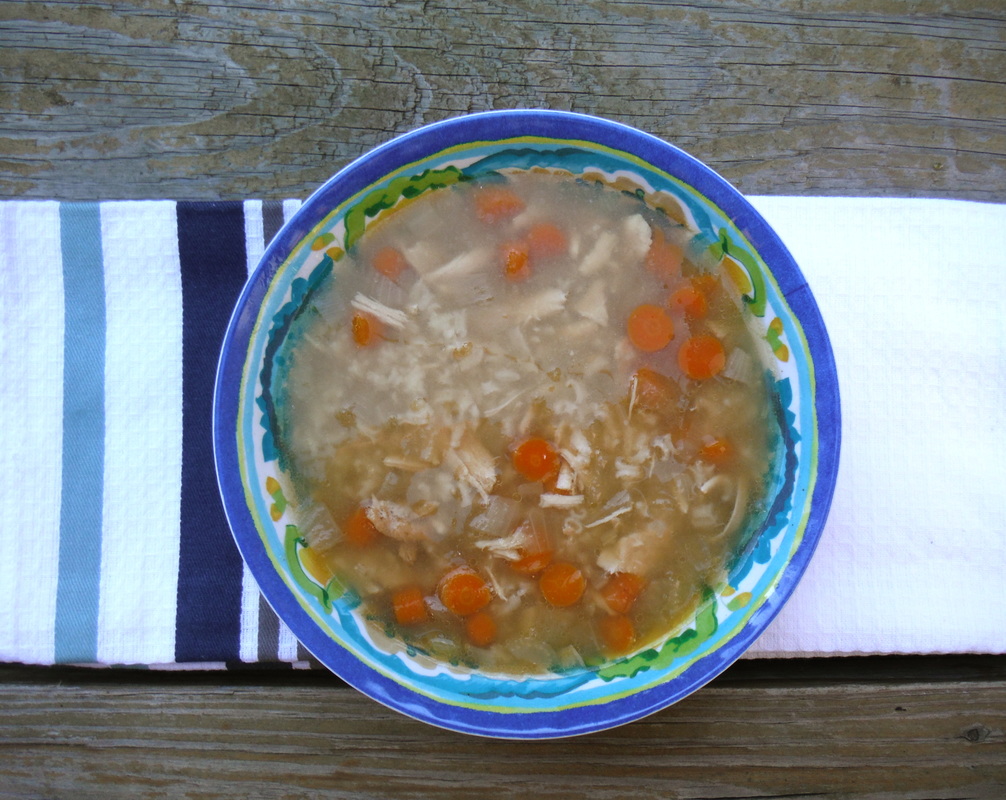
1 quart (4 cups) vegetable broth 1 lb. boneless chicken breasts or thighs 8 cups chicken broth 2 tsp. creole seasoning 3 cloves garlic, minced 1 onion, diced 2 to 3 stalks celery, sliced 3 carrots, sliced 1 tsp. or less salt* 1 cup uncooked rice Freshly ground pepper (if you like) to taste Combine all ingredients in the crock pot except for the rice*. Cook on low for 8 to 10 hours. About an hour before you will serve the soup, remove the chicken and shred it. Add 1 cup uncooked rice to the soup. Add the shredded chicken back to the soup. Continue to cook on low for about an hour or until the rice is tender. *If you are using homemade broth or low sodium broth you will probably want to add salt. If you are using store bought broth that is high in sodium, you may not want to add any salt. I would wait and taste it after it has cooked and add it if needed. Make sure not to add the rice until the last hour to prevent mushy rice. Recipe: Home Ec @ Home original 
Paying It Forward with Pizza: A Story of Kindness and Generosity
Tonight I walked into a Little Caesar’s Pizza Restaurant to pick up a pepperoni pretzel crust pizza. When I ordered they said it would be a 7 minute wait. So I told them I would be back in a few minutes, I needed to sit with the kids in the car (which was right by the front door, but I didn’t want to leave them alone that long.) When first I came into the restaurant, there was another customer. I asked him if he had been served and he said yes he had. He was just waiting for his order. I went out to the car and read library books with the kids while we waited, as we had just been to the library. I looked at the clock on the dash and when seven minutes had passed I went back into the store. I had to wait for a couple of minutes while they prepped and boxed the pizza. The same gentleman who had been waiting before was still waiting. We engaged in small talk about the weather since it looked like it might rain. When the pizza was finally ready and the employee handed it to me, he said it was taken care of. I thanked him thinking maybe it was because of the long wait and he said that the gentleman waiting had taken care of my order for me. I was so surprised, but managed to thank him before leaving the restaurant. He humbly acted like it was no big deal and I went on my way. The chances of him reading this post are slim, but to the kind and generous patron at Little Caesar’s thank you. You didn’t know much about me other than I have kids and ordered a pizza tonight and yet you kindly paid for our dinner. Maybe you saw a busy Mom and thought “I am going to give her a break.” Whatever your reason, thank you. What he didn’t know was that my husband works long hours finishing up his dissertation so ordering pizza tonight was a gift to myself of a night off in the kitchen. I love my kids more than life itself, but the days are long when my husband works late. He also didn’t know that we are on a tighter budget than usual since my husband is between jobs at the moment. And he didn’t know that we will soon be going through some big transitions including a move for my husband’s new job. We are excited, but this will mean big changes for our family. Considering everything happening in our lives right now, his small gift meant more than he could have imagined. I would like to challenge you to pay it forward when the chance arises. You never know what your small gesture could mean to someone else. It could be paying for someone else’s pizza, passing on a free cart to another customer at ALDI (cart rental is 25 cents), picking flowers and sharing them with an elderly neighbor; better yet spending some time with an elderly neighbor. The possibilities are endless. If you have ever paid it forward by doing a random act of kindness or been the recipient of someone else’s kind gesture feel free to share. I would love to hear your story.
Linking up at Dream, Create, Inspire, The Mommy Club, Friendship Friday, Share the Wealth Sunday, Create with Joy, Mommy Moments
Thank you for supporting Home Ec @ Home. The links in this post are my affiliate links.
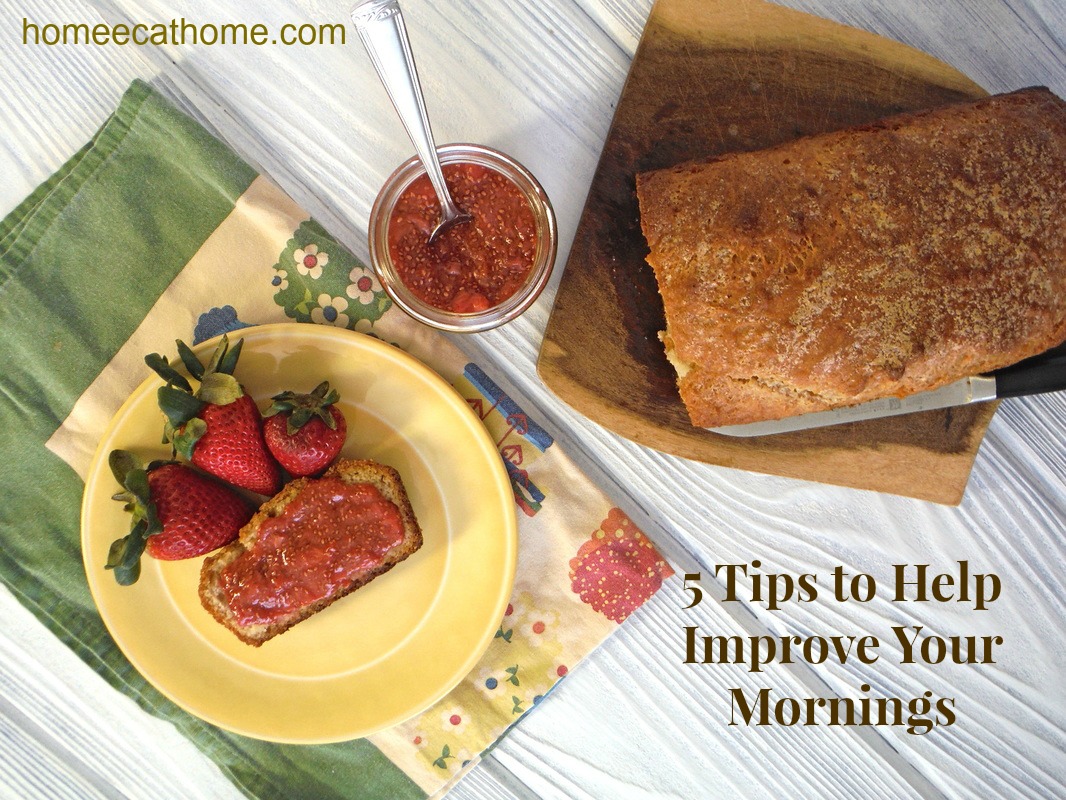
I hate being rushed in the morning and having to rush the kids out the door so I try to prepare and get some things done the night before. If I have less to do in the morning, I feel less stressed and things run much more smoothly for our family. There are some nights I go to bed without completing everything I need to do in anticipation of the next day and it creates more work for my morning so I generally try to stick with a nightly routine.
Here are some tips to help you improve your morning routine and hopefully your entire day. 1. Evaluate which tasks eat up your morning time and could be done the night before to help your morning run more smoothly. I like to take a relaxing bath every other day, but this really cut into my morning time and I found myself rushing out the door. I started giving myself half an hour at night to relax in the tub and I love it. No rushing in the morning, kids are in bed and I have much needed alone time. 2. Clean the kitchen every night. I have been doing this for years so it is a habit for me. I love coming down to a clean kitchen every morning. It is easy to start breakfast and the kids can sit right down at the table. 3. Rotate the laundry and fold a load each night. I have to do about 2 loads a day to keep up with our laundry so I make sure to fold a load each night and then I put it away the next day. It is easy to watch a favorite show after the kids have gone to bed and fold a load of laundry. Actually, it's kind of relaxing and I get to catch up on Downtown Abbey, Call the Midwife, or another Masterpiece favorite. 4. Get ideas for lunches and breakfast the night before. Every night during the school year I make sure icepacks go in the freezer at night then I pack non-perishable foods in my son's lunchbox. Anything that I can make ahead and pre-package I put in the fridge the night before. Then all I have to do in the morning is add an ice pack and fresh food (sandwich, fruit, etc.) Our breakfast are pretty simple, usually cereal, fruit, cheese, toast, etc., but I try to get an idea the night before and if we are low on our usual supplies I'll make a loaf of bread, some muffins or boil some eggs so that I am prepared for the morning. 5. Give yourself a bedtime. This is totally new to me. I have been a night owl for as long as I can remember. I always thought I could handle staying up late, but it does interfere with productivity and general mood the next day. After completing Make Over Your Mornings, I decided to try going to bed earlier and see if it really made a difference. I think it makes a huge difference for me and so I plan to continue giving myself a bedtime. I notice my energy levels are higher and I feel like a better, more patient Mom when I get a good night's rest. I took Crystal Paine's (Money Saving Mom) Make Over Your Mornings online course and I loved it. If you are ready to experience more productivity and enjoyment in your life, I highly recommend Make Over Your Mornings. And while you're there, read my testimonial on the Make Over Your Mornings site.
Thank you for supporting Home Ec @ Home. The links in this post are my affiliate links.
Linking up at Do Tell Tuesday, The Mommy Club, Friendship Friday, Create with Joy, Share the Wealth, Raising Samuels Homeschool, Dream Create Inspire

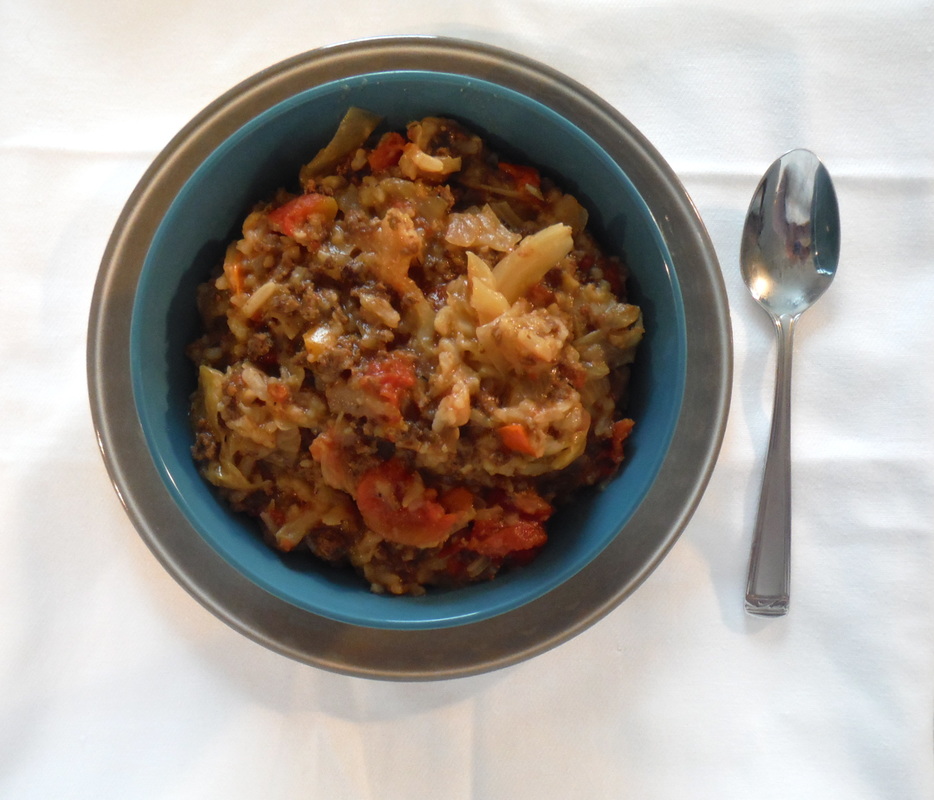
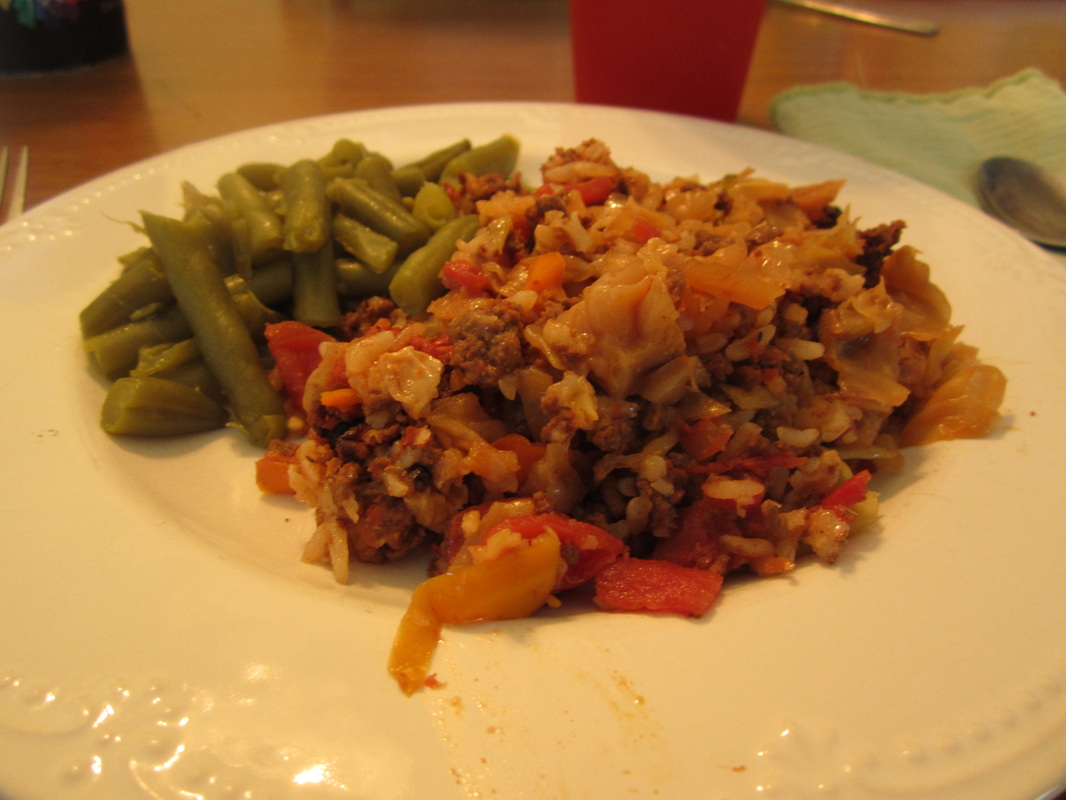
This is an old favorite that has been on the blog for almost two years and since we enjoyed it for dinner tonight, I thought it was time to update this post. We love Lazy Cabbage Roll Casserole. It is easy to throw together early in the day and it is delicious. All three of my boys love it and to prove it, they cleaned their plates again tonight. Over the past two years, this recipe has been one of my top pinned recipes on pinterest. Even with this old orange photo. Although, admittedly the casserole looks delicious in spite of my bad photography skills.
Ingredients:
1 lb. lean ground beef or deer 1 onion, chopped 1 red, yellow, or green bell pepper, diced 2 T Worcestershire sauce 2 tsp dried thyme 2 tsp garlic powder 2 tsp salt 28 oz can diced or crushed tomatoes 6 cups coarsly shredded cabbage, (1 small head) 1/2 cup uncooked rice Instructions: 1. Brown beef, onion, green pepper, worcestershire, thyme, garlic, and salt in skillet over medium heat. 2. Stir in tomatoes and uncooked rice and heat until bubbling. 3. Place cabbage in slow cooker and pour meat mixture on top. Cook on low 6-8 hours or high 4-6 hours. Adapted from Spark Recipes. 
Linking up at Create with Joy

You may have noticed I haven't been here much lately. Did you notice I haven't posted a menu plan in I don't know how many months? I've been too busy and I've had some pretty big things to deal with. So I have given myself some grace.
God doesn't expect us to be perfect so why should we expect the impossible from ourselves. All we can do is give the best that we can give at any given time. Sometimes this may look like perfection and sometimes this may be far from it and that's ok. We can't expect perfect. Not from ourselves or from those we love. Yesterday about 5-10 minutes before we needed to leave for my 3 year old's afternoon preschool, I discovered that he and my 4 1/2 year old had gotten into glue sticks in the office supplies drawer of my desk. My 3 year old had bright yellow glue plastered to his head. His white uniform polo shirt was covered in multi-colored streaks of glue. On top of this, he had a pull-up explosion that had leaked through to his uniform shorts. Oh yeah and my blue and white quilt and white sheets had huge streaks of hot pink glue running up and down them. I let the bed go until later, it could wait. Preschool could not. I somehow managed to handle the situation gracefully. Instead of yelling, I kept it together and got my 3 year old into the tub for a serious cleanup. There was some lecturing about staying out of Mommies things, but no harsh yelling. I'm sure I raised my voice, but I felt like I was keeping my cool. I found a uniform in the clean laundry and got him ready for preschool again. We were 10-15 minutes late, but it was ok. (Luckily we live about 5 minutes from the school.) Life went on and he had a great afternoon at preschool. I read an article today at thrivingFamily.com titled Perfect Isn't the Point. It really resonated with me. I have been trying to change my perspective and become more flexible when it comes to my expectations for myself and my family. A couple of months ago, my husband told me that I yell at our children too much. He was right. Too much yelling becomes ineffective anyway. I have been reflecting on this and trying to come up with better ways to redirect our boys and calmly handle messy situations. Simply stopping what I am doing and focusing on my children and their needs seems to go a lot further than yelling. Our house is not always a peaceful and quiet retreat. It's often loud and rambunctious. There is always a mess to clean up, but there is also a lot of love and increasing amounts of grace. I am and will always be striving to give us all a little more grace. Linking up at Create with Joy, Enchanted Homeschooling Mom, Deceptively Educational, Mommy Moments
|

Welcome to Home Ec @ HomeHi, I'm Faith, a former Family and Consumer Science teacher turned food blogger. I love God, my family, and food. You can usually find me in the kitchen preparing family friendly, homemade recipes and taking lots of pictures. 
Still Goldens, Southern, IL
 Fan Favorites

The Best Dry Brined Turkey with Citris and Fresh Herbs

 Dehydrating Pears and Apples in the Instant Pot Duo Crisp Dehydrating Pears and Apples in the Instant Pot Duo Crisp
 
 |

 RSS Feed