|
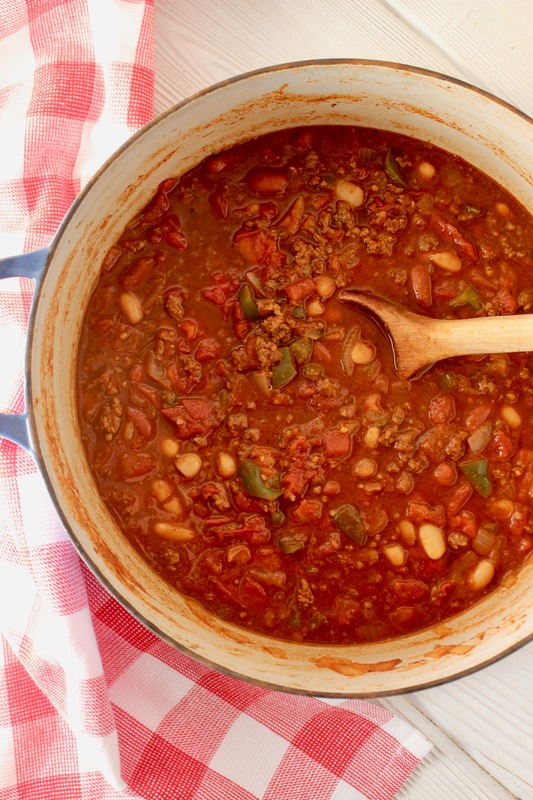
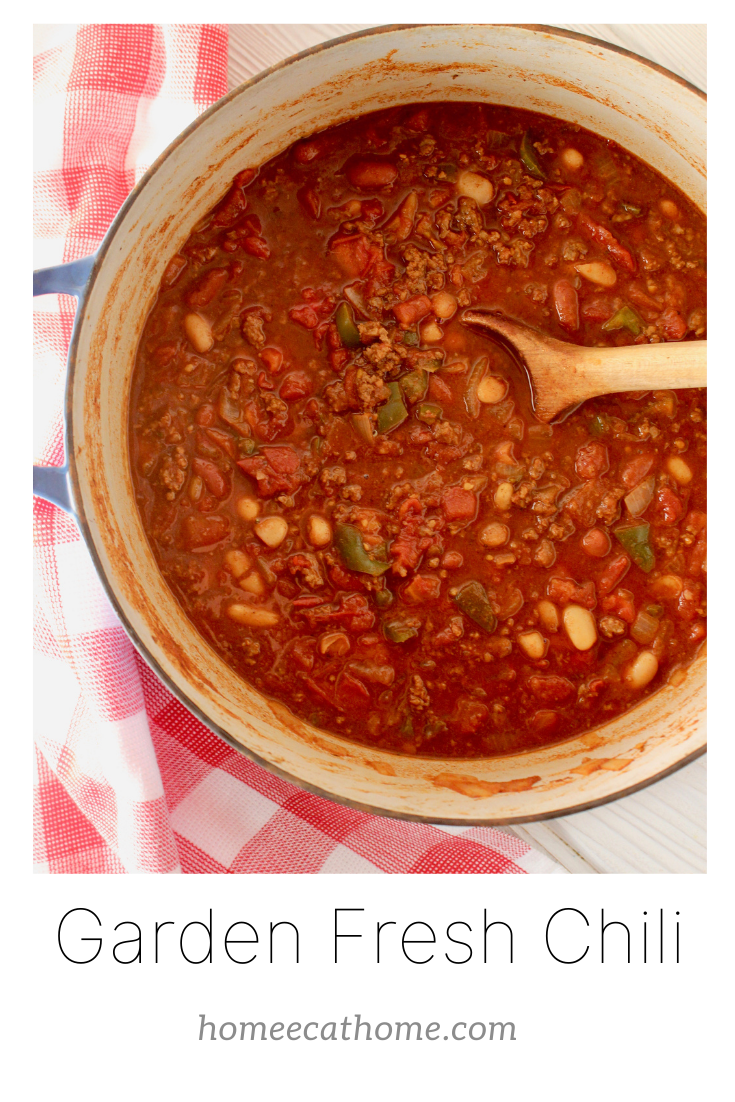
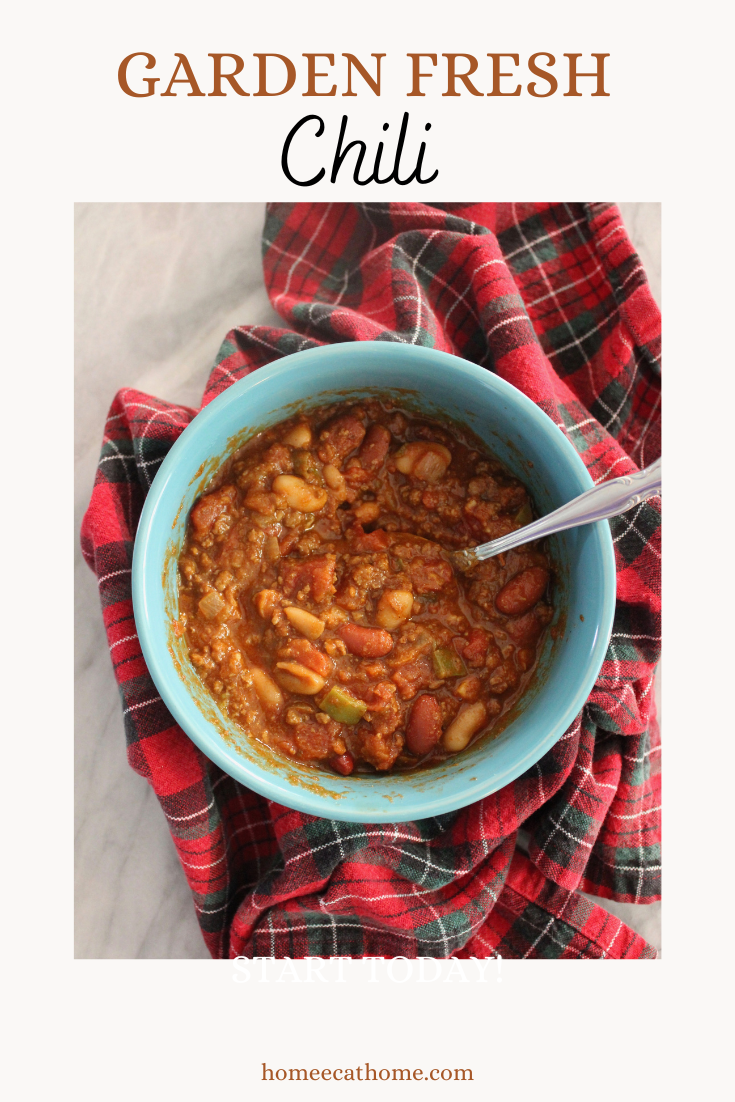
We've been having cold, rainy weather which makes me want to cozy up with a mug of hot chili. I have been making this garden fresh chili with peppers and tomatoes from the garden and it is hearty and delicious. It's also packed with protein, fiber, vitamins, and minerals making it a healthy choice.
We are a participant in the Amazon Services LLC Associates Program, an affiliate advertising program designed to provide a means for us to earn fees by linking to Amazon and affiliated sites.
We grew both bell peppers and sweet jalapeños this summer and either is perfect in this chili. If you have peppers left to use, you can freeze them for recipes. I just dice or slice them and freeze in zipper freezer bags.

We have lots of fresh tomatoes from the garden that I still need to can and freeze so I diced fresh tomatoes for this pot of chili. You can use frozen diced tomatoes or a 32 oz. can of diced tomatoes if you do not have fresh. When freezing fresh tomatoes, I just dice them and put them in quart freezer bags for future use in recipes.
Can you make this chili in a slow cooker?
Absolutely! Simply brown the meat, peppers, onion, and garlic in a skillet then add this cooked mixture to your slow cooker. Next add the rest of the ingredients to the slow cooker and cook on low for 4-6 hours until ready to serve.
Garden Fresh Chili
Ingredients: 1 lb. lean ground beef or venison 1 sweet onion, diced 1 bell pepper or a few sweet jalapeños, seeded and diced 2 to 3 cloves garlic, minced 2 (8 oz.) cans tomato sauce 1 can 10 oz diced tomatoes with chilies (I use mild) 1 quart (4 cups) fresh diced tomatoes* 1 can (14-15.5 ounce) kidney beans, drained and rinsed 1 can (14-15.5 ounce) pinto or cannellini beans, drained and rinsed 1/2 teaspoon Salt 1 tsp. oregano 1 T. cumin 2 T. chili powder or more to taste 1 tsp. creole seasoning (the one I use, amazon link) 1 tsp. coriander For an even more amazing chili, these are some optional seasonings that we think makes this chili the most delicious chili ever! 1 bay leaf (remove before serving) 1/8 tsp. nutmeg 1/8 tsp. cinnamon 1/8 tsp. ginger 1 Tbsp. coconut sugar** or brown sugar 1 can 14.5 oz. stewed tomatoes*** Directions: Brown ground beef or venison with onion, bell pepper, and garlic in a Dutch oven or large pot over medium-high heat. Add remaining ingredients. Cover and reduce heat to low. Simmer for about an hour to blend flavors and tenderize the vegetables. Serve with: Saltines, oyster crackers, corn chips, grated cheese (sharp cheddar or cheddar works well), diced sweet onion and sour cream *You can freeze fresh diced tomatoes from the garden in quart zipper bags to use in this chili or you can use a 32 oz. can diced tomatoes. **Coconut sugar (affiliate link) is lower on the glycemic index so it is a healthier option over brown sugar. I use it all the time in cooking and baking. ***(my husband LOVES stewed tomatoes, so I starting adding them and now he loves this chili even more!)
Pin on Pinterest

6 Comments
We are a participant in the Amazon Services LLC Associates Program, an affiliate advertising program designed to provide a means for us to earn fees by linking to Amazon and affiliated sites.
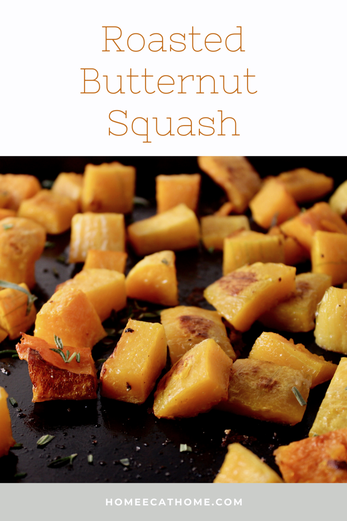
Butternut squash is one of my favorite vegetables so I was so excited when we were able to grow it in the garden this year. Unfortunately, our yield was low due to squash bugs killing the plants, but we have a few butternut squash tucked away for winter. If you know of a remedy for squash bugs that doesn't harm bees, I am all ears:).

Roasting butternut squash is super easy once you get the squash peeled and cubed. I use a vegetable peeler to peel it, then cut it in half lengthwise, then scoop out the seeds. I then cube the squash.
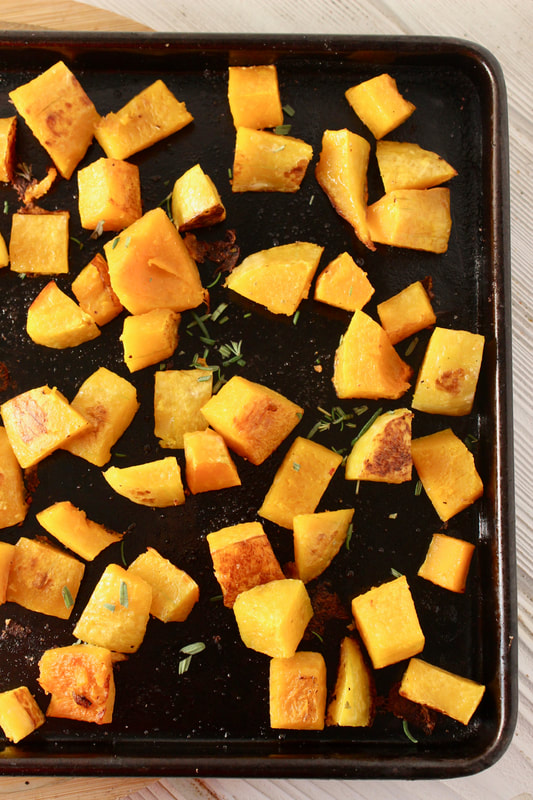
Roasted butternut squash is so good my kids clean their plates and come back for more.
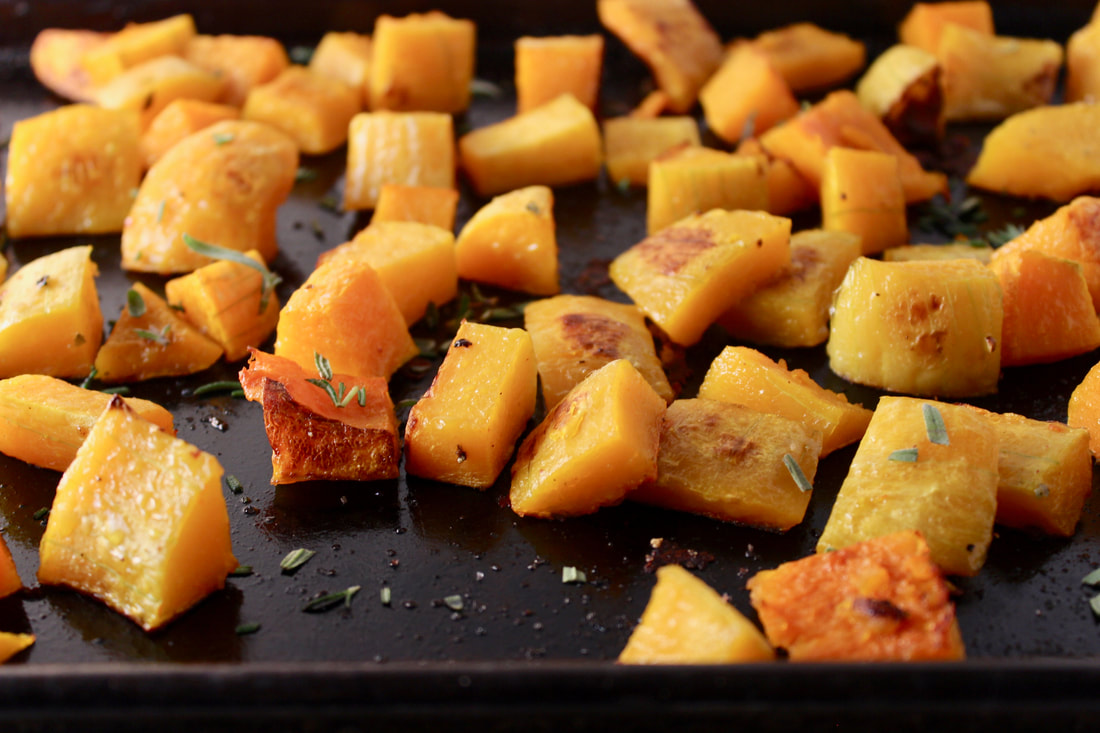
You want to spread the squash out on a large baking sheet that has been spritzed with olive oil. Spread it out so that the squash can caramelize. Then sprinkle with fresh ground salt and pepper. Bake until tender and caramelized, then to really take it up a notch sprinkle with fresh snipped rosemary. The rosemary makes it truly amazing. This will be your signature "company is coming" side dish.
Herbs are so easy to grow too. I have a couple of big pots on the back patio full of mixed herbs so that I can just snip what I need as I need it. They are actually really pretty in big mixed pots providing ornamental beauty to the patio in addition to flavoring our food.
Serves 4-6
Ingredients: Large butternut squash Olive oil (spritzer that I use, amazon link) Fresh ground salt and pepper Fresh rosemary leaves, chopped (at least a T.) 1. Preheat oven to 400 degrees F. 2. Cut off ends of butternut squash, then peel. Slice in half lengthwise, scoop out seeds, then cube squash. 3. Spritz baking sheet with olive oil. Spread squash out on the baking sheet. Spritz squash with more olive oil. Salt and pepper squash to taste. 4. Bake for 15 minutes. Flip squash, then bake for another 10 to 15 minutes until squash is tender and caramelized. 5. Remove from the oven and finish with a sprinkling of chopped fresh rosemary leaves.
Pin on Pinterest
We are a participant in the Amazon Services LLC Associates Program, an affiliate advertising program designed to provide a means for us to earn fees by linking to Amazon and affiliated sites.
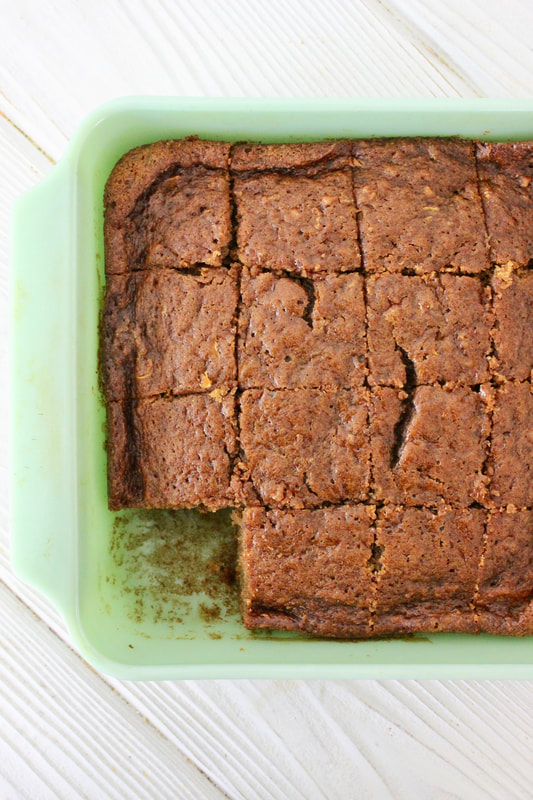
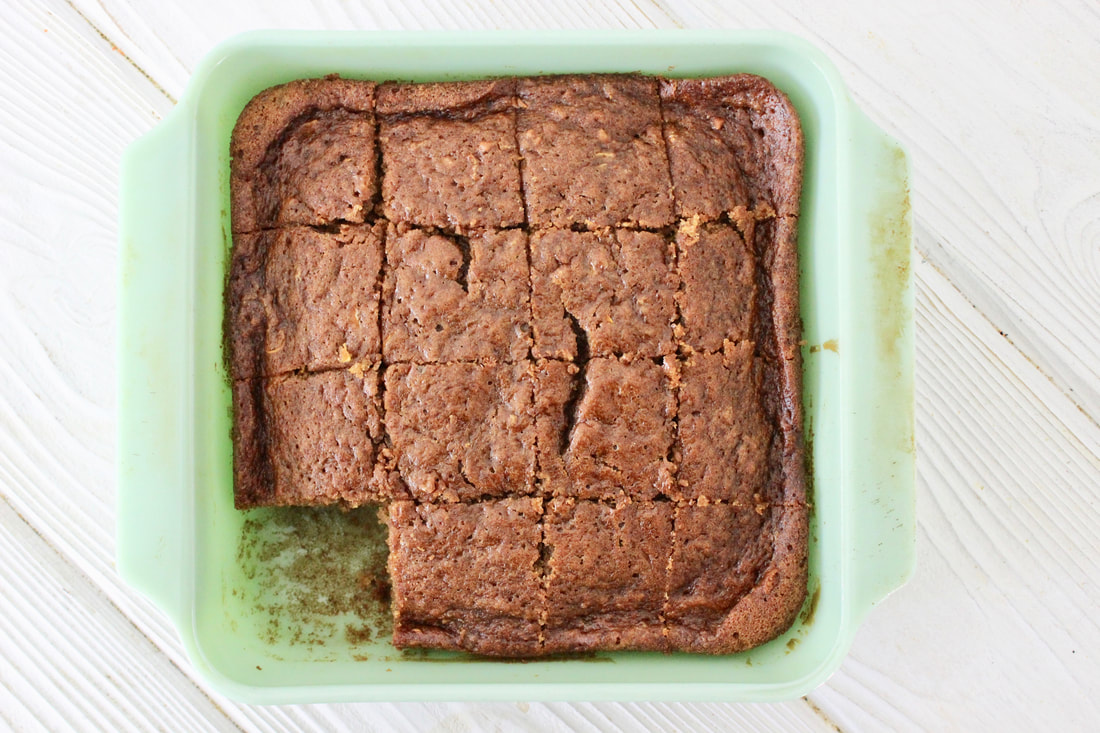
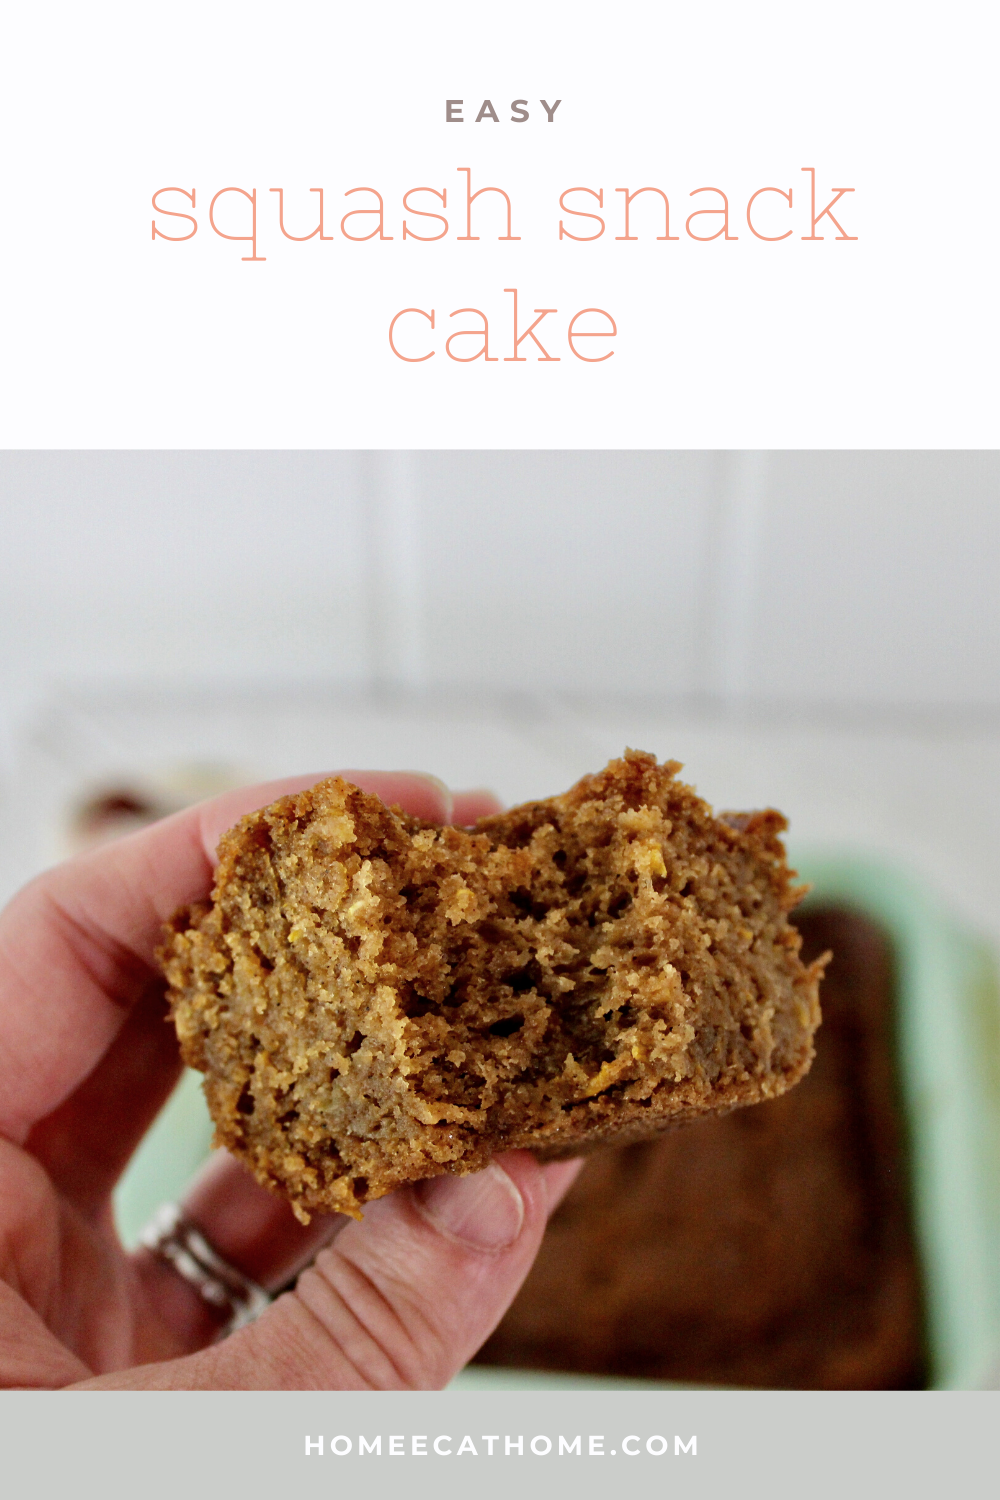
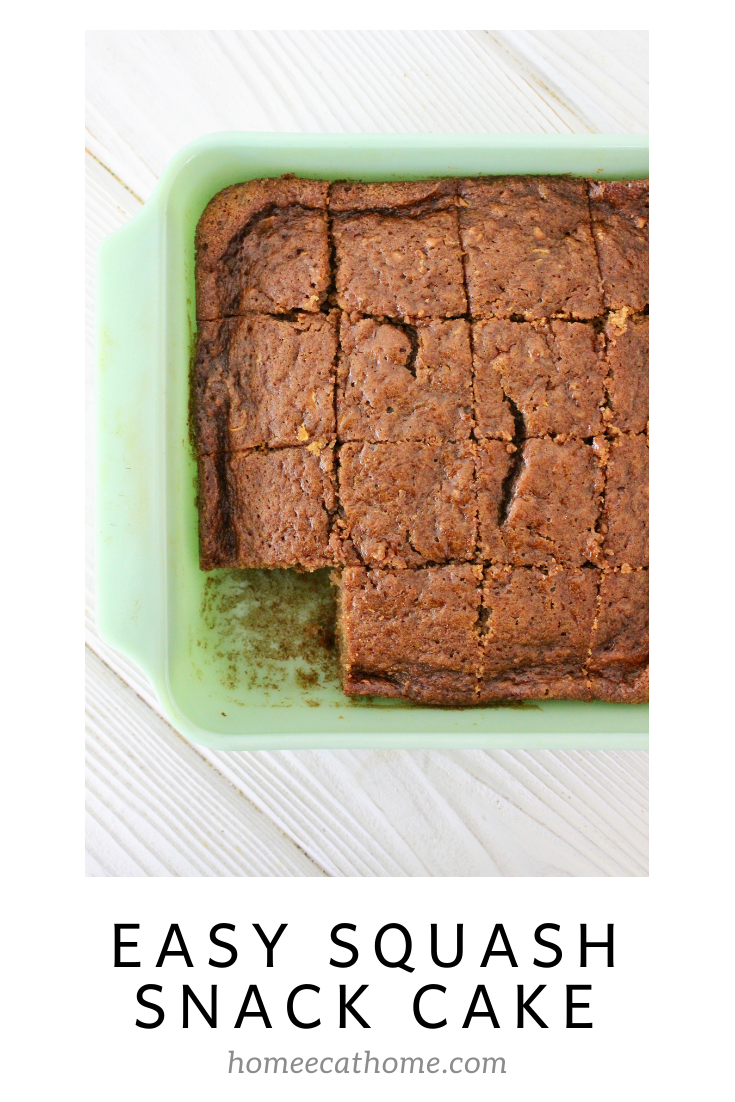
My parents grow a large garden every year. They always grow yellow crookneck squash and I remember my mom making squash cake when I was a child. It was always such a yummy way to eat squash. This delicious cinnamon and vanilla flavored squash cake with the texture of a fluffier zucchini bread is one of my family's favorites!
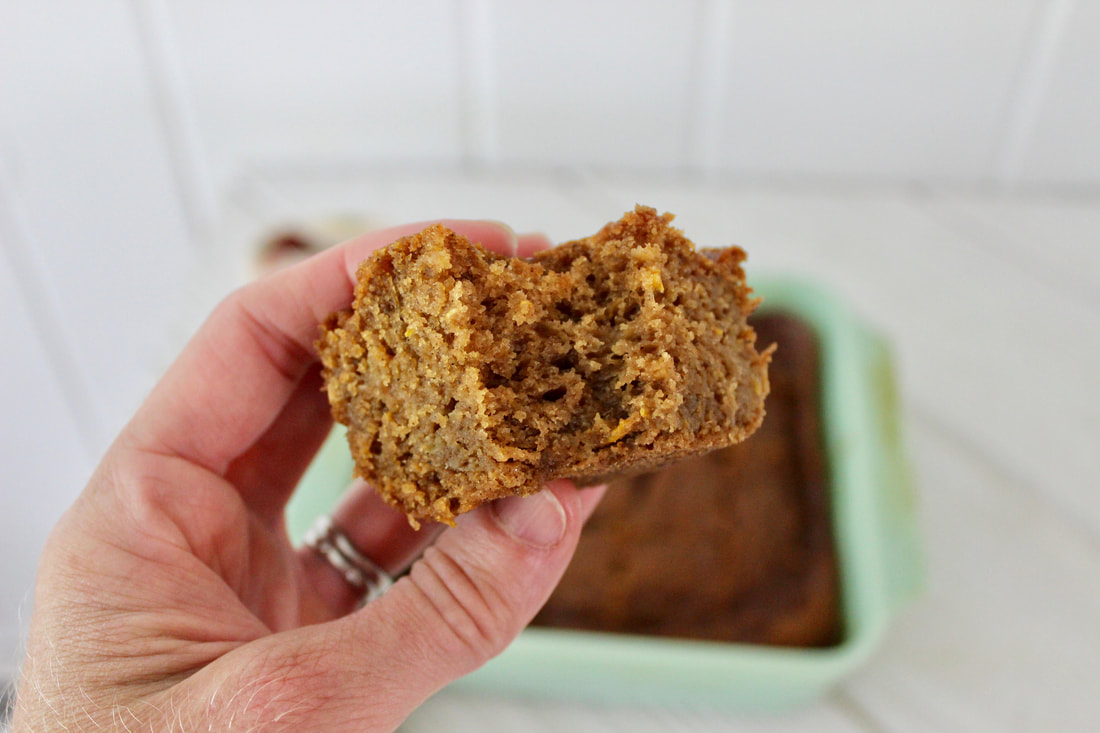
I have made squash cake a few times over the years, but this summer I have made soooooo much squash cake. With a garden full of squash and four boys who can finish a cake in no time, I found myself whipping up more cakes than I can count.
This little cake is so easy to throw together. Although grating squash is not my favorite thing to do so I use my food processor (amazon link) to make quick work of it. I usually grate more than I need and store the extra in the fridge for a day or two until I bake another cake.
You can use granulated white sugar or coconut sugar to make this cake. To be honest, I like it better with coconut sugar. It's a healthier option and I think it is too sweet when made with white sugar, but just right when made with coconut sugar.
I am a little lazy when making this simple snack cake and only spray olive oil or brush some coconut oil in the pan. It sticks a little which you can see, but it's good enough for me since it always come out of the pan. If you want to do things properly, you should probably use nonstick cooking spray or grease and flour the pan to prepare it for batter. I always use this square baking pan which is a 9 X 9 or 10 X 10 inch pan. Either size should work fine for the one hour baking time.
Squash Cake
Ingredients: 1 cup coconut sugar or granulated white sugar 3/4 cup coconut oil (melted) 1 1/3 cup all purpose flour 1 tsp. salt 1 1/4 tsp. baking soda 1 1/4 tsp. baking powder 1 1/4 tsp. cinnamon 2 cups grated yellow crookneck squash 3 eggs 1 tsp. vanilla 1. Preheat oven to 300 degrees F. 2. Mix all together and pour into prepared baking pan. 3. Bake for one hour or until cake springs back when lightly touched.
Pin on Pinterest
Disclosure: We are a participant in the Amazon Services LLC Associates Program, an affiliate advertising program designed to provide a means for us to earn fees by linking to Amazon and affiliated sites.
Our garden is producing squash like crazy this year so I have been coming up with creative ways to use it. This summer squash pizza has to be our favorite squash recipe I have made. It is a huge family favorite as my husband and the boys all love it!

My husband and I usually eat it with a fork and knife, but the boys just pick it up and eat it pizza style.
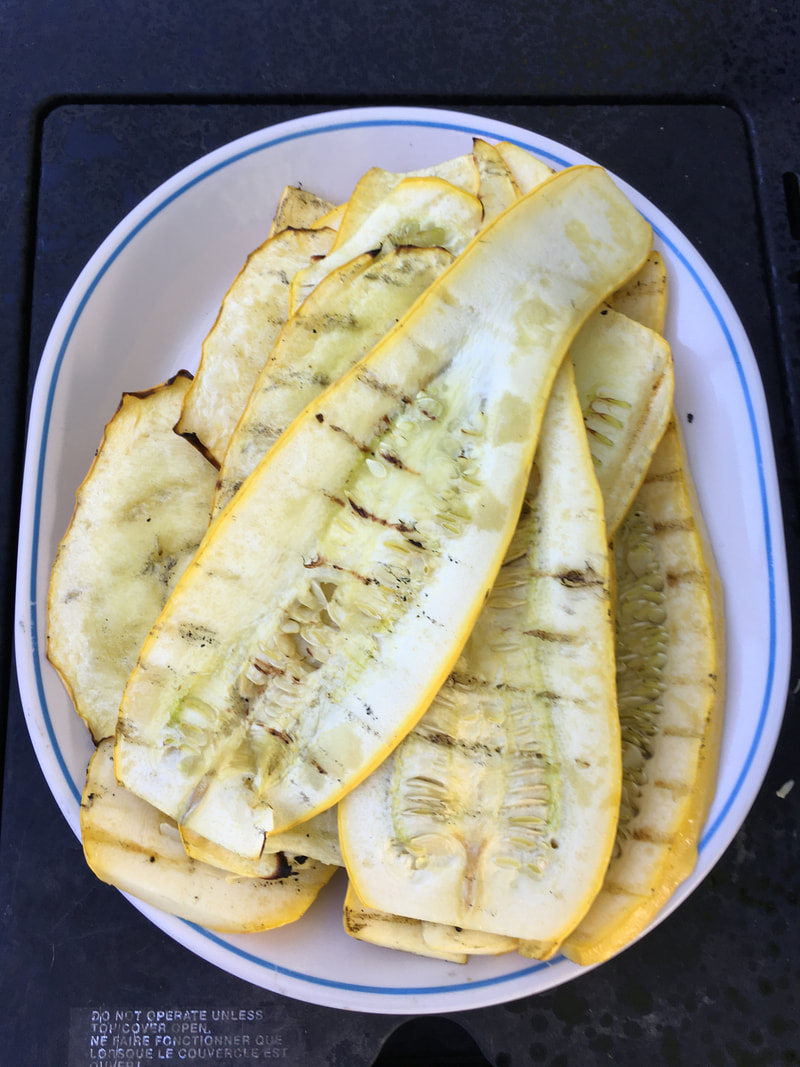
I have just made it and baked it and I have grilled the slices first before baking to dry out the squash and remove some moisture. Either way is delicious, but I think it is better when grilled first.
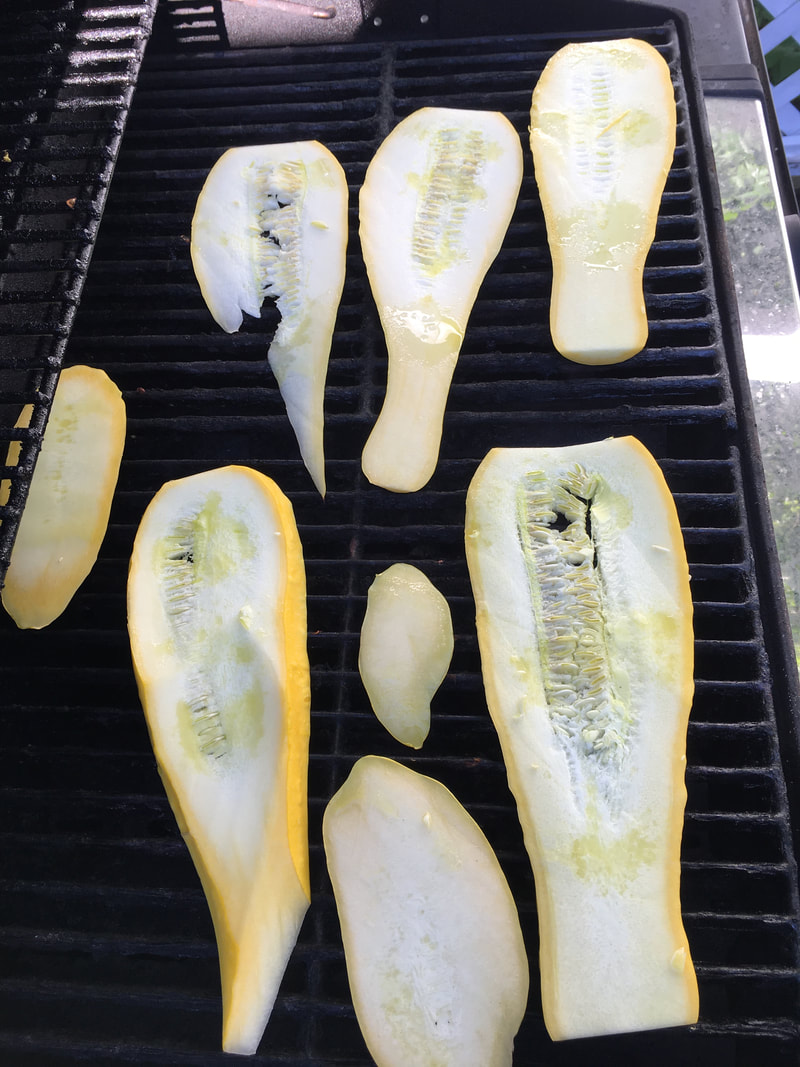
I spritz slices with a little olive oil. This is the spritzer I use and love and have had for years. (amazon link). If you don't have a spritzer, you can brush some olive oil on the slices. Then grill over medium heat for about 5 minutes per side. If you don't have a grill, you could try baking the slices in the oven for a few minutes on each side before putting sauce and toppings on. I have also just baked the squash without pre-cooking/grilling and it was very good, just had a little more moisture.
Grilled squash ready to make squash pizza.
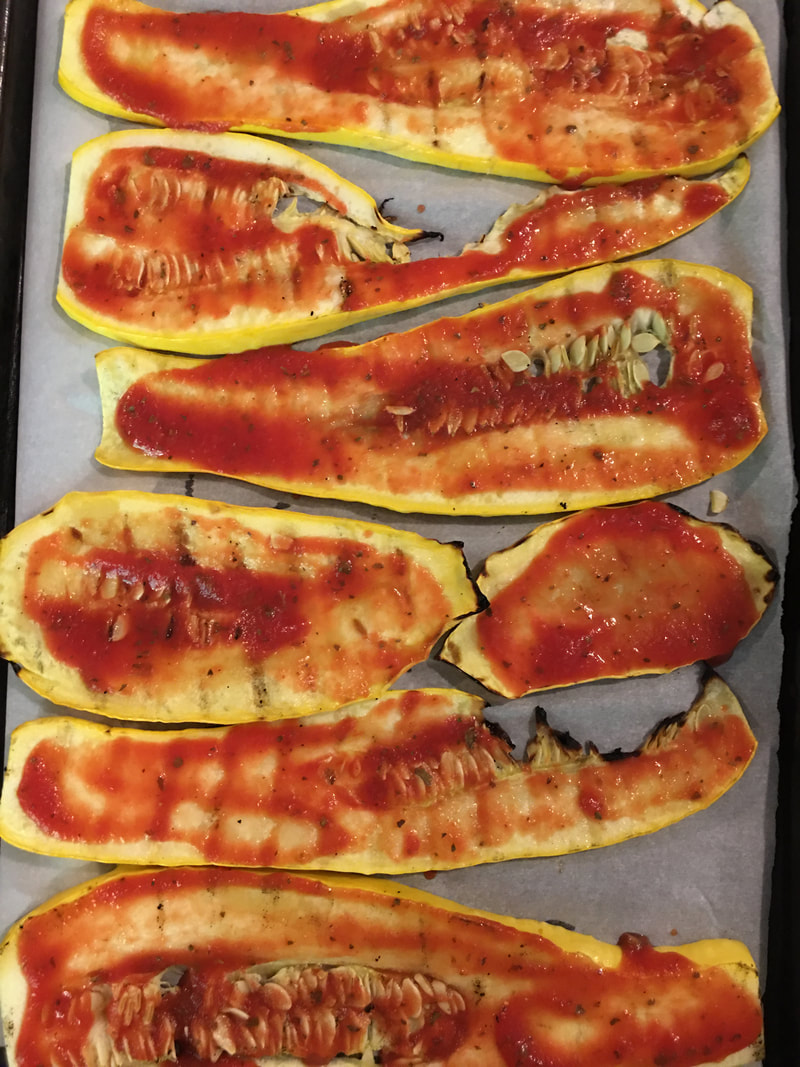
I place the squash slices on a parchment lined baking sheet then layer sauce and cheese and toppings.

You can use zucchini squash or yellow crookneck squash. I have made it with both and they are equally delicious. Our yellow crookneck squash plants are producing huge harvests this year so I have been making this a lot with yellow squash.
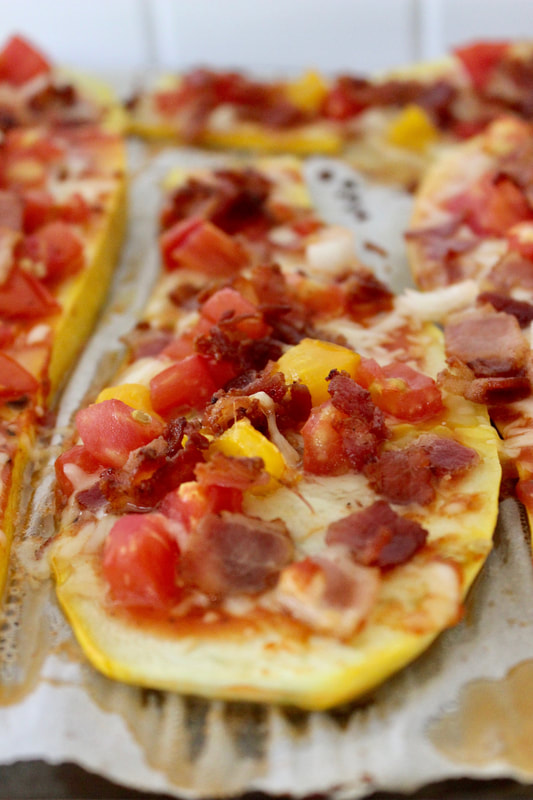
Enjoy this delicious fresh from the garden squash pizza. We love the bacon, tomato, onion combo, but the best part is that you can use your favorite toppings and make it your way. Plus, if you are watching your carbs, squash is a much better option than pizza dough and it is rich in vitamin C.
"Summer squash is an excellent source of copper and manganese. It is a very good source of vitamin C, magnesium, dietary fiber, phosphorus, potassium, folate, vitamin B6 and vitamin K. Additionally, it is a good source of vitamin B1, zinc, omega-3 fatty acids, niacin, vitamin B2, pantothenic acid, calcium, iron, choline and protein." (whfoods.com).
Serves 6
Ingredients: 2 large Zucchini or Yellow Crookneck Summer Squash Olive oil (optional) 1/2 Jar Pizza Sauce 16 oz. shredded mozzarella cheese 1/2 sweet onion, diced 2-3 tomatoes, diced 3/4 lb. bacon, cooked and crumbled 1. Preheat oven to 425 degrees F. 2. Slice 2 large zucchini or yellow crookneck summer squash (pick large straight pieces) into 1/4 inch thick slices lengthwise. 3. Option: Grill slices for about 5 minutes per side to remove some of the moisture. I spritz slices with olive oil before grilling. You could also brush them with olive oil. Or you can go straight to baking in step four. 4. Line two baking pans with parchment paper. 5. Place squash slices on parchment lined baking pans. Spritz or brush slices with olive oil if not already done in step 3. 6. Spoon pizza sauce onto slices and spread (like a pizza). 7. Sprinkle each slice with mozzarella cheese. 8. Then place onions, tomatoes, and bacon crumbles on the slices. 9. Bake for 10-12 minutes until cheese is melted and squash is tender. 
Pin on Pinterest
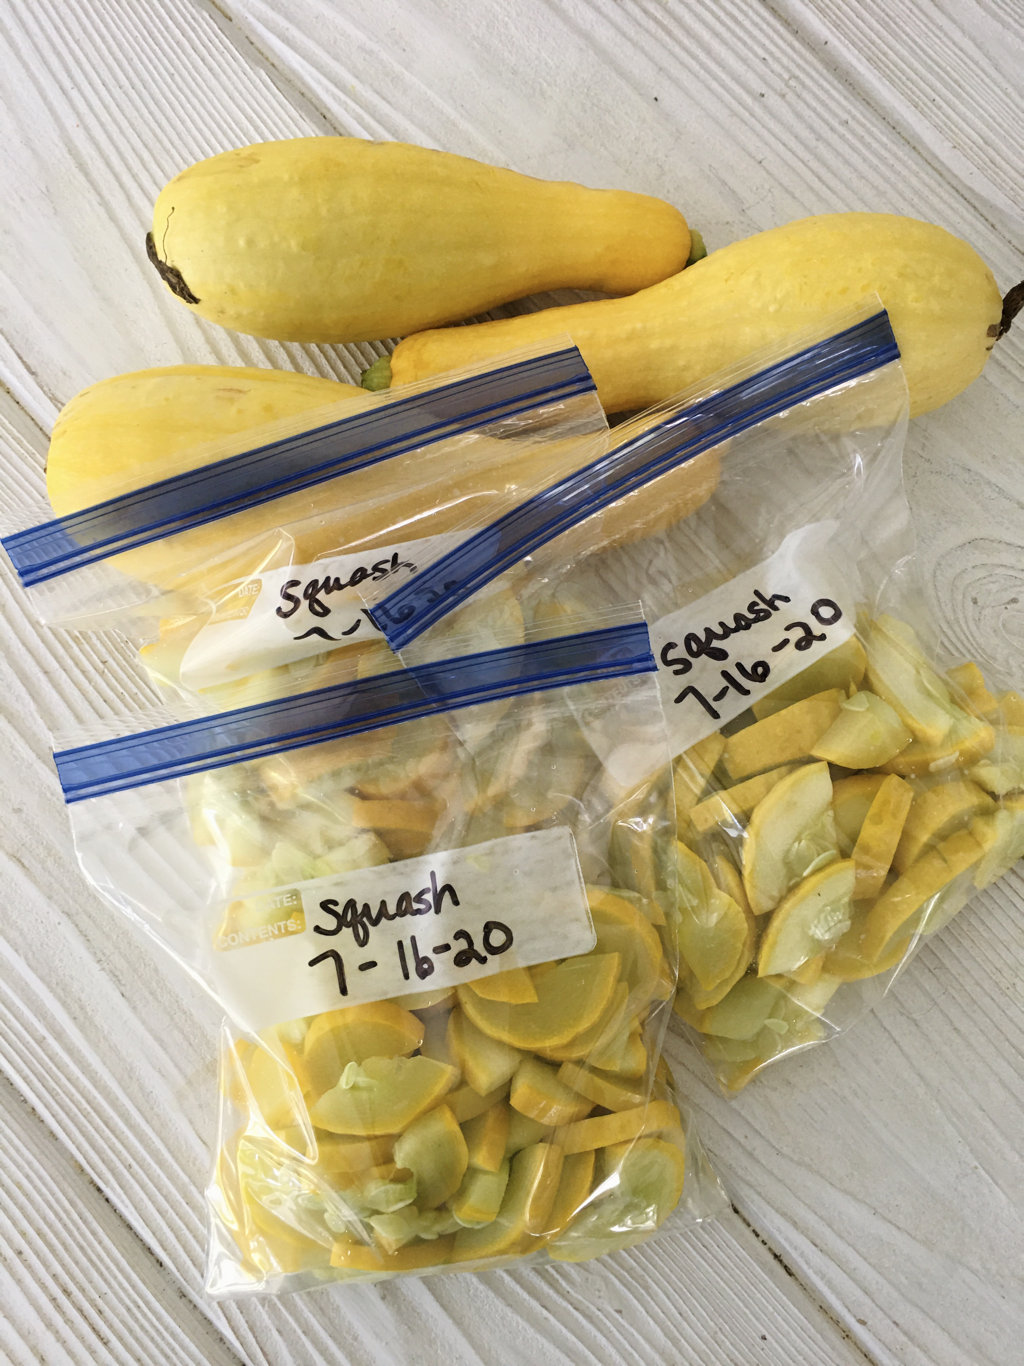
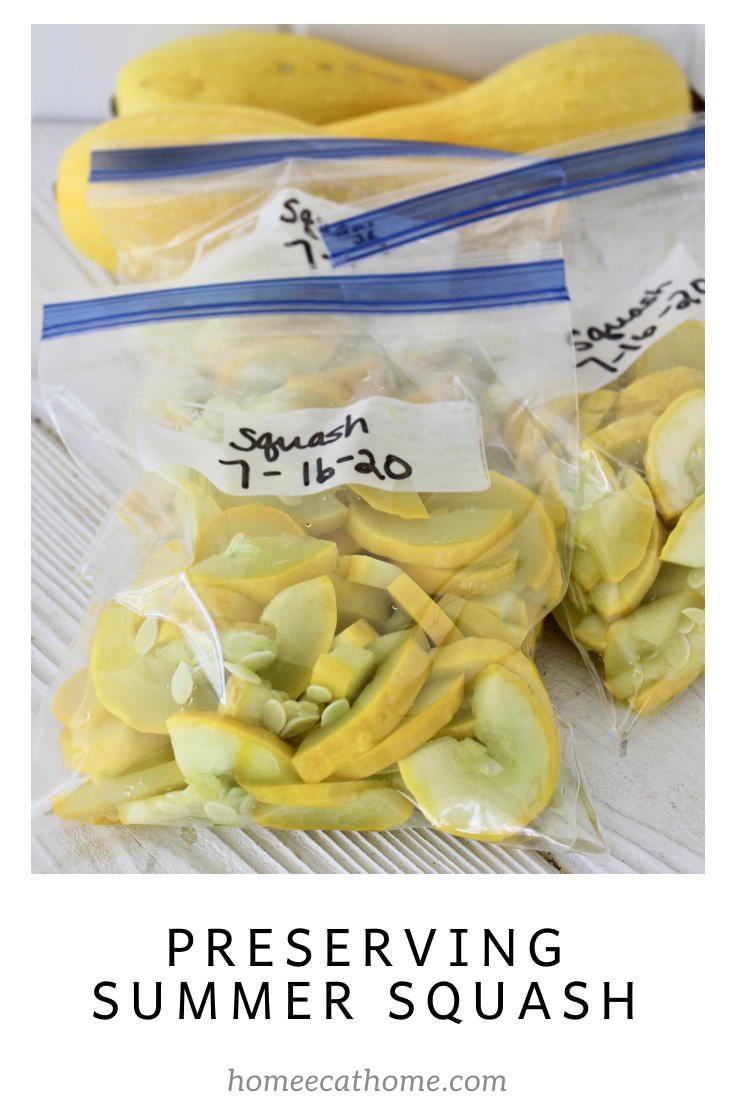
I love yellow crookneck summer squash. My parents always grew it and still do so I grew up eating it. When we planted our big garden this year, I knew I wanted to plant yellow summer squash. We love squash, but we have more than we can use right now so I started blanching and freezing it to use all year. What a treat it will be this winter! My mom makes the best squash casserole and I look forward to being able to make mom’s casserole all winter long.
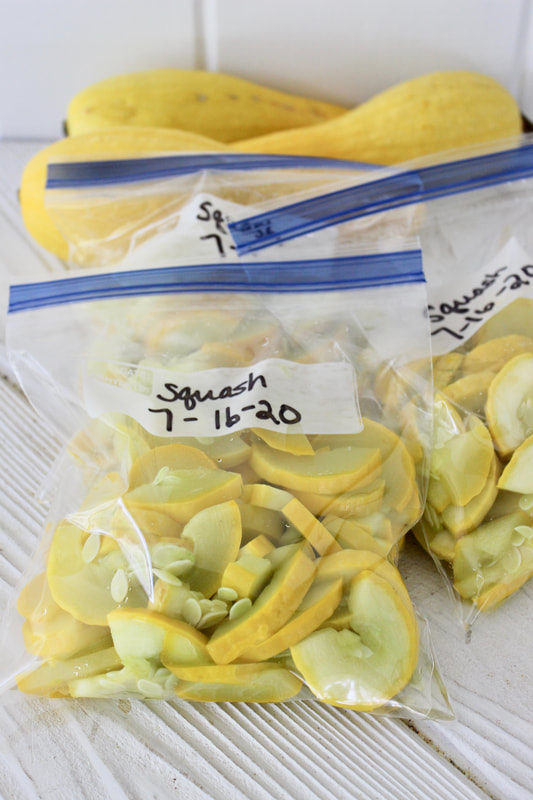
I put up six quarts of squash the other day and will freeze more this week.
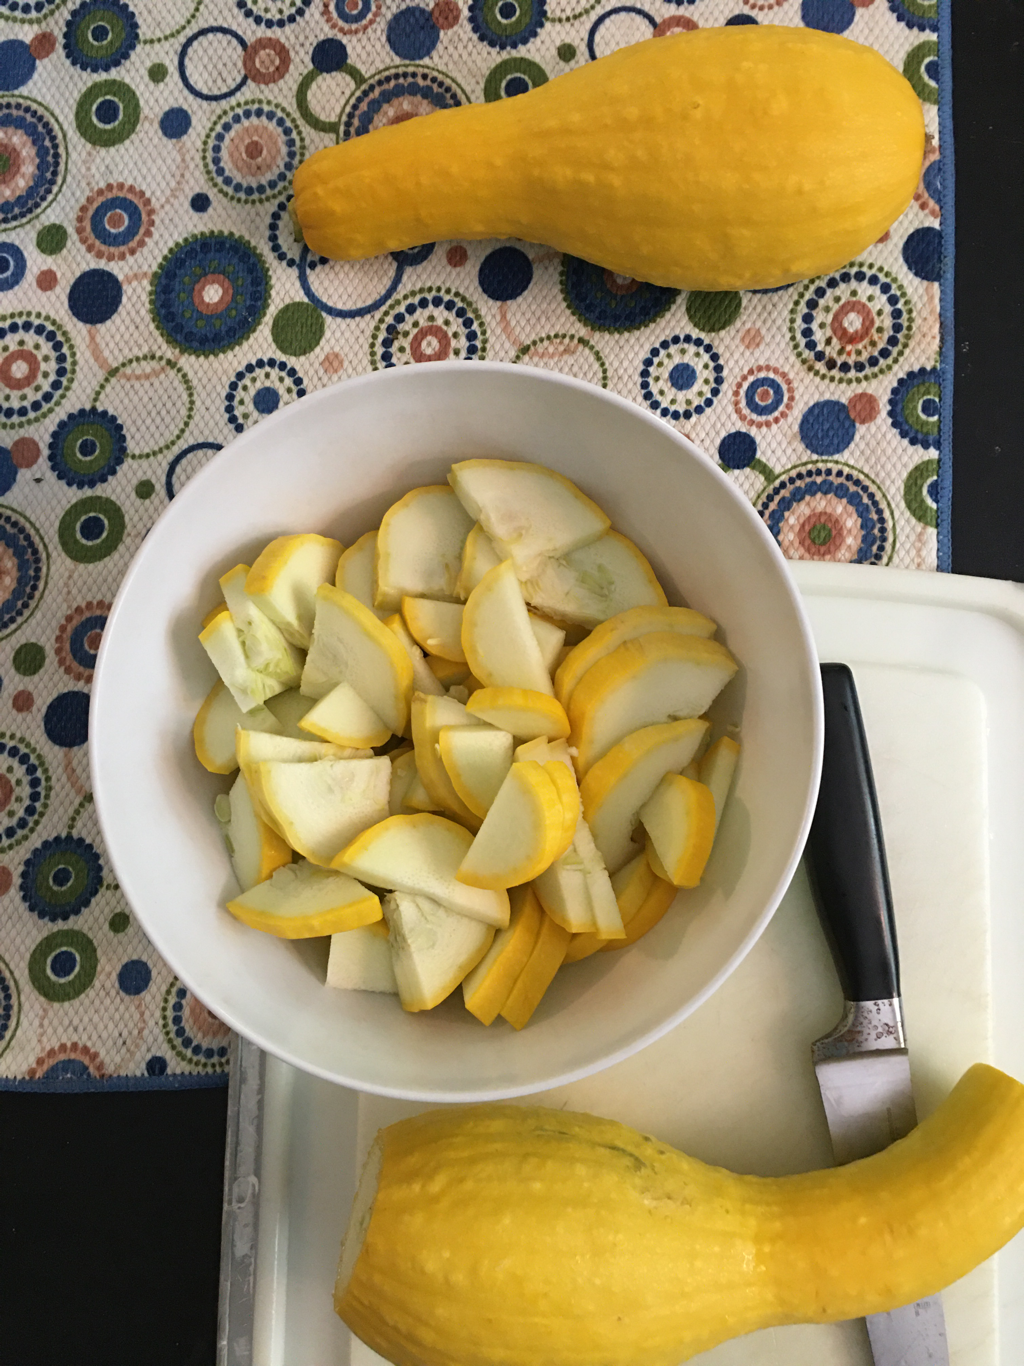
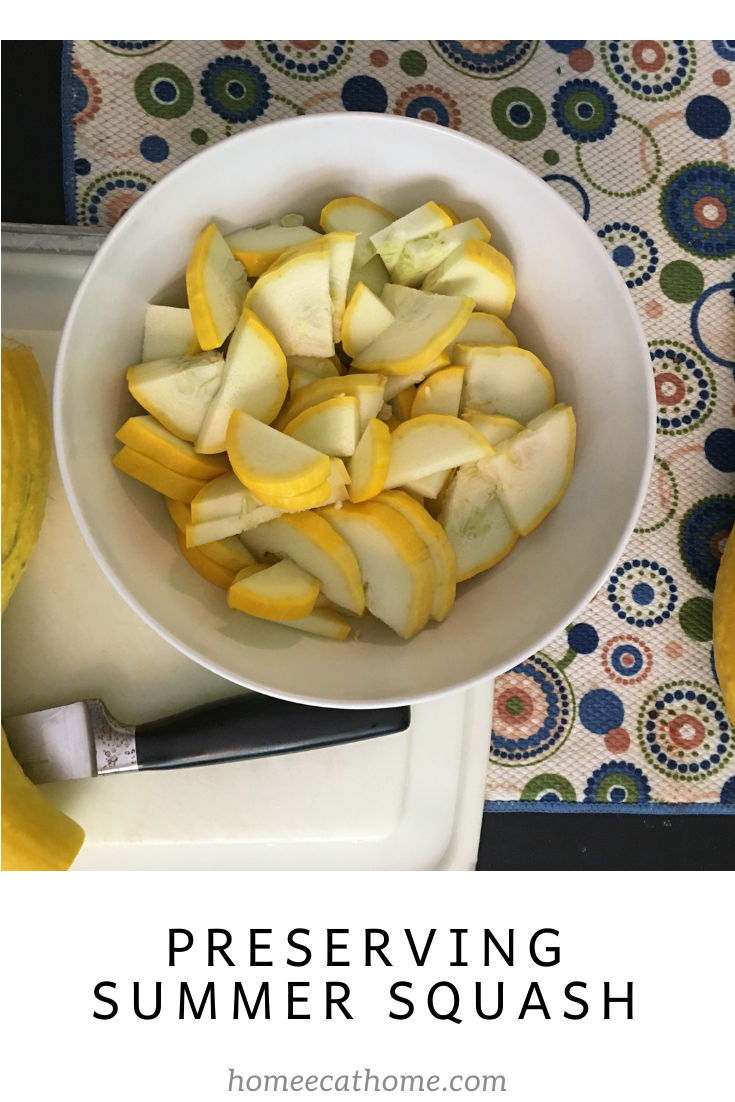
Slice the squash to your desired size.
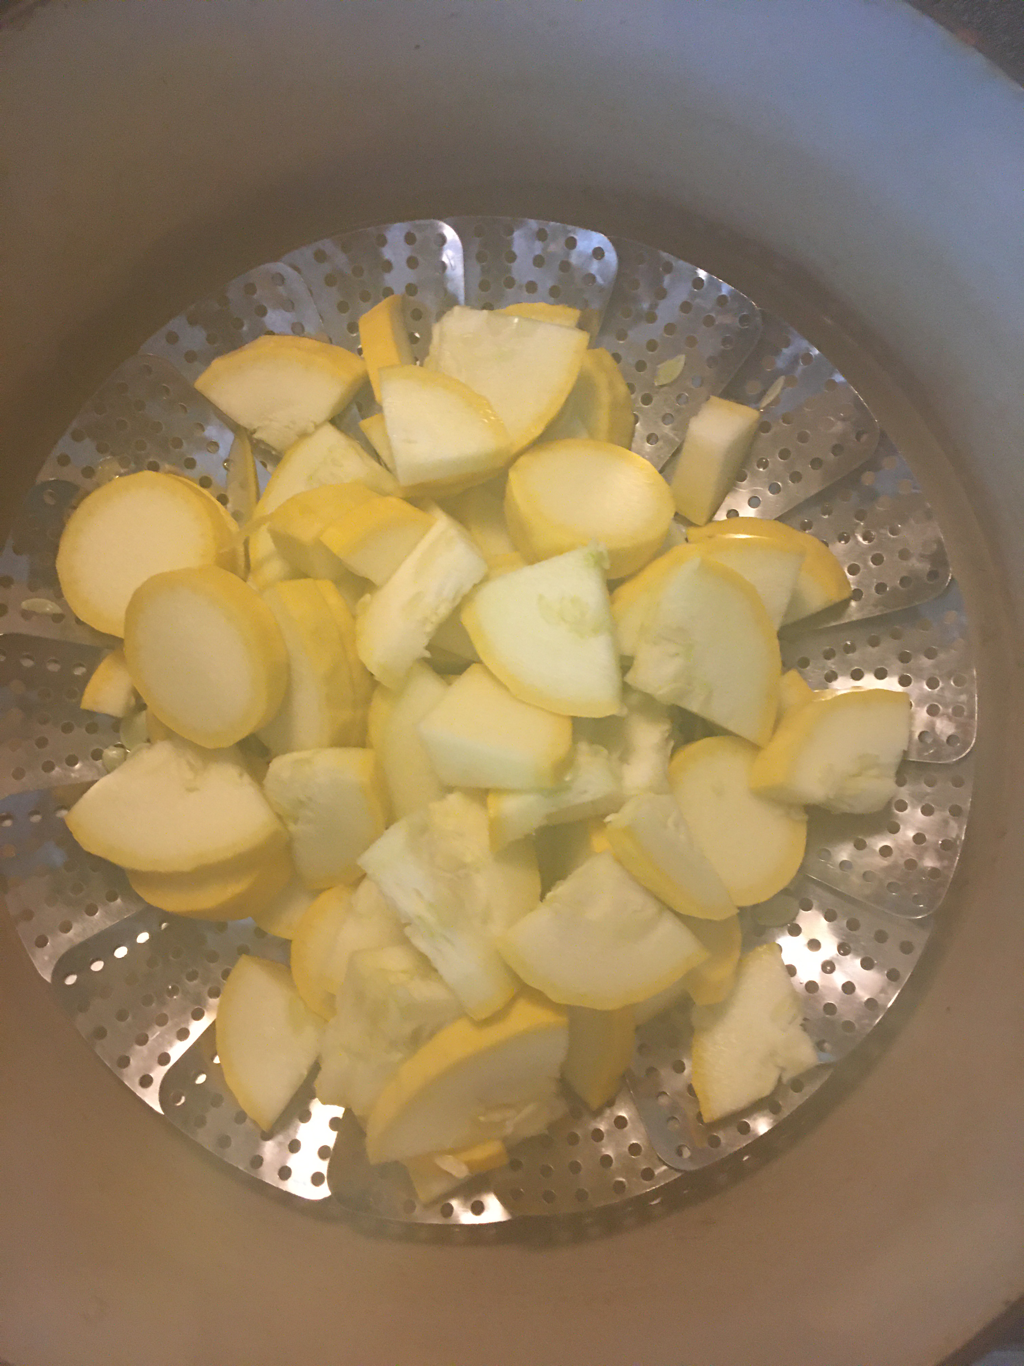
Then steam or boil the squash in batches for 3-5 minutes. I always set a timer for 3 minutes since I have so much going on with 4 kids. That way if it cooks for an extra minute or two until I can get to it, it won’t overcook.
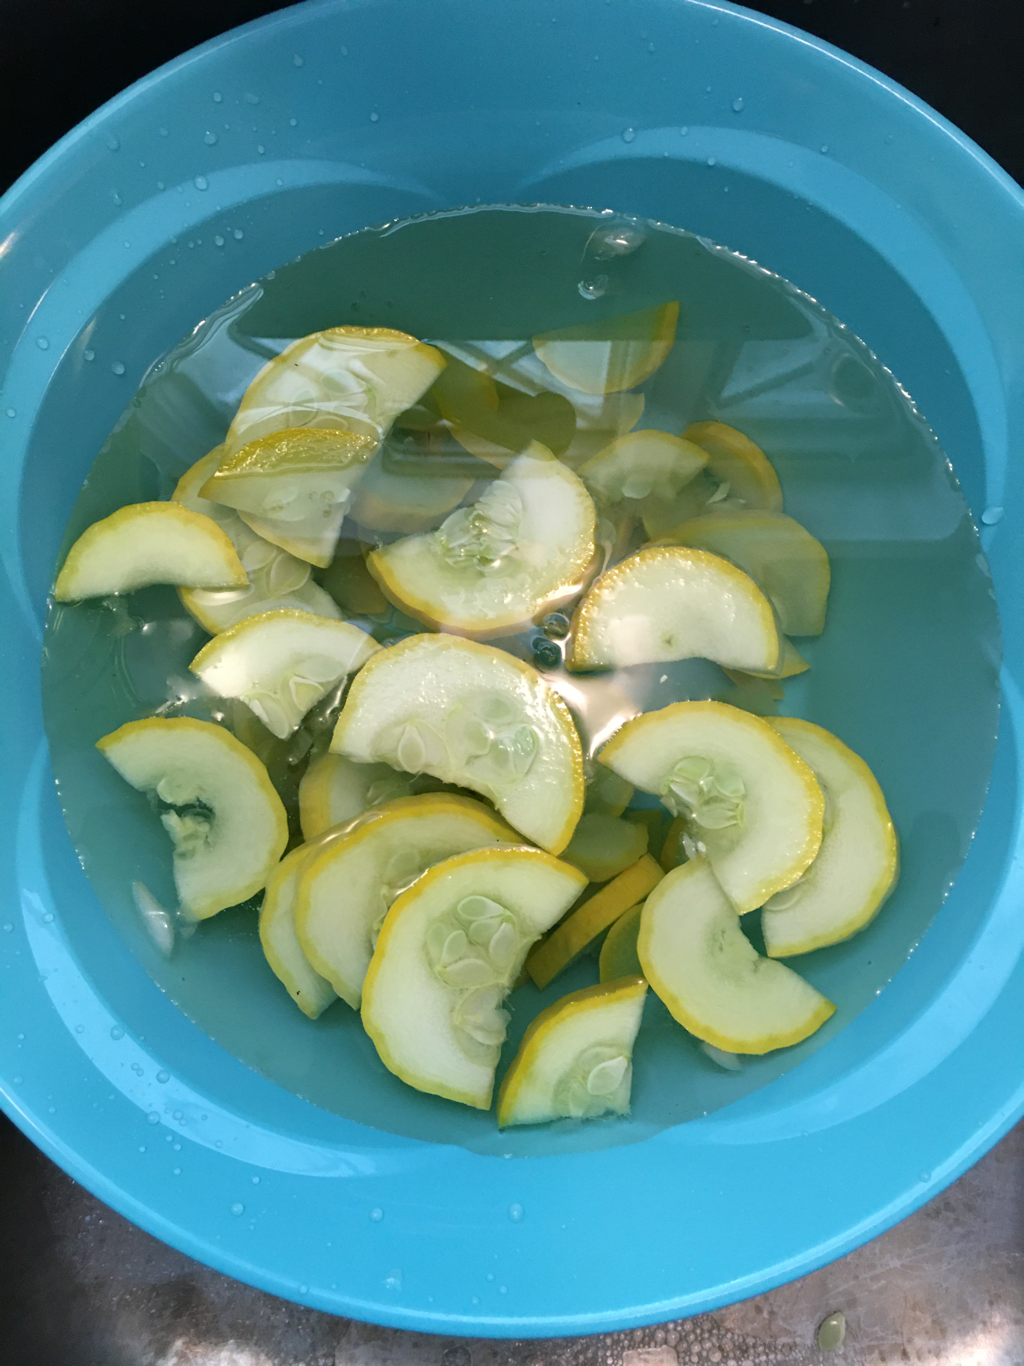
Then I move the squash to ice water for 3-5 minutes. I set a timer again for 3 minutes.
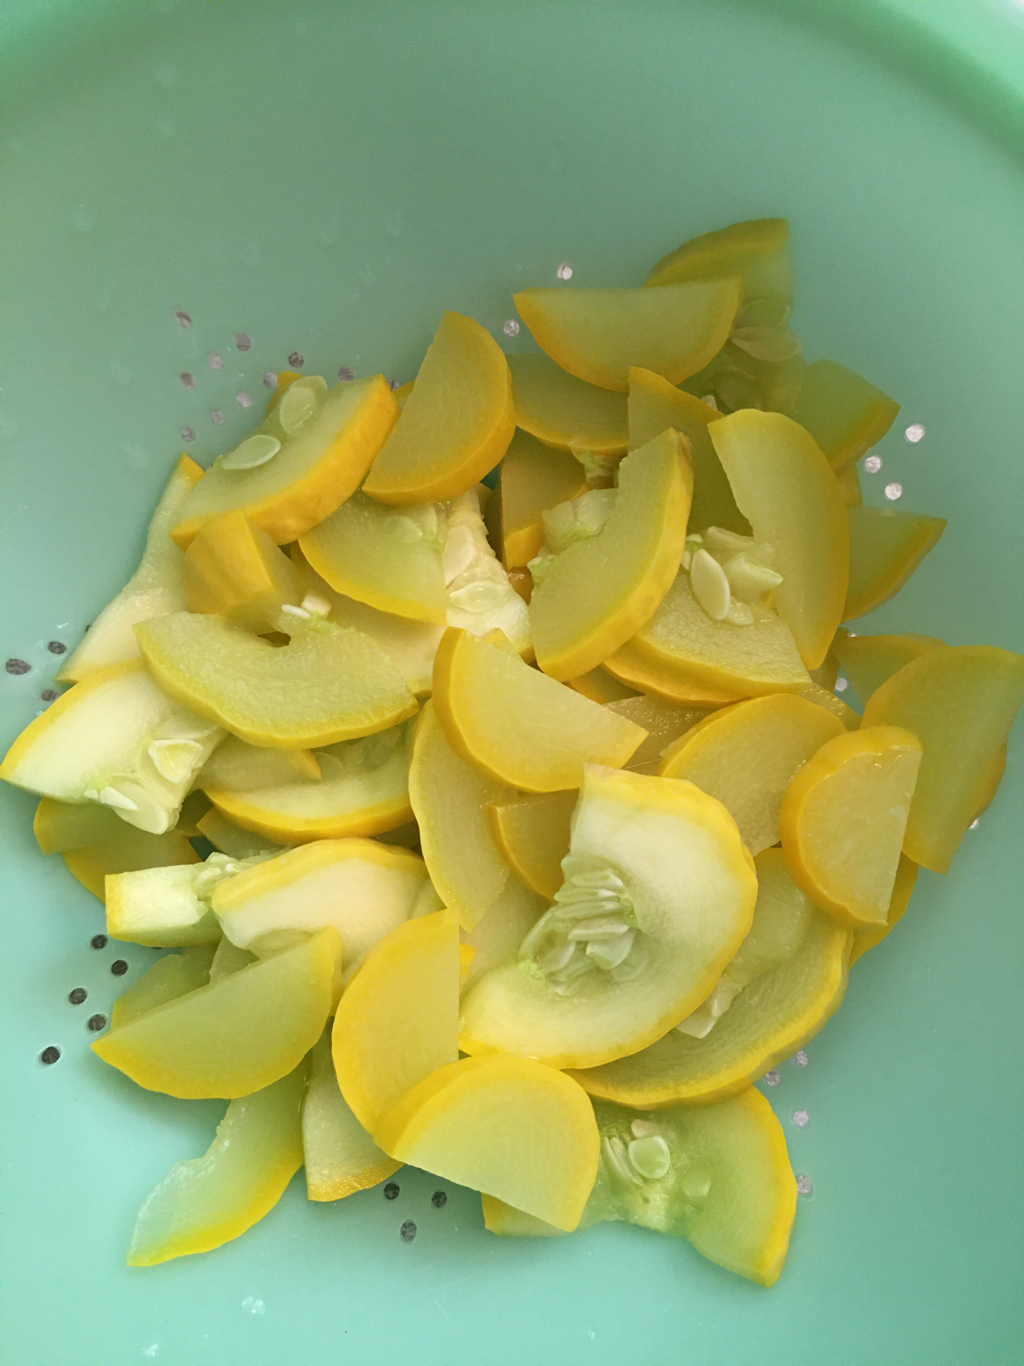
Next I drain the squash in a colander.

Then I dry the squash between clean dry kitchen towels.
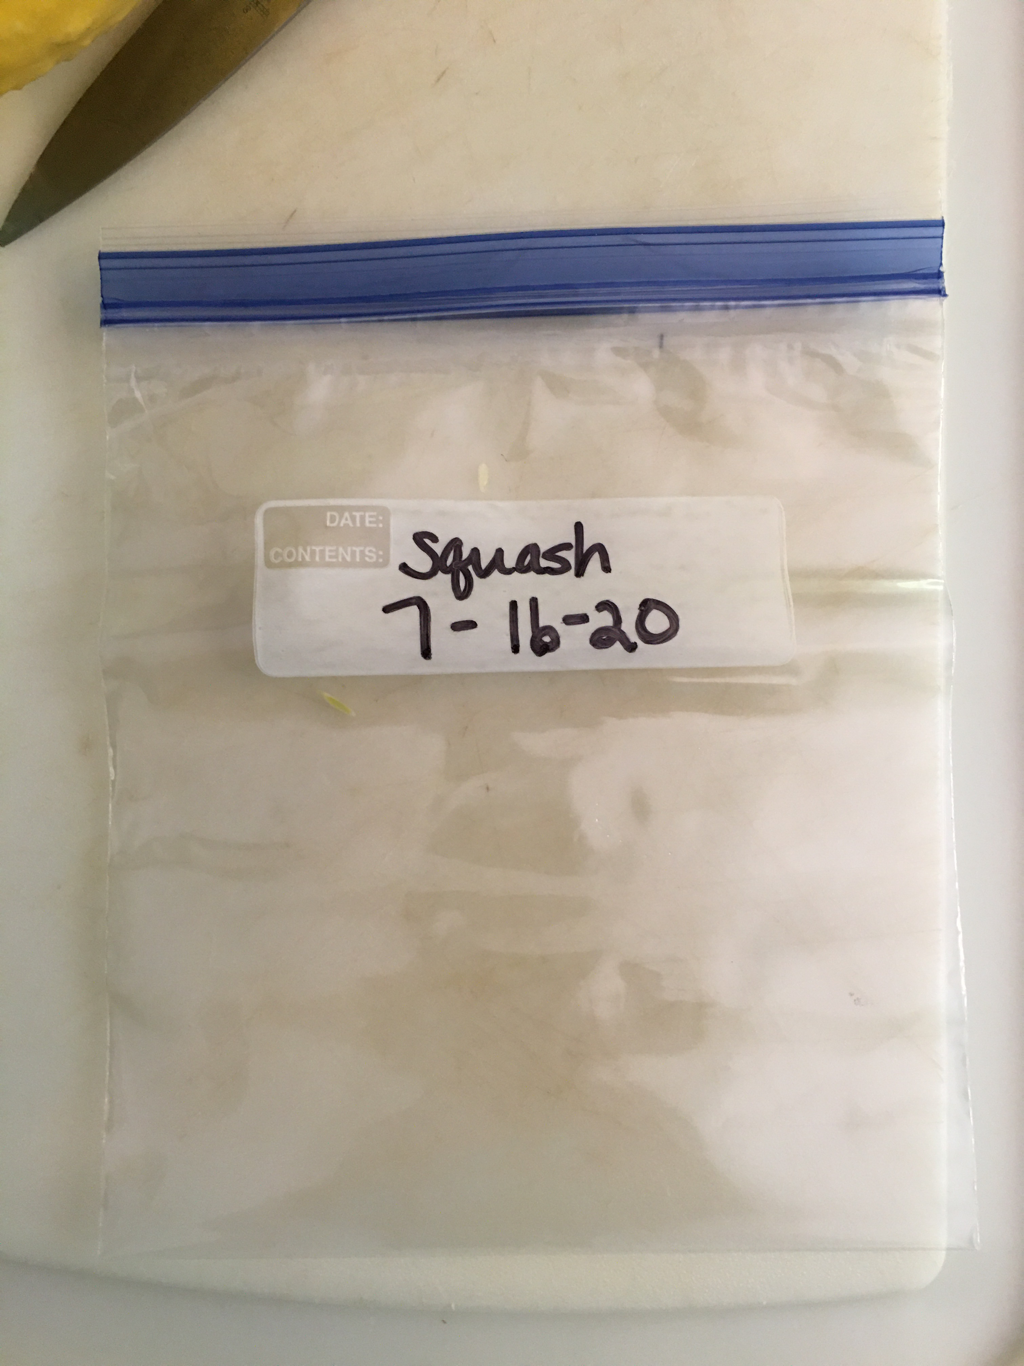
Next I fill labeled quart freezer bags with squash, press the air out, and seal. The squash is now ready for the freezer.
Pin on Pinterest
Disclosure: This post contains affiliate links. If you make a purchase through one of my links, I will make a small commission helping to support this blog.
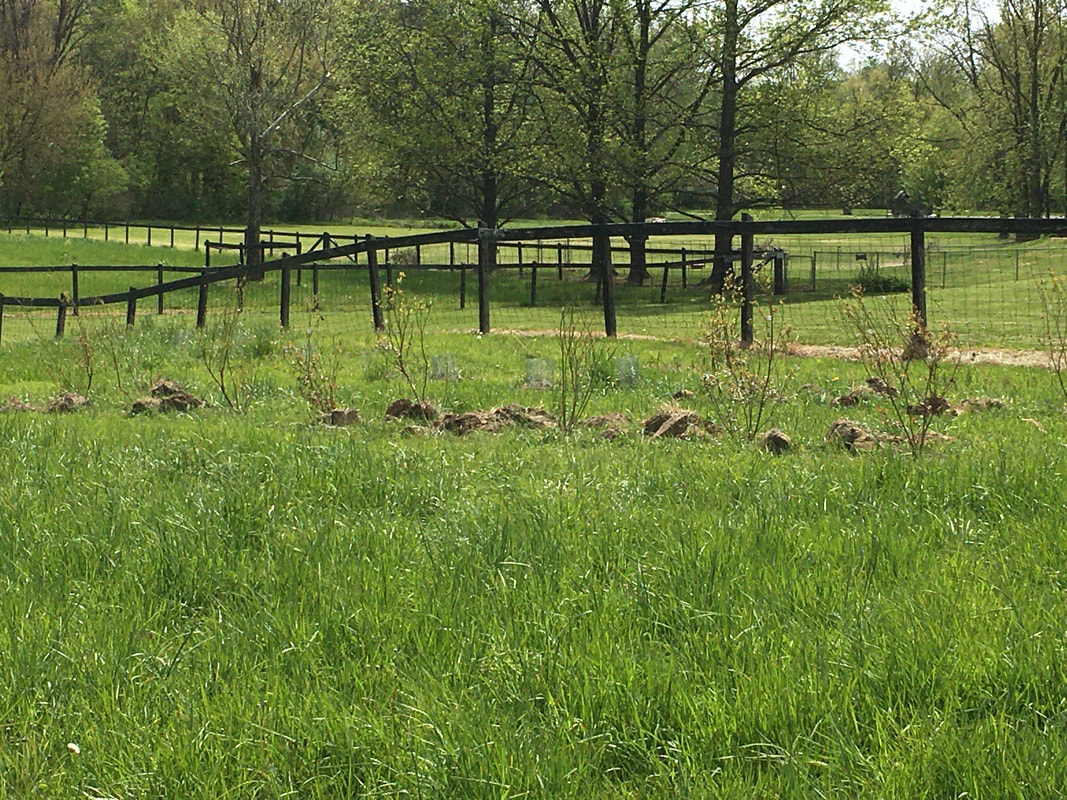
My husband has dreamed of putting in a blueberry patch for years. Since this is our first spring on our little homestead, we planted blueberries and some raspberries too. We actually planted these about a month ago. Spring and fall are the best times to plant blueberries. (The grass in the pasture is really tall because it will be bailed for hay.)
Since this was a dream of his, he wanted really good established blueberry bushes. He did some research online and called the owner of a family-owned blueberry farm, True Vine Ranch in Kansas. The owner was really nice and answered his questions so my husband felt confident ordering from them. This is not a sponsored post, but we are really happy with these blueberry bushes so sharing our experience. It was a big investment to order a dozen three year old blueberry bushes so he wanted to make sure he ordered good plants and planted them correctly.
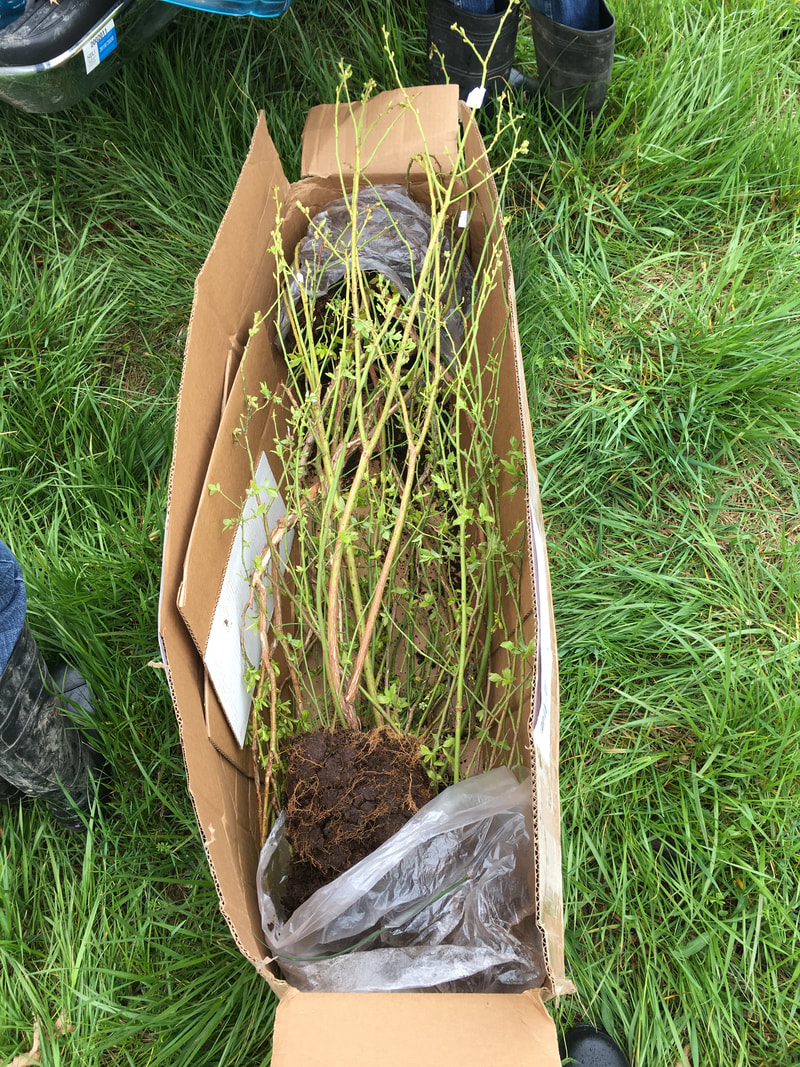
The blueberries arrived in large boxes as shown without containers, but with a lot of moist soil on the roots. They were packed six to a box.
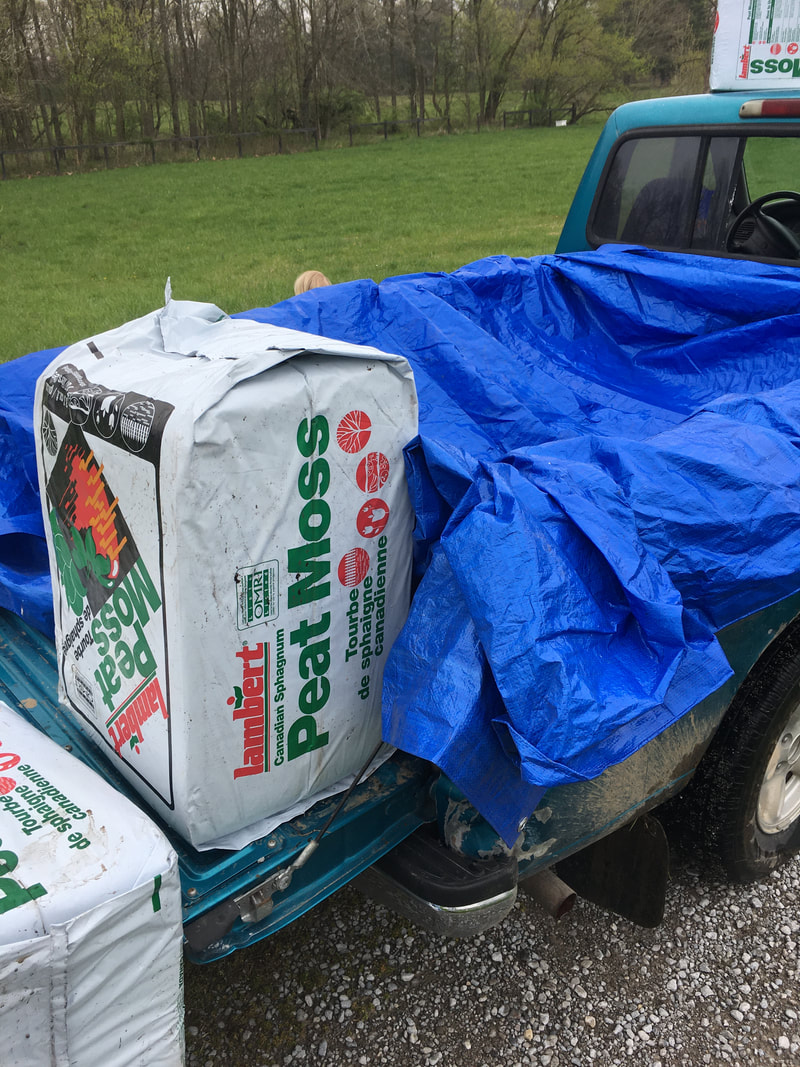
We planted the blueberries in peat moss, per the instructions from True Vine Ranch. We needed to saturate the peat moss before putting it in the planting holes in the ground. We lined the back of the little truck bed with a tarp and filled it with peat moss. I then carried 5-gallon buckets of water from the old well in the pasture to the truck and dumped them in for the kids to mix. I think we used five bales of peat moss and somewhere around 16 or 17 (5-gallon) buckets of water. My husband dug all of the holes while we were mixing the peat mixture. My husband has since put a pump on the well and a hose so we don't have to carry buckets of water anymore.
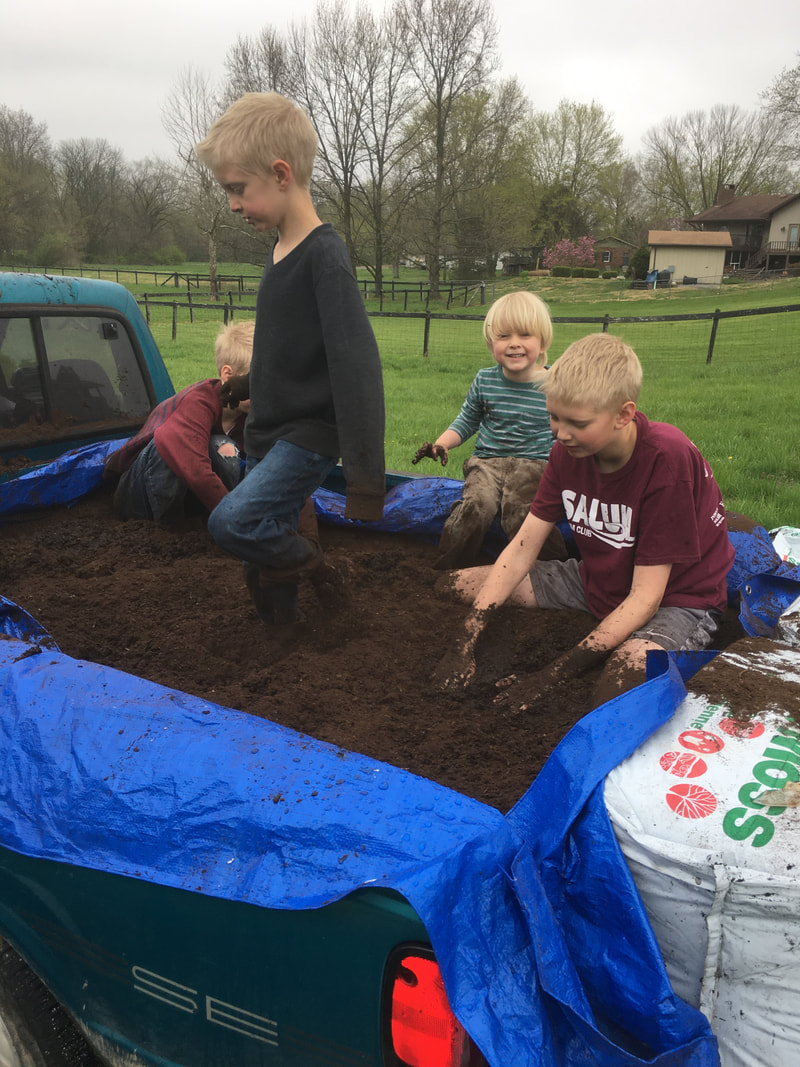
The boys helping to mix peat moss and water.
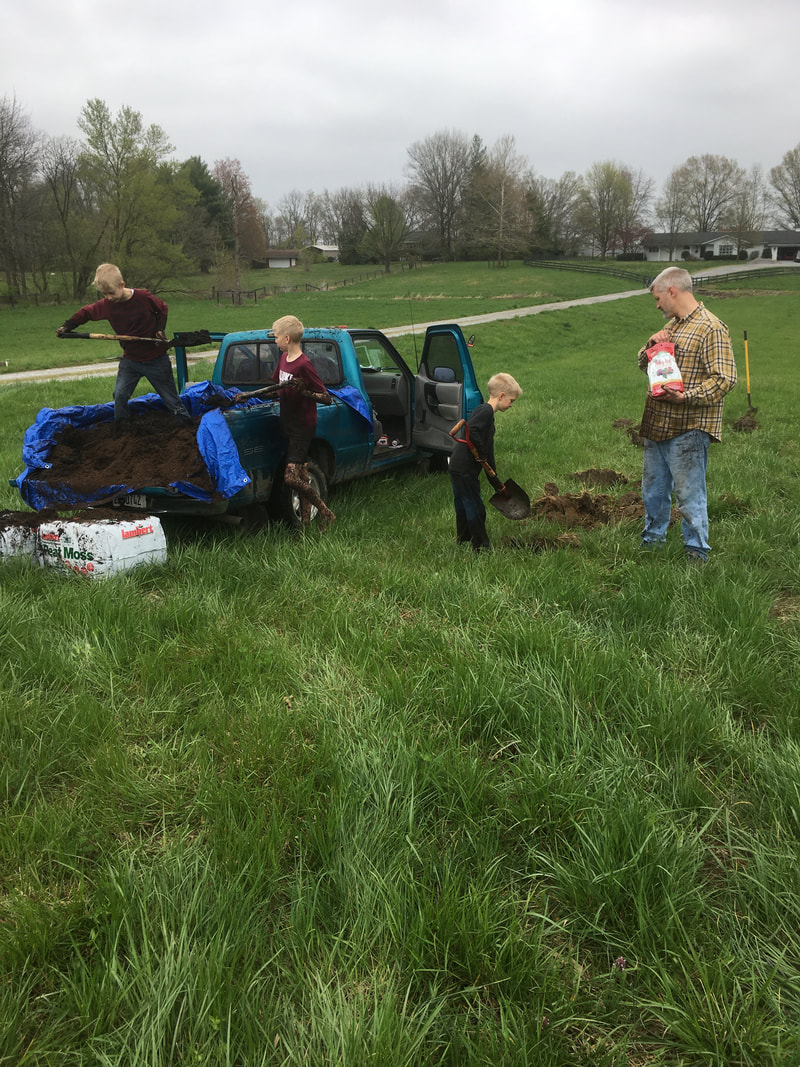
My husband fertilized with Holly-tone (amazon link) an acidic fertilizer for acid loving plants like blueberries while the boys filled the holes with the peat mixture.
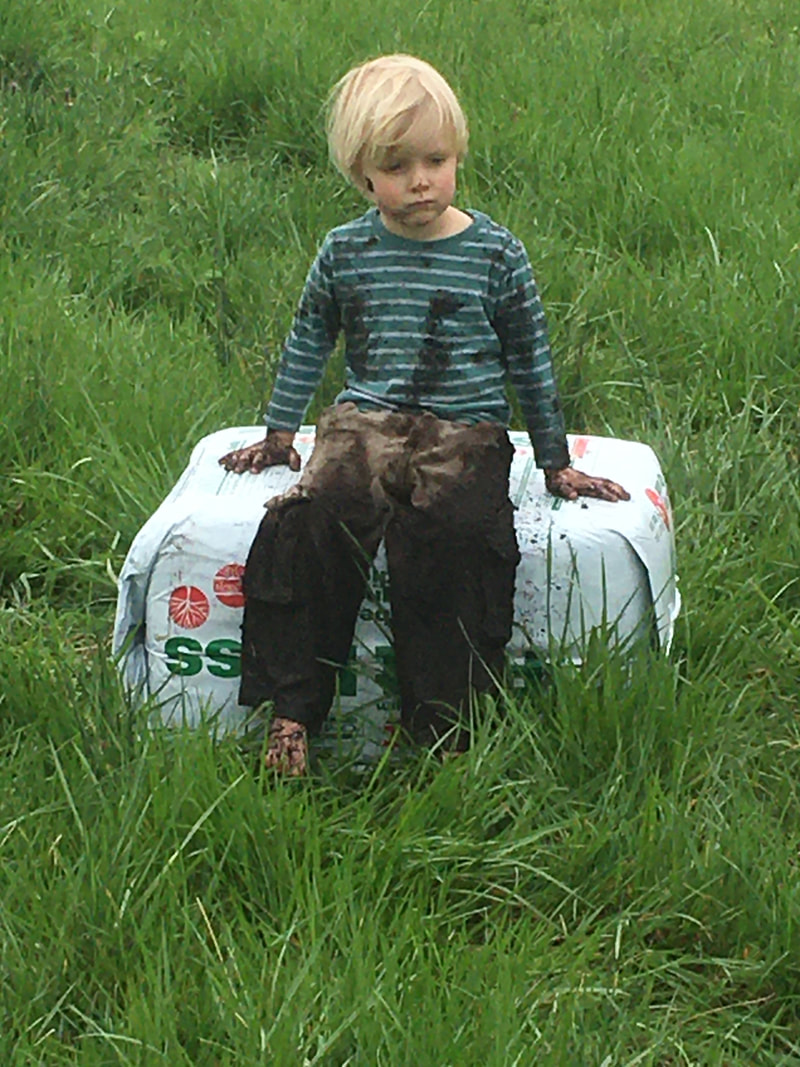
This poor little guy was done with planting blueberries and ready for a warm bath.

Planting blueberries was a lot of work and a big investment, but also a wonderful family experience. We hope to enjoy delicious blueberries and many wonderful family memories of picking berries, and preparing yummy berry dishes for many years to come.
For more info on growing blueberries check out the Blueberry Council.
Pin on Pinterest

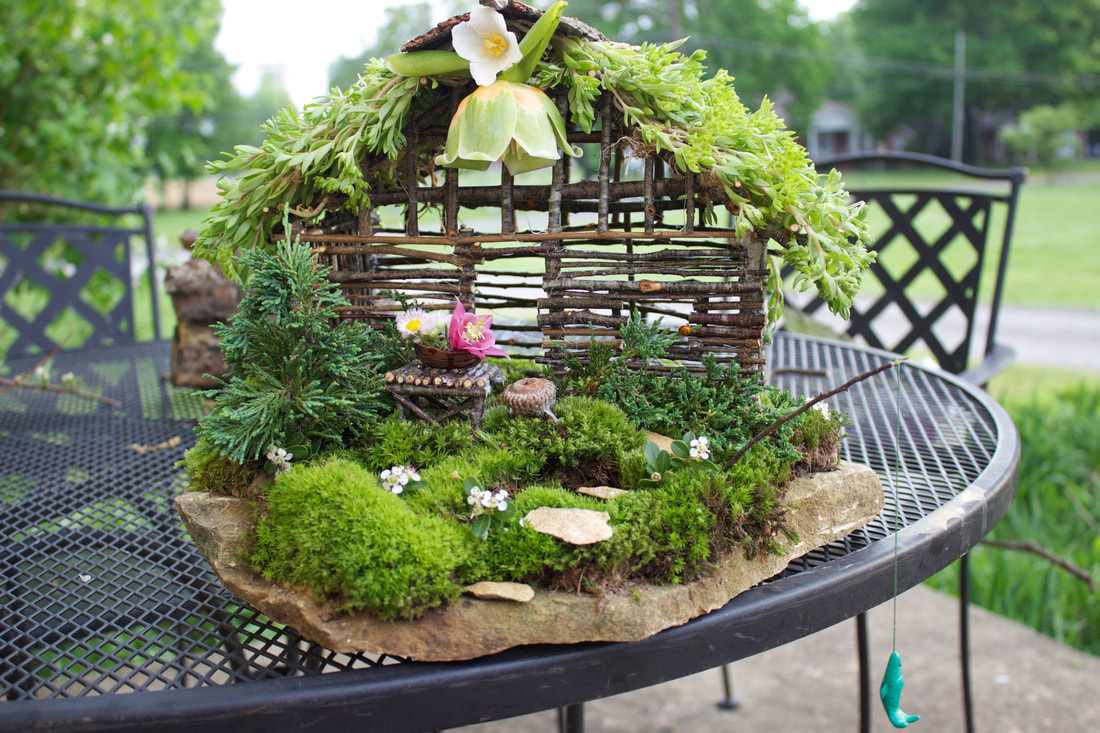
You may have already seen this on facebook and instagram because this proud mama posted it everywhere. My husband who tends to be really creative made a fairy garden last week with the boys to enter in the Murray Woman's Club Floral and Iris Show.
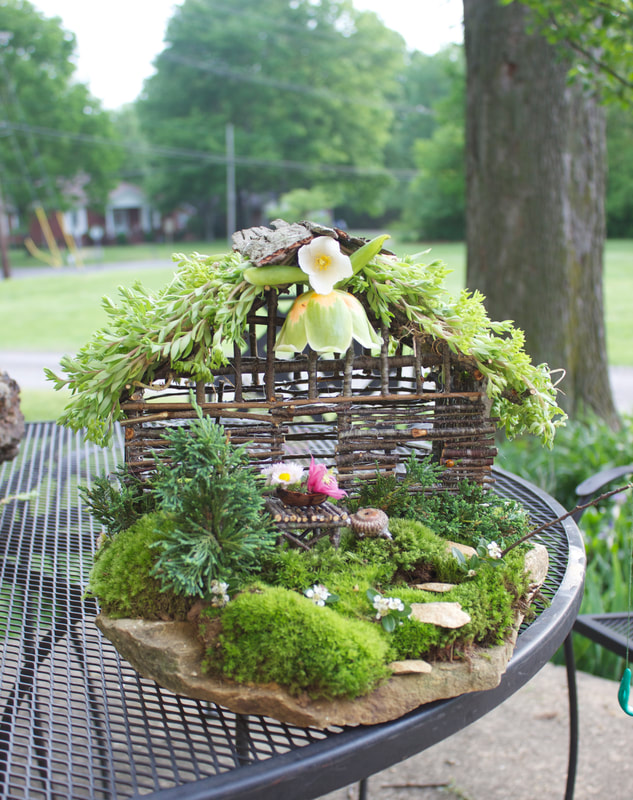
The boys gathered everything for this project from the yard and the arboretum which is basically an extension of the back yard.
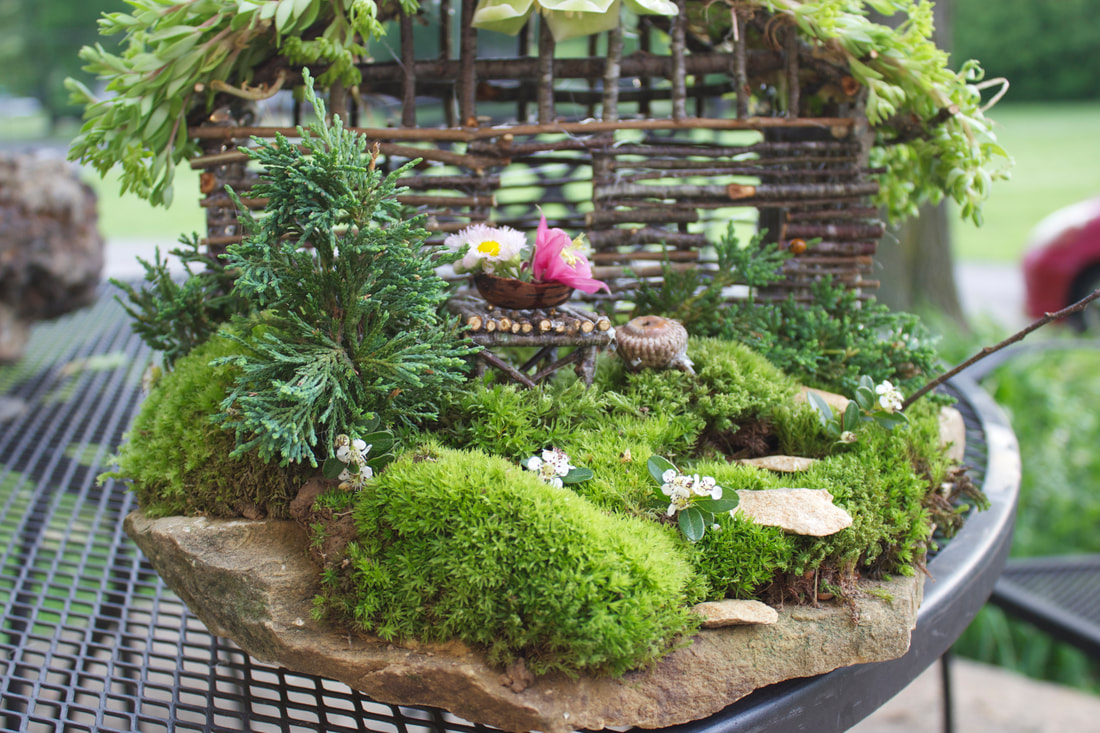
So much detail! They meticulously glued sticks together to build the house and furniture using a hot glue gun.
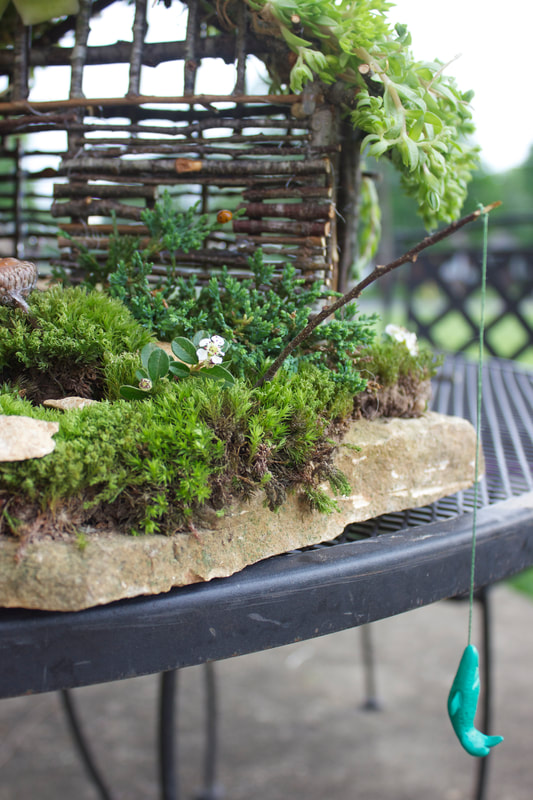
I love this little fishing pole. My husband made a little clay fish to dangle on the line.
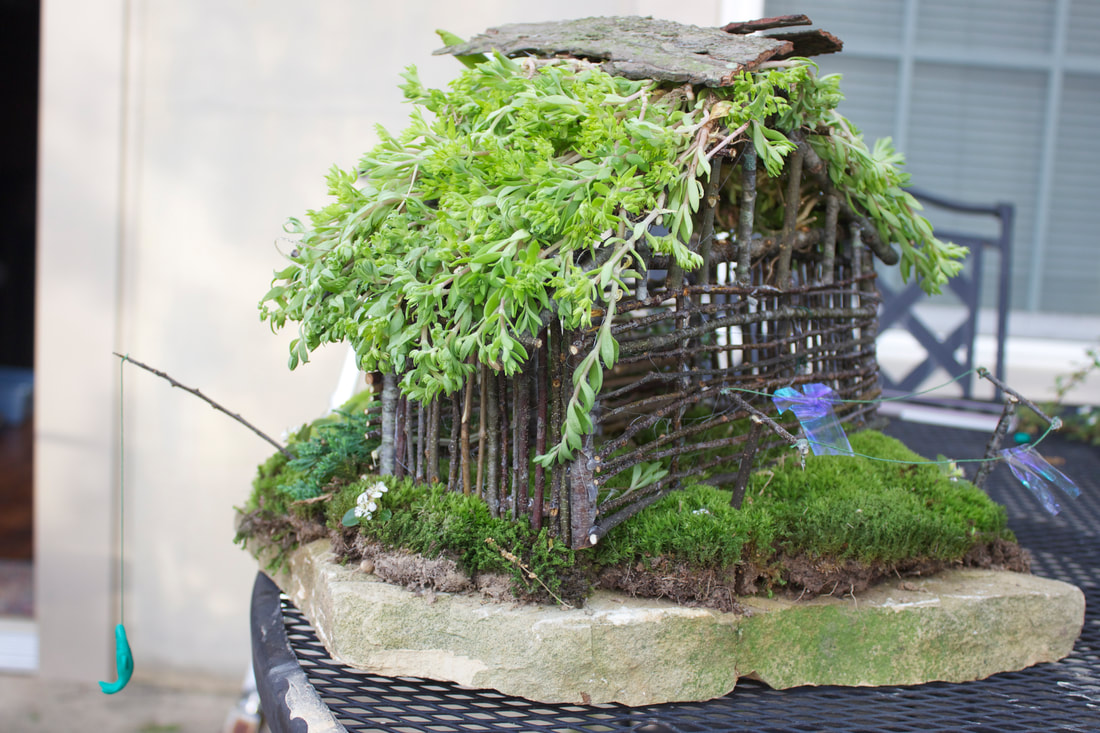
They even made a little clothes line and tiny iridescent clothes to hang on the line. This stone was borrowed from our flower beds.
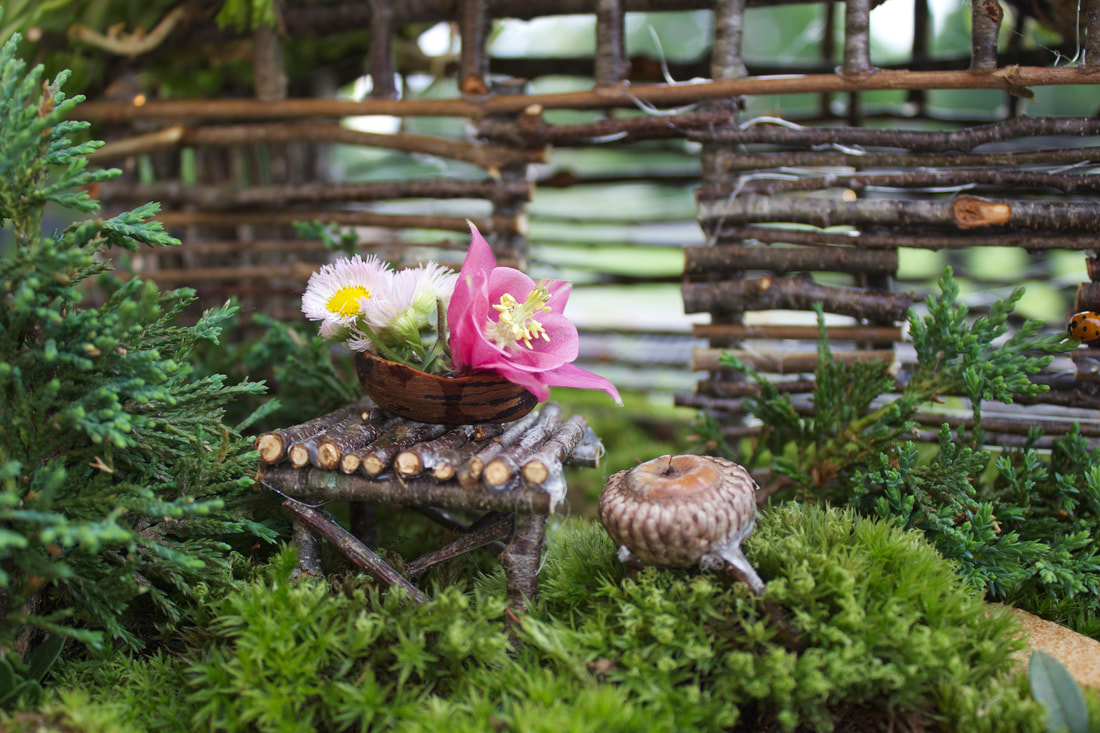
The boys made this tiny pecan shell vase and arranged small flowers in it. Our oldest made this little table and stool from sticks and an acorn.
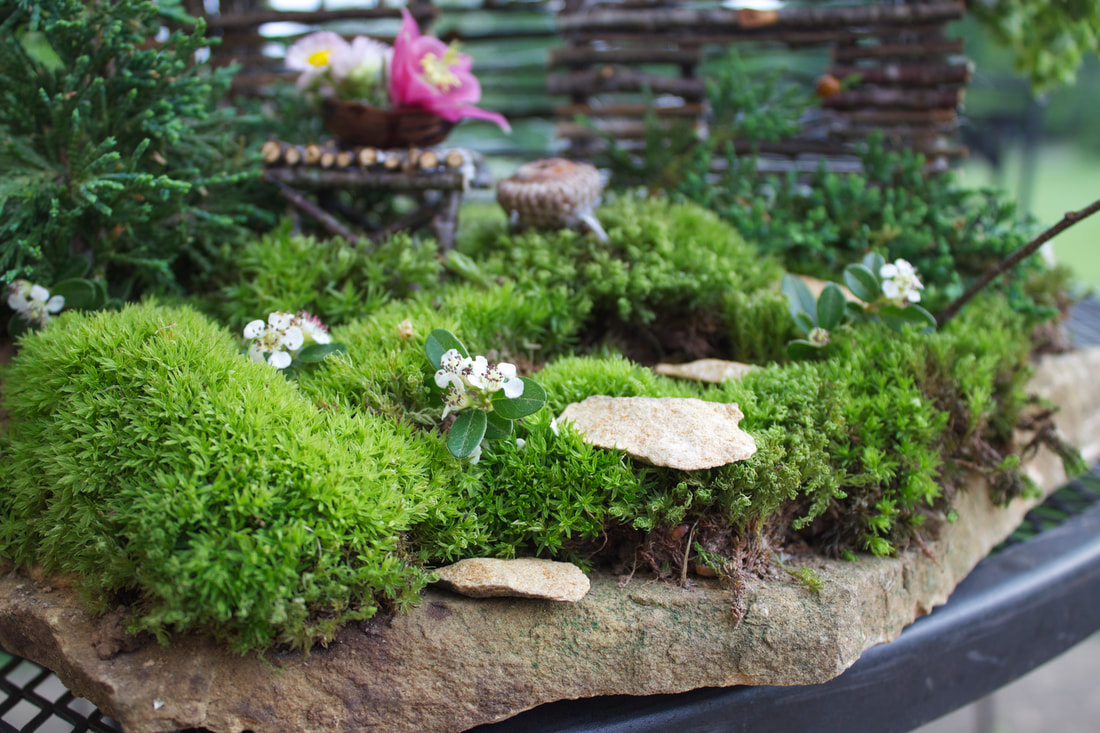
My husband chipped away bits of stone from the large stone to make these little stepping stones.
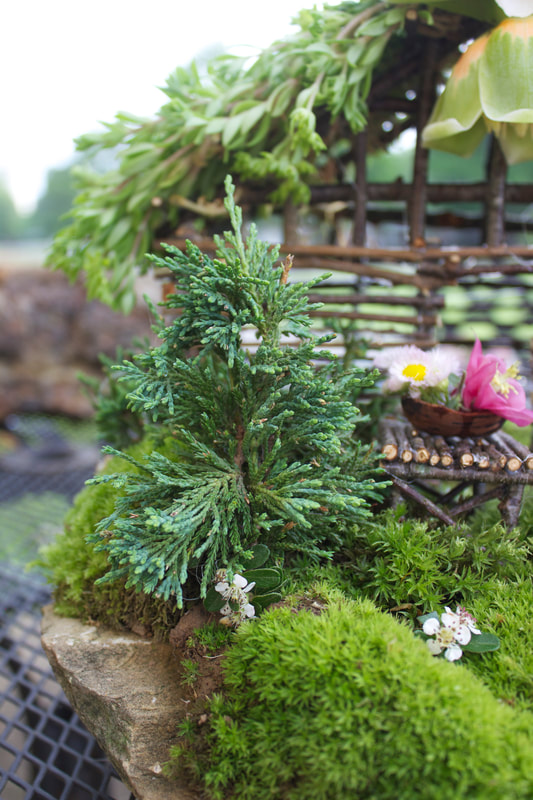
I think this little tree is adorable. It is made from four pieces of Juniper glued together.
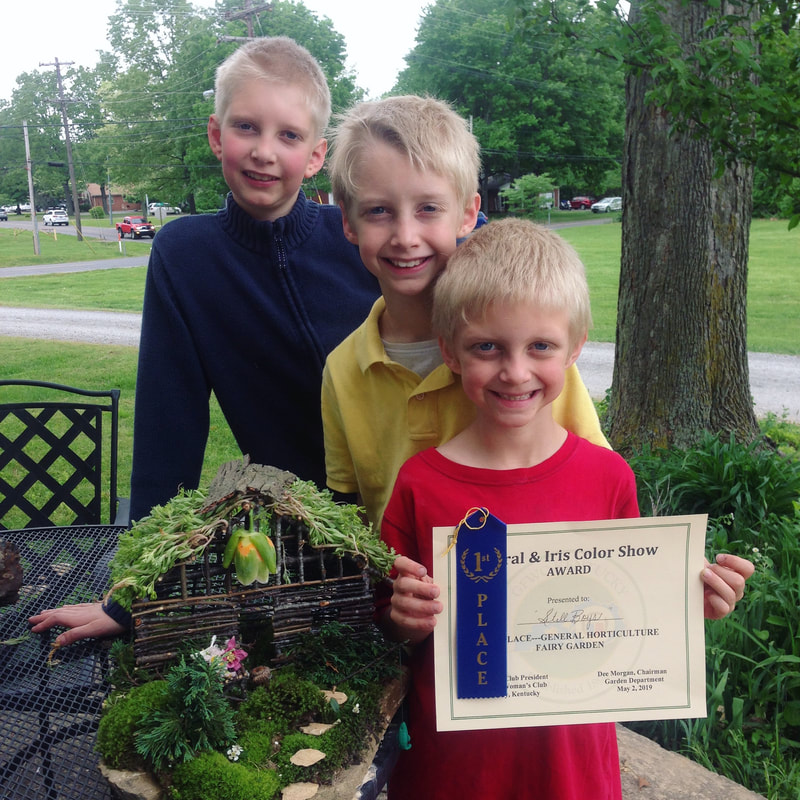
The boys were so excited to win 1st place in the fairy garden competition!
I made a quick video of the fairy garden and posted to youtube.

The boys did an amazing job and had fun doing it! I am so proud of them and my awesome husband.
What are your kids doing this Summer? For many of us Summer time with the kids is a time to enjoy the outdoors, the sunshine and if you're lucky the ocean. As much as kids love Summer holidays, keeping them busy can be a challenging! If you've not got the luxury of a Summer camp then it's up to you as parent to find things to keep them busy. 
Failing that, your kids might spend all their time in front of a computer, tablet, phone or other screen and research has shown that spending too much time in front of a screen can have a detrimental effect on the health and wellbeing of children. Studies have shown that taking part in nature-based activities helps people who are suffering with mental health problems and can contribute to a reduction in levels of anxiety, stress, and depression. In fact, a daily walk in nature has shown decreased activity in a region of the brain associated with a key factor in depression. One in four people are estimated to experience bouts of mental health problems and it's on the rise. Prescription medications of antidepressants are also at a record high level and the demand for more invasive treatments are also on the rise. Health officials are examining different options for cost effective services for mental health sufferers and one of these options is a daily walk of 90 minutes or more. Let's go back to a time when children got excited to spend their time climbing trees and building forts rather than spending hours in front of the tv.
Joe at Nature Rated understands this all too well and has put together an infographic of 15 Summer activities to get your kids outside enjoying nature.
This is what it looks like:
From baking a blackberry pie to constructing a pond or insect hotel, there's plenty for the youngsters to do. Head on over to his site for step by step instructions to get your kids outside and into nature. Thank you Joe for guest posting. An outdoor enthusiast, Joe is the lead editor at Nature Rated; a website which rates and reviews the best outdoor gear for people who quickly want to know what to buy. He believes in no fluff, to the point reviews, which help you choose the right gear for your next adventure. Whenever daily life gets him down he heads to the nearest lake or river with his kayak and camera spending time recharging his batteries.
We are trying to raise our boys to explore, create, and use their imaginations so their screen time is very limited. I love these ideas to get kids outside. We also want our kids to have a good work ethic and a great way to instill this is to let them help with outside chores and projects.
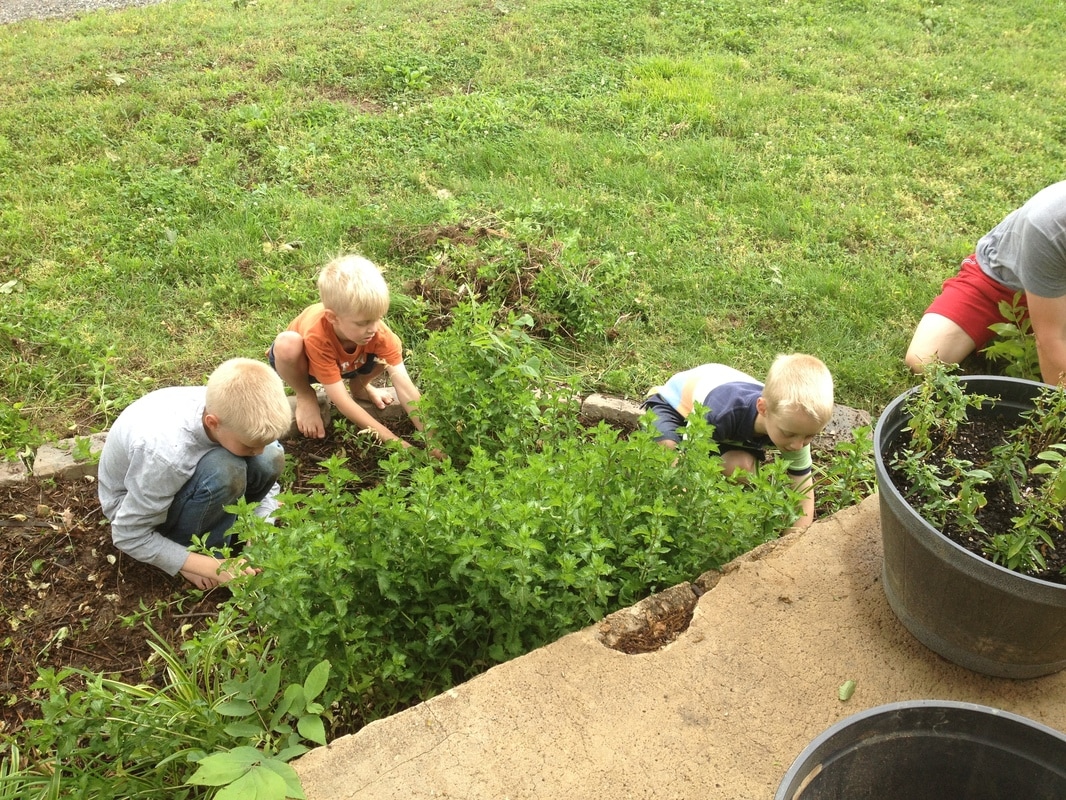
The boys helped clean the overgrown mint out the flower beds to make room for perennials. They have also been working hard in the community garden this summer.
Watch this cute video of the boys showing off their catch, which we did cook for dinner.
The boys love to go fishing and have already been twice this summer. Luckily we live close to the lakes and their Dad likes taking them. Fishing is fun, but just being outside at the lake is fun too. They could spend hours looking at rocks, shells, and exploring trails. What are your favorite ways to get your kids outside?
You might like:
A friend of mine whose parents have a beautiful orchard and garden on their place invited us over to pick peaches, apples, and tomatoes the other day. We (along with several other friends) enjoyed the afternoon picking fresh homegrown produce and brought home a bountiful harvest. When we were driving away, I realized that I had a teachable moment to talk about being thankful with the boys so we said a quick prayer of thankfulness. 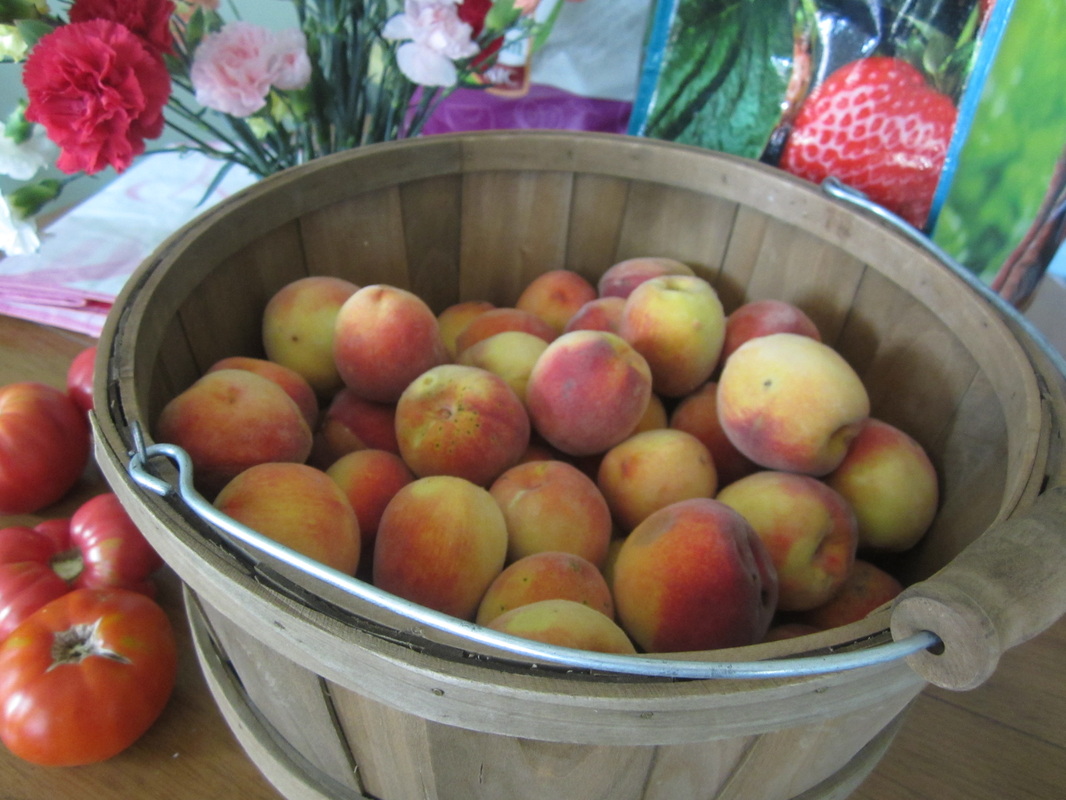 Peaches and Tomatoes 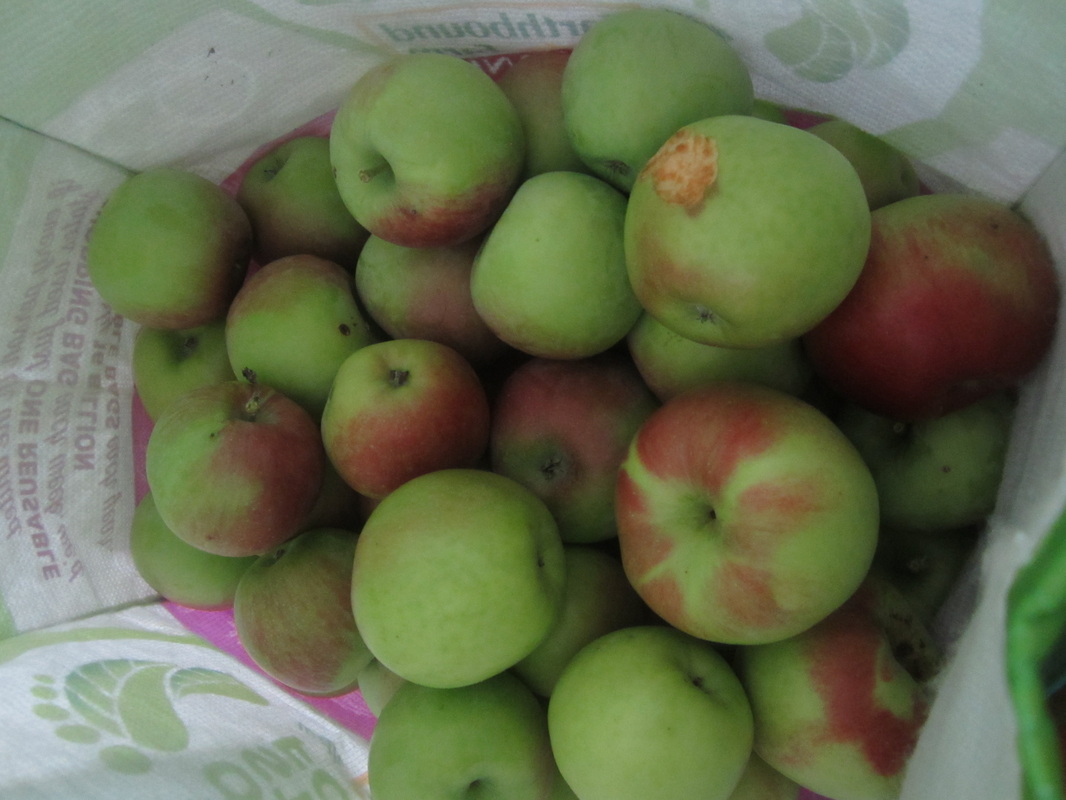 We had two big bags of apples. Notice one of the boys took a bite out of one. I put the apples in our second refrigerator because they store well chilled and gave some to family since we had so much. As the peaches have been ripening, there has been an invasion by a small army of fruit flies so I made another homemade fruit fly trap tonight which should do the trick. This recipe is condensed from a Ball Blue Book that my mother-in-law bought me. The Ball Blue book is really helpful because it is for food preserving beginners like me and is easy to follow. I used the sugar pack method for freezing peaches which is super easy. First, you wash and drain ripe fruit. Next, peel, pit, and slice the fruit. 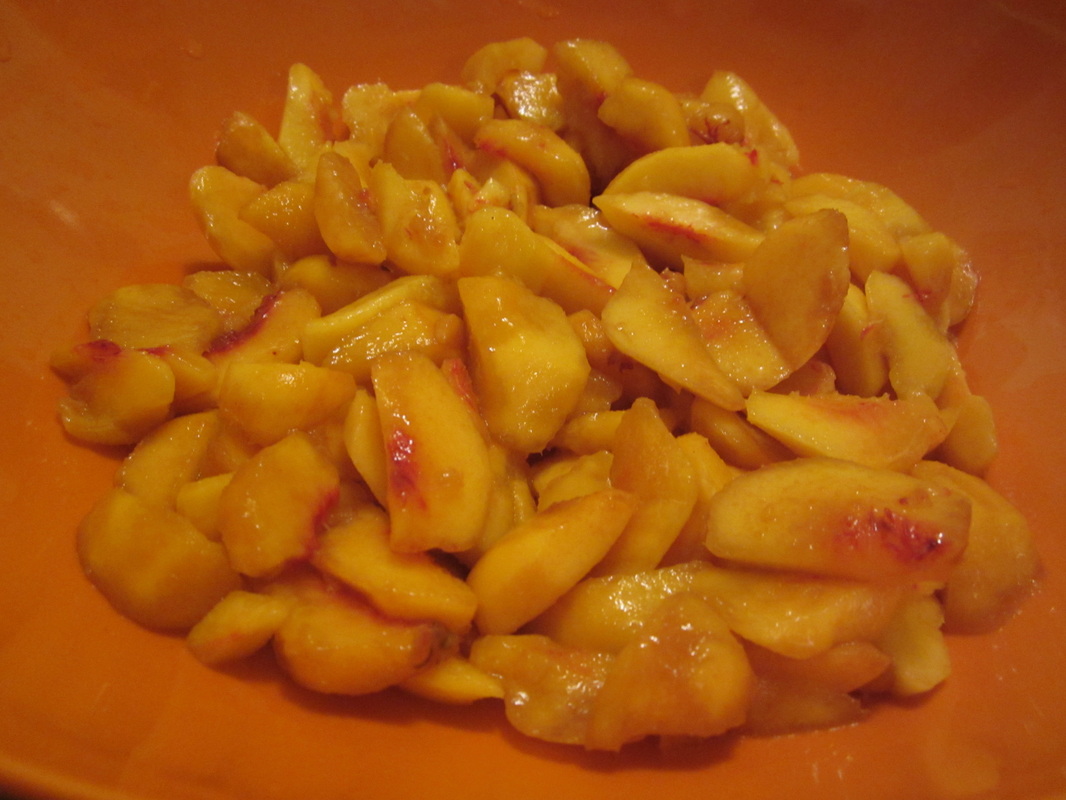 Then mix together 2/3 cup sugar and 2 tsp. Fruit-Fresh. Sprinkle 1 quart sliced peaches with the sugar mixture. Toss gently to coat. 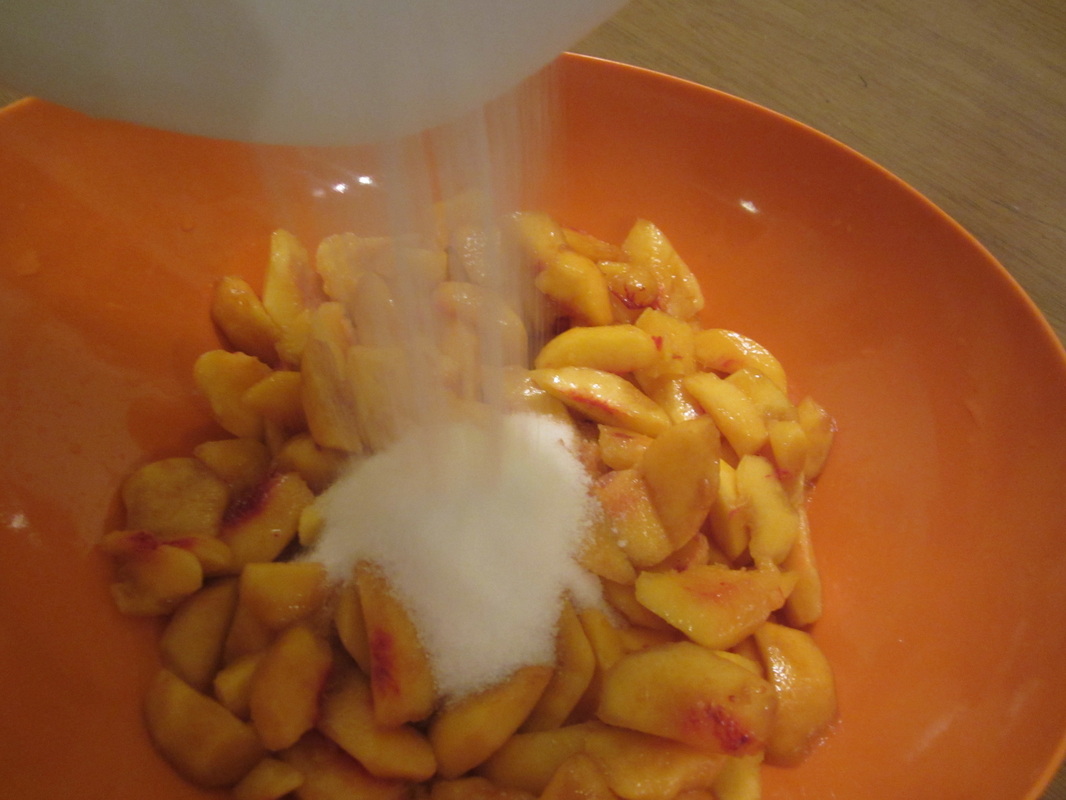 Allow this to sit until sugar dissolves, about 10 minutes. 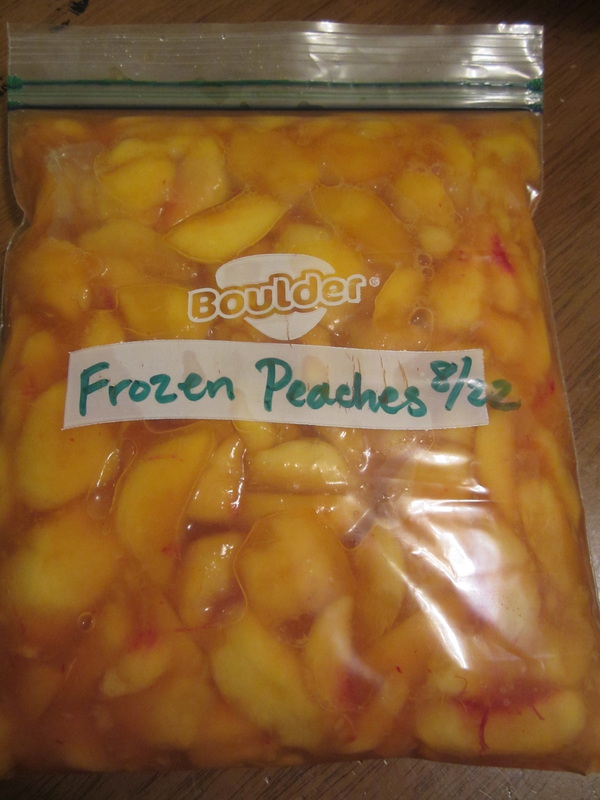 Ladle fruit and syrup into freezer containers or freezer bags leaving some space for expansion. Recommendation is 1/2 inch for freezer containers. Label containers with date and contents then freeze.
|

Welcome to Home Ec @ HomeHi, I'm Faith, a former Family and Consumer Science teacher turned food blogger. I love God, my family, and food. You can usually find me in the kitchen preparing family friendly, homemade recipes and taking lots of pictures. 
Still Goldens, Southern, IL
 Fan Favorites

The Best Dry Brined Turkey with Citris and Fresh Herbs

 Dehydrating Pears and Apples in the Instant Pot Duo Crisp Dehydrating Pears and Apples in the Instant Pot Duo Crisp
 
 |


 RSS Feed